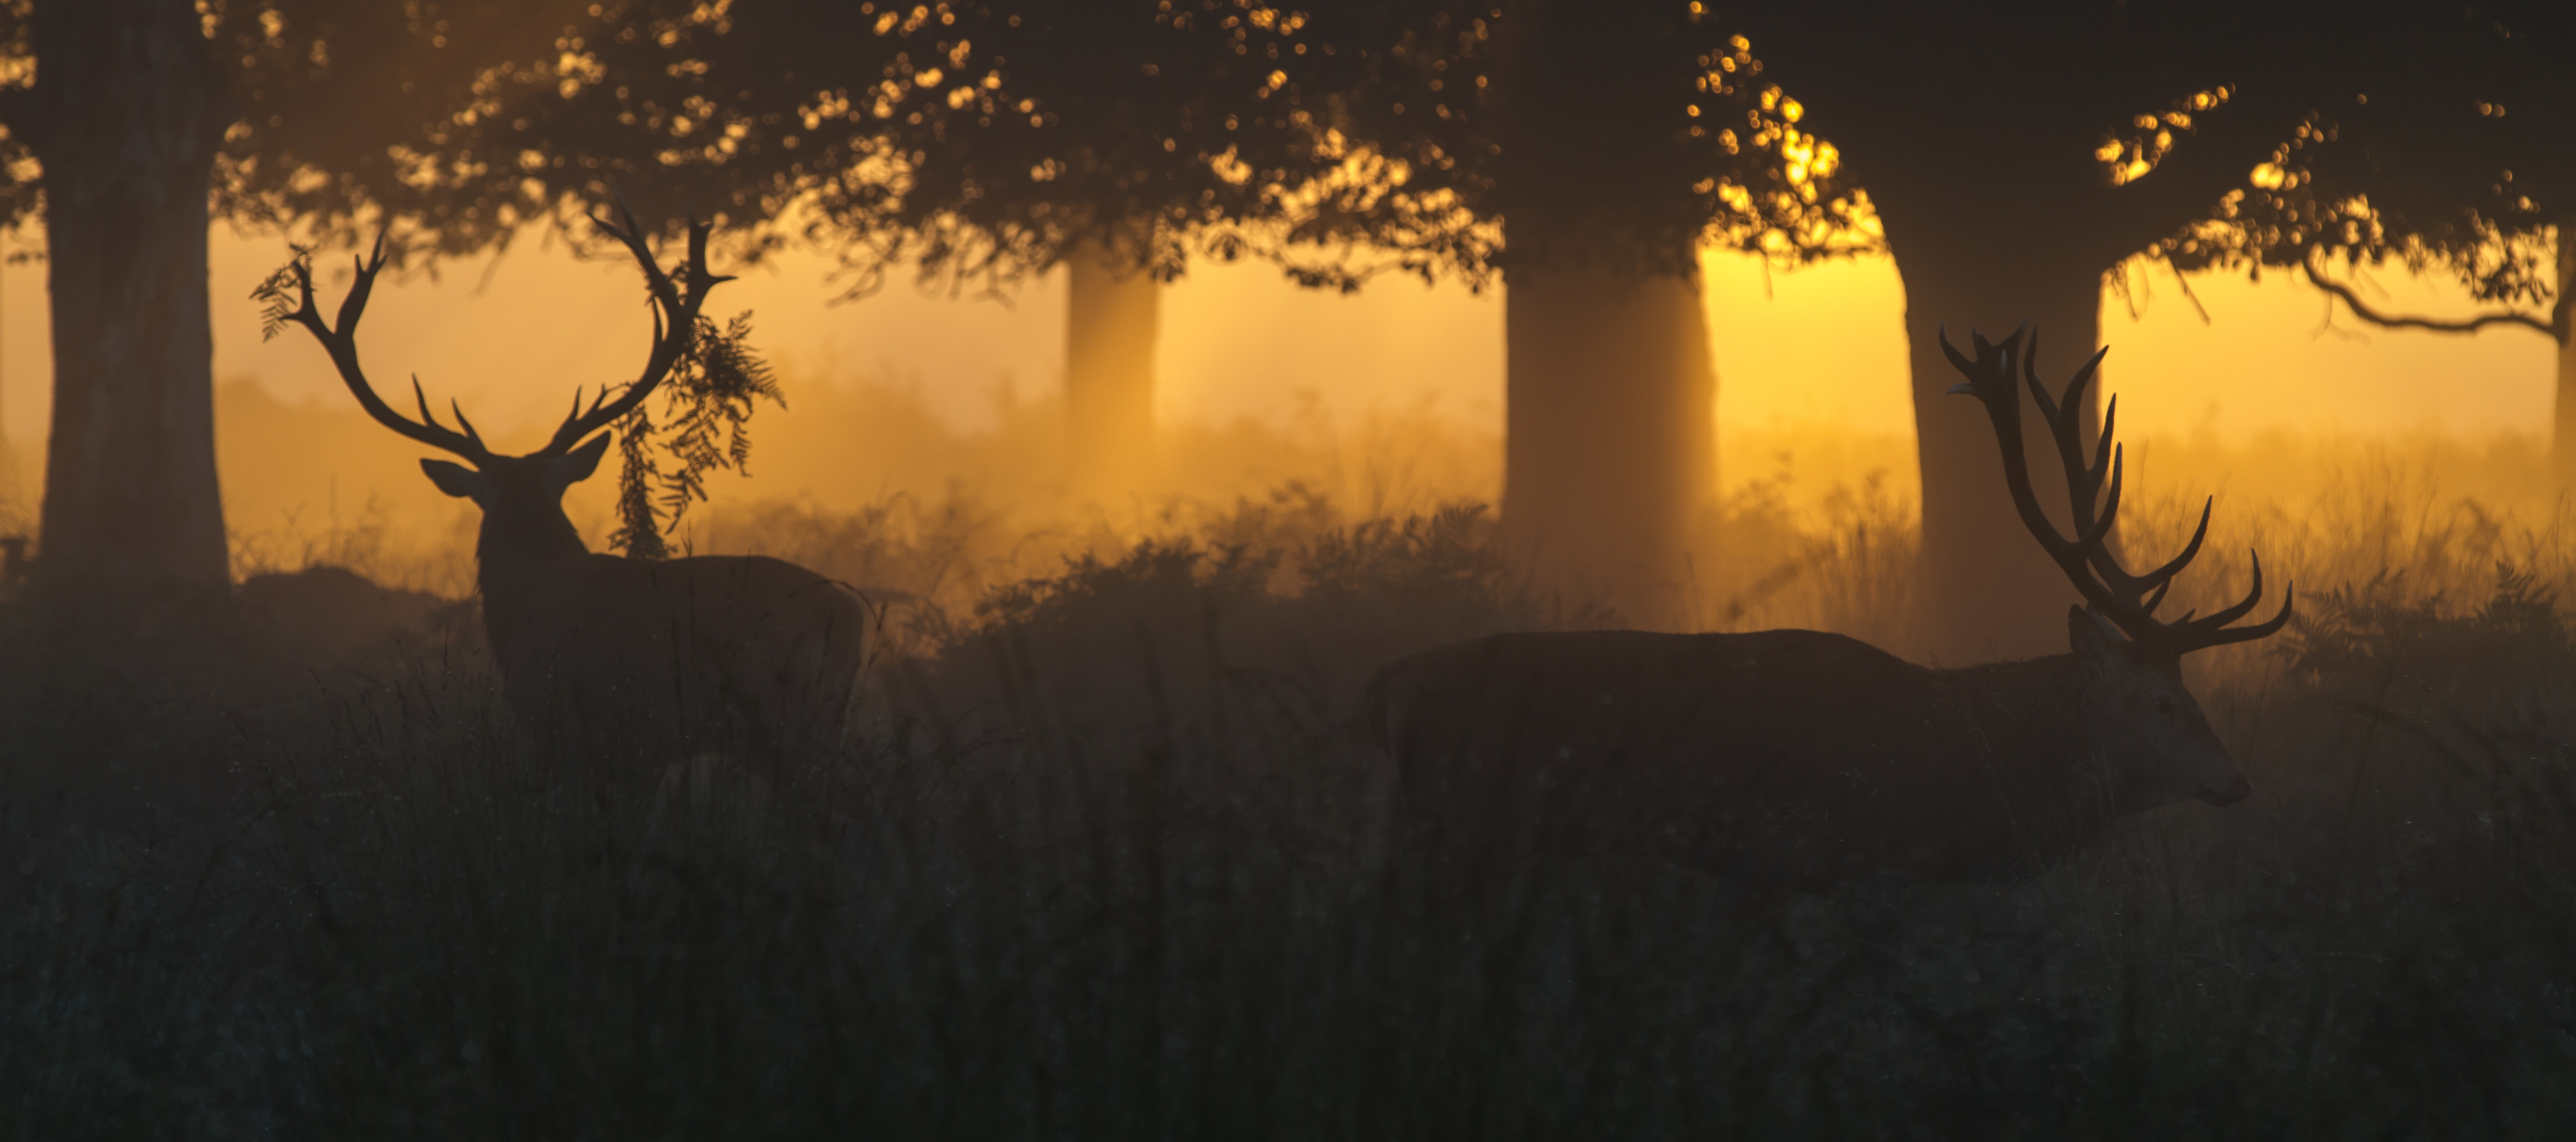
Are You Ready to Make the Most of Deer Season?

Deer hunting is a beloved tradition throughout much of the United States. While numbers overall https://www.washingtonpost.com/national/huntingisslowlydyingoffandthathascreatedacrisisforthenationspubliclands/2020/02/02/554f51ac331b11eaa053dc6d944ba776_story.html” rel=”nofollow”>https://www.washingtonpost.com/national/huntingisslowlydyingoffandthathascreatedacrisisforthenationspubliclands/2020/02/02/554f51ac331b11eaa053dc6d944ba776_story.html” target=”_blank” rel=”nofollow noopener” data-wpel-link=”external”>https://www.washingtonpost.com/national/huntingisslowlydyingoffandthathascreatedacrisisforthenationspubliclands/2020/02/02/554f51ac331b11eaa053dc6d944ba776_story.html” rel=”nofollow”>https://www.washingtonpost.com/national/huntingisslowlydyingoffandthathascreatedacrisisforthenationspubliclands/2020/02/02/554f51ac331b11eaa053dc6d944ba776_story.html” target=”_blank”>have dwindled, each deer season sees plenty of new hunters trying out the sport for the first time.

As any experienced deer hunter knows, taking the shot is just one piece of a much bigger puzzle. Tons of prep work goes into a successful hunting season, much of it taking place long before the deer opener itself.

Whether it’s your first or your fiftieth, it’s never too early to start getting ready for the upcoming deer hunting season.

Recommended Read: http://www.dailyshooting.com/turkeyscoutingtips/” rel=”nofollow”>http://www.dailyshooting.com/turkeyscoutingtips/” rel=”nofollow” data-wpel-link=”internal”>http://www.dailyshooting.com/turkeyscoutingtips/” rel=”nofollow”>http://www.dailyshooting.com/turkeyscoutingtips/“>5 Best Turkey Scouting Tips for Hunters


10 Things to Check Off Your To-Do List Before Deer Season


In prepping for the hunting season, it’s easy to overlook the little things. Once you’re out in the field, however, the little things are what matter most.

Here’s what to do in the weeks and months leading up to your next deer season:

1. Scout your location

Unless you hunt in the same spot each year, it’s never too early to find a good location. Don’t be that hunter desperately trying to gain access to private land the week before hunting season kicks off.

Many landowners are https://www.fieldandstream.com/5typeslandownersyoullaskpermissionfromthishuntingseason/” rel=”nofollow”>https://www.fieldandstream.com/5typeslandownersyoullaskpermissionfromthishuntingseason/” target=”_blank” rel=”nofollow noopener” data-wpel-link=”external”>https://www.fieldandstream.com/5typeslandownersyoullaskpermissionfromthishuntingseason/” rel=”nofollow”>https://www.fieldandstream.com/5typeslandownersyoullaskpermissionfromthishuntingseason/” target=”_blank”>happy to host hunters as long as they are safe and responsible.

Waiting until the last minute not only pits you against other hunters who are location-scouting but can also leave a bad impression on your local landowners.

If privately owned land isn’t an option, check out your local https://www.doi.gov/blog/everythingyouneedknowabouthuntingpubliclands” rel=”nofollow”>https://www.doi.gov/blog/everythingyouneedknowabouthuntingpubliclands” target=”_blank” rel=”nofollow noopener” data-wpel-link=”external”>https://www.doi.gov/blog/everythingyouneedknowabouthuntingpubliclands” rel=”nofollow”>https://www.doi.gov/blog/everythingyouneedknowabouthuntingpubliclands” target=”_blank”>public access land. Some, but not all, public land is open to hunting.

Keep in mind that public land often comes with its own set of hunting guidelines. Not all publicly owned land is open for the entire deer season. There may also be restrictions on what time of day you can hunt.

2. Monitor the trails prior to deer season

When you plan ahead and have access to your hunting location long before the season starts, you also gain access to a whole host of information related to the native wildlife.

Trail cams may have turned into a hobby all on their own, but these https://www.bowhuntingmag.com/editorial/howtousetrailcamerasthroughouthuntingseason/327379” rel=”nofollow”>https://www.bowhuntingmag.com/editorial/howtousetrailcamerasthroughouthuntingseason/327379” target=”_blank” rel=”nofollow noopener” data-wpel-link=”external”>https://www.bowhuntingmag.com/editorial/howtousetrailcamerasthroughouthuntingseason/327379” rel=”nofollow”>https://www.bowhuntingmag.com/editorial/howtousetrailcamerasthroughouthuntingseason/327379” target=”_blank”>little gadgets are invaluable to novice and experienced hunters alike.

By setting up https://amzn.to/3cwQocd” rel=”nofollow”>https://amzn.to/3cwQocd” target=”_blank” rel=”nofollow noopener” data-wpel-link=”external”>https://amzn.to/3cwQocd” rel=”nofollow”>https://amzn.to/3cwQocd” target=”_blank” rel=”nofollow”>trail cams in your planned hunting area, you can get a better idea of the local deer population and its movement patterns.

Some hunters set up trail cameras as soon as winter begins to turn into spring. For the average deer hunter, though, installing a few cameras at the end of summer should be plenty.

3. Prep your cover

Your https://www.amazon.com/RhinoBlindsR150RTEHuntingRealtree/dp/B07KXQ8VPM/?tag=dailyshooting0820” rel=”nofollow”>https://www.amazon.com/RhinoBlindsR150RTEHuntingRealtree/dp/B07KXQ8VPM/?tag=dailyshooting0820” target=”_blank” rel=”nofollow noopener” data-wpel-link=”external”>https://www.amazon.com/RhinoBlindsR150RTEHuntingRealtree/dp/B07KXQ8VPM/?tag=dailyshooting0820” rel=”nofollow”>https://www.amazon.com/RhinoBlindsR150RTEHuntingRealtree/dp/B07KXQ8VPM/?tag=dailyshooting0820” target=”_blank” rel=”nofollow”>hunting blind or tree stand is home base when out in the field. Achieving the perfect set up is a must for a great deer season. It can also be tedious, time-consuming, and super noisy.

Once you have your hunting locale narrowed down, get out there and prep your https://www.amazon.com/SummitTreestandsSU81119ClimbingTreestand/dp/B00K0LISF8/?tag=dailyshooting0820” rel=”nofollow”>https://www.amazon.com/SummitTreestandsSU81119ClimbingTreestand/dp/B00K0LISF8/?tag=dailyshooting0820” target=”_blank” rel=”nofollow noopener” data-wpel-link=”external”>https://www.amazon.com/SummitTreestandsSU81119ClimbingTreestand/dp/B00K0LISF8/?tag=dailyshooting0820” rel=”nofollow”>https://www.amazon.com/SummitTreestandsSU81119ClimbingTreestand/dp/B00K0LISF8/?tag=dailyshooting0820” target=”_blank” rel=”nofollow”>stand or blind. Ensure everything is sturdy and well-disguised. Be sure to account for any upcoming seasonal changes like falling leaves.

Ideally, you shouldn’t need to make any changes or adjustments on your first day out. Just show up and hunt.

Checking this off your to-do list early isn’t just about convenience. If you mess with your stand or blind too close to the deer season-opener, you’re going to scare away the exact animals you plan to hunt.

4. Clear all bait before deer season starts

Does your area permit deer bait or salt licks? More than half of all states https://www.gameandfishmag.com/editorial/baitingdeercontinuesdwindlemidwest/370173” rel=”nofollow”>https://www.gameandfishmag.com/editorial/baitingdeercontinuesdwindlemidwest/370173” target=”_blank” rel=”nofollow noopener” data-wpel-link=”external”>https://www.gameandfishmag.com/editorial/baitingdeercontinuesdwindlemidwest/370173” rel=”nofollow”>https://www.gameandfishmag.com/editorial/baitingdeercontinuesdwindlemidwest/370173” target=”_blank”>ban this practice. But if your state is one that does allow baiting, be sure to remove all bait before your state’s cut-off date.

Most states require removal of bait one month before hunting season begins. Always check with your local Department of Natural Resources (DNR) for exact cut-off dates.

Deer baiting laws can change drastically from year to year. It’s a good idea for all avid hunters to stay up-to-date on the latest rules and regulations in their area.

Baiting laws can also vary greatly between private and public land. If you are hunting in a new location this deer season, double-check which laws apply.

Recommended Read: http://www.dailyshooting.com/howmuchmeatfromadeer/” rel=”nofollow”>http://www.dailyshooting.com/howmuchmeatfromadeer/” rel=”nofollow” data-wpel-link=”internal”>http://www.dailyshooting.com/howmuchmeatfromadeer/” rel=”nofollow”>http://www.dailyshooting.com/howmuchmeatfromadeer/“>Estimating How Much Meat From A Deer Will Yield

5. Take annual inventory

Even if you hunt every year, a lot can happen during the off-season. Start each new deer season by checking all your gear and supplies.

The most obvious thing to look at is your weapon and ammunition of choice. But that’s just the tip of the iceberg.

Check your hunting apparel and cold-weather gear for damage or excessive wear-and-tear. The earlier in the season you can replace these items, the easier it will be to find them in stock.

Once the big-ticket items are sorted out, make sure you have ample amounts of small necessities like https://www.amazon.com/HotHandsBodyHandSuperWarmers/dp/B0007ZF4Q8?tag=dailyshooting0820” rel=”nofollow”>https://www.amazon.com/HotHandsBodyHandSuperWarmers/dp/B0007ZF4Q8?tag=dailyshooting0820” target=”_blank” rel=”nofollow noopener” data-wpel-link=”external”>https://www.amazon.com/HotHandsBodyHandSuperWarmers/dp/B0007ZF4Q8?tag=dailyshooting0820” rel=”nofollow”>https://www.amazon.com/HotHandsBodyHandSuperWarmers/dp/B0007ZF4Q8?tag=dailyshooting0820” target=”_blank” rel=”nofollow”>hand warmers, first aid supplies, duct tape, and anything else you regularly use during the hunting season.

6. Noise-proof your gear

It’s difficult to describe the sheer silence of the undisturbed wilderness. No amount of visual camouflage will prevent the local deer population from hearing your every movement.

First, ensure all of your wearables are as quiet as possible. This is also a good time to trial-run any brand new gear for the season. Better to discover that noisy zipper pull or creaking pair of boots now rather than out in the field.

Second, address any sound issues with your shelter (this is just another reason why setting up early is so important!).

You can DIY your noise-proofing with insulation tape, https://amzn.to/3pEutVT” rel=”nofollow”>https://amzn.to/3pEutVT” target=”_blank” rel=”nofollow noopener” data-wpel-link=”external”>https://amzn.to/3pEutVT” rel=”nofollow”>https://amzn.to/3pEutVT” target=”_blank” rel=”nofollow”>rubber paint, pool noodles, and tons more https://midwestoutdoors.com/hunting/summerprojectsoundprooftreestands/” rel=”nofollow”>https://midwestoutdoors.com/hunting/summerprojectsoundprooftreestands/” target=”_blank” rel=”nofollow noopener” data-wpel-link=”external”>https://midwestoutdoors.com/hunting/summerprojectsoundprooftreestands/” rel=”nofollow”>https://midwestoutdoors.com/hunting/summerprojectsoundprooftreestands/” target=”_blank”>household items for cheap.

7. Eliminate odors at the source ahead of deer season

Even if deer can’t see or hear you, they can http://www.dailyshooting.com/10tipsscentfreehunting/” rel=”nofollow”>http://www.dailyshooting.com/10tipsscentfreehunting/” rel=”nofollow” data-wpel-link=”internal”>http://www.dailyshooting.com/10tipsscentfreehunting/” rel=”nofollow”>http://www.dailyshooting.com/10tipsscentfreehunting/” target=”_blank”>smell you. And it’s much easier to kill odors at the source than to try and cover them up out in the field.

The best prep starts when you stow away last season’s gear. Storing everything in a garage or closet won’t be enough — invest in an airtight tote or sealed bag for everything.

When you pull out your gear for the season, give everything a good wash. Do not use any scented laundry products. You might want to clean your washer and dryer first to remove any residual odors.

8. Know your entrance and exit strategies

Good hunters know that even the best location is useless if you can’t get https://nclandandfarms.com/treestandentryandexitroutes/” rel=”nofollow”>https://nclandandfarms.com/treestandentryandexitroutes/” target=”_blank” rel=”nofollow noopener” data-wpel-link=”external”>https://nclandandfarms.com/treestandentryandexitroutes/” rel=”nofollow”>https://nclandandfarms.com/treestandentryandexitroutes/” target=”_blank”>in and out undetected. Don’t sacrifice a great season for the sake of an unrealistic tree stand or blind setup.

There’s only one rule to nailing the perfect entrance and exit strategy: Steer clear of the places in which deer spend their time.

If you set up trail cams earlier in the year, use them to identify deer hangout spots and paths. This can take much of the guesswork out of getting to and from your shelter.

Of course, you should also use line-of-sight to hide your movements — even if you’re a good distance away from any deer.

Use dense tree lines and small hills to your advantage. An aerial view of your hunting spot can reveal a lot about which routes to try and which to avoid.

9. Monitor the forecast

Hunting in inadequate gear isn’t just uncomfortable. It can also be quite dangerous for those hunting in northern states or at high altitudes.

If you’re hunting in an unfamiliar climate, reach out to local hunters. You’ll be surprised just how valuable their advice can be, especially when it comes to braving harsh weather.

10. Know the process

Prepping for deer season often feels like a bunch of build-up to that perfect bow or gun shot. But there’s a lot you’ll need to do after landing that star buck or doe.

Will a successful hunt happen every season? No. But you need to assume you’re bringing home a deer regardless. Without a solid plan for processing, you’ll be left scrambling.

Many deer hunters https://www.fieldandstream.com/howtobutcheryourowndeer/” rel=”nofollow”>https://www.fieldandstream.com/howtobutcheryourowndeer/” target=”_blank” rel=”nofollow noopener” data-wpel-link=”external”>https://www.fieldandstream.com/howtobutcheryourowndeer/” rel=”nofollow”>https://www.fieldandstream.com/howtobutcheryourowndeer/” target=”_blank”>process their own animals, but not all have the necessary space or resources. If you’re in a popular hunting area, some professional processors are so busy that getting in a last-minute deer isn’t always possible.

Before the season begins, know exactly where you’ll be transporting your kill for processing (and how you’ll get it there).

You’re One Step Closer to Landing the Perfect Shot

If you’re like many hunters, the days leading up to deer season are hard to patiently sit through. Fortunately, there’s nothing stopping you from getting started right now with some important planning and prep work.

Do you have any of your own must-do tasks for the hunting pre-season? Let us know about them in the comments below!


Featured Image by Steve from Pexels
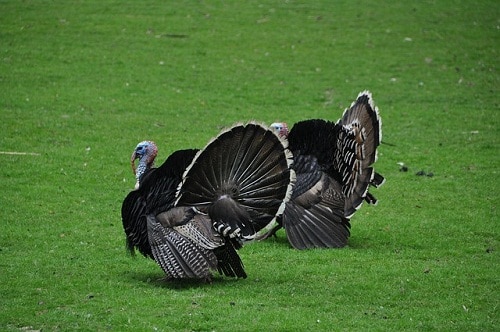
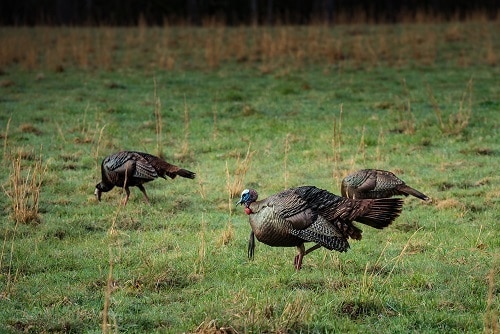
5 Best Turkey Scouting Tips for Hunters

If you’re looking to get into hunting as a beginner, turkey hunting can be a great introduction to this exciting and passion-filled lifestyle. My first hunting kill was a turkey during the Autumn season in South Dakota, along with my father and uncle. I was hooked after that. I’ve returned almost every year and taken part in many Spring season hunts as well.

Turkey hunting scouting tips are plentiful on the web and we’ll incorporate top tips and my experience here to give you a well-rounded knowledge base for the upcoming season. Make sure you check weapon requirements and bag limits for the state where you hunt and bring your camo gear. Here we go!


The Top 5 Turkey Scouting Tips for Hunters

Without further ado, here are my top five turkey scouting tips for all of you hunters out there.

#1: Identify the best location

Different states and provinces have different regulations, so do research in advance and then get out there to scout the area.

  • The location is the most important of my turkey hunting scouting tips. Ideal turkey habitats are diverse and contain different sources of food, plenty of water, and shelter. Turkeys roost in trees and often drink from streams in more open areas. Much of their food is found in open areas.
  • Note whether you’ll be on public or private land and be sure you have necessary permits and permissions. (Here’s a great video about location)
  • Try planting a food plot heavy with bugs and wood to attract turkeys. I prefer to do this because it gives me the best chance at having nearby, well-hidden ambush areas. If you have the means to do this set it up while turkeys are roosting and be sure not to leave a man-made trace, (for reference, see this article).

#2: Start scouting early!

Turkeys are notoriously feisty and paranoid and without the proper approach you’ll find yourself eating Hormel from the grocery store instead of experiencing that delicious wild game taste and the satisfaction of self-sufficiency. Do your planning and you’ll see the easier side of turkey hunting.

  • There is no reason not to begin your turkey hunting scouting in late winter, like February or March. By finding where the flock is in your target location well in advance, you’ll have the best chance at knowing their habits and ultimately having a successful hunt. (Great article here)
  • As turkeys are very mobile, the longer you are able to observe them during scouting gives you best chance to learn their movements and be prepared for the hunt. Note their roosting and drinking areas on your map and how long they tend to spend there per day.
  • Set up trail cameras across the area and check on them every 2-4 days (checking more often is just extra time out that gives turkeys more chances to see you and avoid the area). Find where they are feeding, and when the season starts to follow the turkey hunting scouting tips in step 3.

#3: Plan to make a day out of scouting before the hunt.

Prep equals perfection. That’s my hunting motto, and the most successful  hunts I’ve done are the ones I prepped for the most. Follow a routine and always take notes of what you’re doing!

  • Break your day up into sections, each with a primary focus to help you achieve the overall goal of bagging a turkey. The night before, make sure you have everything in order and ready to go. Binoculars, topo map, GPS, notes/outlines/research of the target area, weapon, outdoor supplies and clothes. Get on the road by dawn and cruise around the hunting area listening for turkey sounds and keeping an eye out for any hints of turkey presence. (Good discussion here)
  • Later in the morning, patrol the hunt area. Watch for strutting toms in the fields, wooded areas, ridgetops, and crevasses. Blow the occasional owl call to perk their ears. Remember, when in open fields keep quiet always pay stark attention.
  • By afternoon you should have a general idea of where the turkeys are. Look for roost trees, droppings, food, and other signs to mark their trail and start pinpointing your ambush spots based on where they will be later in the evening. Your turkey hunting scouting process is now in full swing.
  • In the evening, follow their track from feeding back to roost spots. Before heading home, make sure you know exactly where they will be when you return the next morning for the hunt. I like to take notes on the map and mark ‘X’ in two to three different places I plan to hide out.

#4: Turkey talk!

Calling the birds reduces the chances that they will run away or remain hidden. Watch some videos of calls and practice while in your vehicle.

  • To call in the turkeys, you’ll want to frequently use the mating noises of young hens. Hopefully, you’ve been practicing all winter! In the fields, stop frequently to make the call and then listen carefully for ruffles, noises, or movement. Turkeys respond to calls and can be surprisingly social. Toms come in easier than the quiet gobblers. (Here is a sample turkey talk)
  • Having a decoy or stage noise maker makes your calls seem more authentic. Try and switch back and forth between your calls and using a decoy, this sounds more convincing!
  • More info on talk and fall prep here.

#5: Have your weapon ready to go during scouting.

This makes scouting as realistic as possible and gives you a chance to test visibility in your ambush areas. Just be sure to prep your weapon:

  • To avoid detection of your barrel, it should be camouflaged or at least dulled. Do this before turkey scouting and practice some approaches from your ambush spots. As part of your scouting prep be sure that the gun will shoot a clean shot to the head or neck from 20-40 yards, body shots won’t drop the bird cleanly.
  • For bow hunting, you’ll want to get within 20 yards. Practice your approach during the scouting and use a blind to conceal movement. (For actual hunting guide, see here)

#6: Practice calling

If you’re looking to get a lot of turkeys, you should really be good at calling. This will take practice, it doesn’t come naturally. It’s never to early to start practicing either, and it’s good to start months before the season begins.

#7: Do a ground check

If you find a location and don’t see or hear any turkeys, don’t worry. Search the ground for other clues before leaving, such as droppings or track marks. Feathers may also be around to signify roosts. Do this during midday hours so that you don’t scare off any birds while they get close to roosting areas.

Making the Most Out of Turkey Hunting Season

I hope these turkey hunting scouting tips help you to better prepare for your next hunt! I’ve found turkey hunting to be the most addictive way to hunt because of the unique challenges those feisty birds bring to the table. I’d love to hear your thoughts and stories of turkey hunting- please share in the comments below! When taking new hunters out in the field, have them read up on procedures and take notes of what you are doing. If you found this article useful, share on social media because being prepared and educated about hunting is the best way to keep our passion sustainable for everyone.

12 Tips for Scent-Free Hunting

Although deer are not as aggressive as other species, deer possess a level of adaptability and defensive skills that allow them to protect themselves – their strongest asset being their noses. Over the years, there have been numerous types of gear and products that are specially created to help hunters control scent.


12 Tips for Scent-Free Hunting

Here are a few easy tips that will keep you scent free:

1. Use Odorless Detergents

Once you’re finished hunting, make sure that you use a detergent product that is manufactured specifically for hunting. Some of the best choices that you can find online or at local sporting stores include Scent A Way and Dead Down Wind.

2. Wash your clothes in baking soda

An alternative to store-bought hunting detergents is detergent you can make in your own home. Washing your clothes in baking soda can help eliminate odors picked up by deer. You can also make large quantities of simple DIY detergent composed of peroxide, baking soda, and distilled water.

3. Dry your clothes outside

After you’ve washed your hunting clothes, dry them outside. Hanging them outside to dry prevents indoor scents from clinging to your clothes like cleaning products, baking/cooking scents, etc.

4. Store your washed hunting clothes

Once your clothes are completely dry, place them in a large air tight container for storage until your next usage. For an added measure, you can leave odorless dryer sheets in the container with your clothing.

5. Use scent-free products

Take a scent-free shower before heading out into the field. Use scent-free body wash, shampoo, tooth paste, and deodorant. You can also use scent-sealed hunting gear to eliminate human scent, like scent-sealed slings, bags, and more.

6. Use scent-eliminating spray

Using scent-eliminating spray will help mask any remaining scents you have or you’ve picked up on the way to the field.

7. Scent-free baby wipes

For easy, inexpensive, and fast cleanup in the field, use scent-free baby wipes. An alternative for this is bringing rags that have also been washed in scent-free detergent, but they are harder to pack around than a package of scentless baby wipes.

8. Use an Ozonics Unit

Although some hunters may think that Ozonics Units are unnecessary if you’ve taken enough precautions to cover up scent, they still can help hide human scent in the field. Ozonics Units mask your scent in ozone and continuously work to neutralize scent throughout the time that you’re out in the field.

9. Wear rubber boots

Use knee-high rubber boots and tuck your pants into them. Make sure they are placed in an air tight container beforehand. Do not wear your boots at home or in any location to and from the hunting area.

10. Keep your stand site downwind

One of the most basic yet important rules for preventing the spread of scent in the field is to stay downwind. Check the direction of the wind before setting up your stand site to make sure the wind won’t be blowing in the direction of your target and their bedding/feeding areas. You can check predicted wind conditions on weather websites and apps beforehand, but be prepared to double check the direction of the wind once you have arrived. It’s best to have the direction of the wind blowing towards a cliff, lake, pond, etc.

11. Use the bathroom

Make sure to use the bathroom before you get a shower. This will give you a chance to clean off from any urination or defecation smells.

12. No smoking

It’s crucial to stay away from any smoking or chewing before, during, and after your hunt. If you go through the motions of showering and properly washing all of your clothes, just one cigarette will completely ruin all of that. Chewing tobacco will also make you detected easily — there’s generally a strong wintergreen odor in many varieties of it.

Making the Best Out of Your Scent-Free Hunting Experience

These are all excellent tips and techniques that can make you successful when scent-free hunting. If you use them, you’re much more likely to beat some of the big game’s strong sense of smell!

7 Tips To Help You Improve Your Long-Range Shooting

Most everyone wants to be able to shoot their gun as far as possible.

Well, some factors that affect the distance you can shoot is the gun or rounds you are using, but other things that can affect the distance you can shoot accurately has to do with you.

Well, in this article we will look at some factors that go into being able to shoot long-range and accurate at the same time. Read on for the top tips to improve your long-range shooting.


Position

The first thing that goes into being able to shoot a long way accurately is the position that you are in. There are a few things to consider when picking a position to fire your gun in. The first is that you want the position that you are in to be stable. You don’t want to be wobbling, and you don’t want your guns kickback to cause a lot of recoils because that will affect your shot, so being in a tight and stable position is important.

A lot of times the most stable position you can be in for long-range shooting is laying down on the ground. This way you can use the ground for added support and lower center of gravity means less movement. The thing is with being down on the ground though, is it may not be the most comfortable position and the next part of the position is you want to be comfortable. To help it be comfortable clear out a space to lay down so you aren’t on any rocks and you can also add some padding down on the ground if you need too.

If you need to move after you are in position, then be sure to move your whole body and don’t just move your torso or the gun. Moving the whole body will help with shifting your weight thru everything and distributing it easier instead of what part of your body is having all the strain. Having a good position though, and keeping your rifle steady can go a long way in improving your long-range shooting.

View Thru Scope

You need your scope to be 100% clear, or else your shot will be thrown off from distortion or shadows. You also want to make sure that your scope is calibrated perfectly.

Before you even start hunting or shooting for real, you need to take your scope to a range and zero it in.

You want to line up the circles perfectly because if your scope is off or not working right, then your shot is, of course, going to be off.

This means that it is a good idea to invest in a top quality scope especially if you want to have good long-range shooting. Best ar 15 scope for long-range shooting is the good choice, take a look at it.

Shot and Follow Through Perfection

The next thing that goes into being a good long-range shooter is having a solid shot release and follow through.

A top tip is making sure you don’t add any movement to the gun when you are pulling the trigger or after shooting. To pull the trigger properly, you want to make sure you are pulling it straight back and that it is a smooth motion.

The way to properly pull the trigger is to use the center pad of your index finger, and you want to make sure your index finger and fingernail is parallel to the trigger guard. This will make sure that the motion is straight back.

After pulling the trigger, there are still key things to do. One, you need to make sure you keep your eyes open and don’t flinch or blink. This can cause your shot to travel astray.

The next thing is you need to memorize where your crosshairs are when the shot breaks.

This information is vital, and other information that is vital is refocusing on when the shot hits the target. Using this information you can make sure your next shot is even better.

Grip

The next thing that can really affect your shot has a proper grip that can help control recoil. We had already touched on this some when we talked about the position, but we will go into more in-depth on the grip in this section.

For your grip, you don’t want it to be too tight, but you also don’t want it too loose either. For a proper hold, your check should be pressed firmly against the stock with your head held upright and not at an angle.

Having your head at an angle can really affect the view you have through the scope. Having excellent ‘check weld’ is vital to shooting a long distance. Your hand should have a firm hold on the pistol grip, and you want to make sure your thumb is curled around it for safety. If you leave your thumb along the bolt or beside the safety catch, then you will really fell the pain from that if you fire a larger gun.

Breath

The next tip for getting more distance on your shot has to do with your breathing. You want to fire after inhaling and before exhaling. This will help steady yourself and the gun. If you really need the shot to go a long way and be accurate, then you will need to hold your breath.
Eliminating any and all movement in your body is key to being able to shoot a long distance, and the best long-range shooters are excellent at holding their breath as they fire.

Know your Gun and Bullet

The next thing is you need to know your gun and bullet. Certain guns and bullets behave a different way, and you need to be familiar with what you are firing to be able to shoot a long way.
This is similar to the idea that you have to be able to zero in your scope before shooting, you need to know your bullets and gun before shooting as well.
You want to know how the win will affect your rounds and when your bullets start to break. Knowing your rifle and bullets is a key thing to remember when shooting for distance.

Practice

The best way you can learn about how your gun and bullets are going to react is with practice. Before trying to shoot a long distance, you first need to practice with your gun and get shooting short range targets down. 

Once you get good and accurate with your gun at short-range, you can start shooting longer distances. Eventually, with enough practice you will be able to shoot farther.  

The key is to get shooting short down pat first and learn how the wind and environment will affect your gun and get it set up to be able to shoot farther.

Conclusion

With all these tips you should be able to start shooting a longer distance in no time. The key to shooting long range is to practice with your rifle and learn how the wind will affect your bullets and to get your scope zeroed in. 

Once you have done that you want to be in a proper position and be sure to pull the trigger straight back and reduce all movement when firing. If you can, then hold your breath when firing to get top distance from your shot. 

These tips will help your long-range shot, and after reading this, you will be shooting farther in no time.

How to Determine the Shot Size for Turkey?

When it comes to hunting, you have a few different choices you have to make before you even fire your gun. The first is what are you going to hunt, but if you are reading this, then you have already chosen turkeys. The next is what kind of gun to use, and the final thing is what shot size are you going to use in that gun. In this article, we are going to address the shot size question when hunting turkeys. After reading this article, you will know how to answer the question of what is the best shot size for turkey hunting.


What is shot size?

Before going into what shot size to use for turkey, we will discuss briefly what shot size is. Shot size is the size of the pellets that are in a shotgun shell. In a shotgun shell, it is not like a bullet with one projectile coming out. Instead, it has multiple projectiles that are little bullets. Some call them pellets and others call them BBs but shot size is the size of the little round balls that are coming out of the shell.

How to determine the best shot size for turkey?

So, for turkeys what is the best shot size? Well, a lot of people use No. 6s, No. 5s, or No. 4s. The number six is actually the smallest, and the number four is the largest with number five in the middle. No. 6s measure 2.79-millimeter diameter, No. 5s measures the 3.05-millimeter diameter and No. 4s measure 6.1-millimeter diameter. So, now that you know the sizes which one should you use? Well, the common answer is which one patterns the best in your gun. This answer is pretty accurate, and we will go into detail on it shortly, but this isn’t the only factor to consider.

The other thing you need to consider when choosing a shot size for hunting turkeys is the size of turkey you will be hunting. In some areas turkeys are bigger than in other areas, so you need to choose a shot size that matches the size of your turkeys. If the turkey is large, then you will need the larger pellets to get proper penetration into the turkey, but if the turkey is small, then you can use the smaller shot size. When picking a shot size, you want one that is just big enough to bring down your target, but not so big that it ruins a bunch of the meat.

Patterning your gun.

So, now that you know the turkey size plays a big effect, because if you are hunting small turkeys, then you want a small shot size, but for bigger turkeys, you need a bigger size we will get into what patterning is and how it effects picking your shot size. When you pattern your gun, it is setting in up and practicing with the rounds to see how the pellets are going to come out of the shell.

You want the shot to hit the target. It doesn’t matter if you are firing larger number fours if none of the shot hits the target. The same can be said about number sixes. If you can get a bunch to land on the turkey, then you can get a kill even though they are smaller.

When patterning your gun, you will want to fire multiple rounds thru it at targets of varying distances. Normally twenty feet, forty feet, and sixty feet are used. The targets are turkey pictures, and after shooting them, you look at the target and see how many pellets made it into the target. If the pattern is a good cluster at all the ranges, then your gun is patterned, but if they aren’t on the target, you will need to make adjustments and fire some more. Due to how guns work more pellets will hit the target at a closer distance than at farther away ones. That is because the pellets spread out as they travel. Once you have your gun pattern and have around that you like how it fires from your gun that is normally the right shot size for you.

Gun Gauge

Most of the time for the size recommendations on here we are assuming you are firing a twelve gauge gun. Some people like using different sizes though so again this stress the importance of picking the shot size that works best for your gun. Generally, though each shot size has some advantages no matter the gauge, so to help you decide we will cover the advantages of each shot size.

No. 6s

Number six shot size is great for if you are shooting birds that are close. This is especially true if that are smaller birds. No. 6 shot gives great density in your patterns, but since they are small, they lose their ability to penetrate deep enough to kill quicker than the other sizes.

No. 4s

Number four shot, on the other hand, is great for distance because they are bigger and keep their killing power farther. However since they are bigger less come out and they also spread wide when traveling, so they might not provide the density you need sometimes. Also, some guns just don’t pattern No. 4 shot good.

No. 5s

Number five shot is in the middle. It can travel relatively far and keep its penetrating power, but also it stays tight. This makes it good for most hunting situations.

Conclusion

So, which shot size is best for turkey hunting? Well, the answer is that a lot of times you should carry all three between No. 6s, No. 5, and No. 4 because you don’t know the situations you will face, but if you just want to carry one then go with number 5. That is because it offers good distance while also keeping tighter patterns. However, the best thing to do before hunting is pattern your gun so you know how each shot will work in your gun and then choose the one that is best for the situation. If you have a large turkey at a long distance, you can use your number 4, but if you got a smaller turkey that is close, you could use your number 6. The key is to be prepared when turkey hunting so you can get the kill when the opportunity arises, and the best shot size for turkey hunting is the one that you have practiced with. The saying that the best shot size is the one that patterns the best is pretty true because if you get the pellets to land right, it doesn’t matter their size, you will get the kill.

Shot Size for Ducks: Which to Use for Hunting

When hunting any animal, it is important to use proper shot size. That is because you don’t want the meat ruin from using too large of a round.

In this article, we will look at hunting waterfowl and discuss the proper shot size for when you are hunting duck.

Read on to learn all you need to know when it comes to selecting the right size round to use the next time you hunt ducks so you can bag a nice one and possibly have it mounted.


What does shot size mean?

Before getting into the details of how to pick the proper shot size when hunting duck we will look at what is meant by shot size.

Well, shot size is generally given as a number, and the number indicates how big each pellet or bb is in each shell or round.

The bigger number rounds when it comes to shot size are actually the smaller rounds, and the larger numbers are the bigger rounds.

This means that a shot size of 6 which is .110 is smaller than a shot size of 2 which measures slightly bigger at .180 but even though it is only a slight difference size wise, it can make a big difference when hunting because of the force behind them and the pattern it gives.

Rifle with the best ar10 scope is good choice for duck hunting too.

How to pick around?

So, now that you know what the number means when it comes to shot size and that the larger numbers are smaller rounds, how do you pick the right size shot size for your needs? Well, wisdom says that you should only use a round that is big enough to kill the animal you are hunting and not to use anything bigger than that. That is because once you have something big enough and enough force to kill the target, you are not gaining anything by going to a bigger round.

There is actually a chance to cause more harm. That is because you want the impact wound on the animal to be as small as possible because generally, the meat that the bullet goes through is not edible. Also, you don’t want the target torn to pieces because then you can’t display it if you are hunting for that purpose. So, what are some recommended shot sizes for ducks then? Well, the answer depends on the size of duck you are hunting, but read on to find out some suggestions for varying sizes of ducks.

Small Ducks

Small ducks include species such as teal. For small ducks, you don’t need that big of the round at all. That is because they are small and they have less meat for your round to penetrate before it gets to an important organ to be able to kill them. No. 6’s is a great round size. This is because smaller ducks fly fast and you need to be able to hit them. With these loads, you get wider denser patterns that make it easier to hit the smaller faster ducks.

Also, these size shells are commonly used and readily available making them affordable which is always nice. Another benefit to these size rounds is since the pellets are small there is less recoil meaning you can fire faster and also have less wear on you after a long day of shooting because with smaller ducks you will need to kill more to get the same amount of meat as with a larger duck if you are hunting for dinner.

Medium Ducks

Medium ducks are ducks such as Gadwalls, Wood Ducks, Wigeon, and Scaup. For these, you need slightly larger rounds because they are bigger and have thicker tissue than smaller ducks. The best round size to use for medium ducks is No. 4’s that is because they are big enough to put the medium duck down, but not too big to damage the bird. Actually, number fours are a great all-around round to use especially if you are hunting a variety of species of duck. That is because they can be used on teal and work out fine most of the time.

No. 4’s can also be used on mallards and bring them down as well. Size 4 rounds are fast enough to for the teal and work even better on the slightly slower medium ducks. The patterns they give work out well and if you are only going to take one round size with you when duck hunting it should probably be a number 4.

Large Ducks

Last we have the large ducks which are most commonly your mallards but can also include canvasbacks, Small Sea Ducks, and Small Geese. For these larger ducks to be most effective, it is when you should start bringing in the bigger rounds. For best results No. 2’s work great. That is because these large ducks are slower and have a lot more muscle and tissue than their smaller family. This makes it, so you need larger rounds and more force to bring them down.

Pattern

Not only is shot size important, but also the pattern is important like we have already mentioned. It is important to get used to the pattern that the round is going to have in your gun before hunting and to see how well it strings. This can be done at a range and should be down when trying new rounds because even though the pellets might be the same size, different brands of a round can pattern differently.


Gauge

Does, the gauge of round matter or just the size? The gauge matters to some extent because if you are using a weaker load, then you will need a larger pellet. These recommendations are all based on using a 12 gauge shotgun. Twelve gauge works great for ducks because it doesn’t have too much power, but it isn’t too weak either. It has the perfect balance of force and works the best for each size of duck for the size of round specified.

Conclusion

So, now you know how to pick what size round for duck hunting. You know that for small ducks you can use No 6’s and for large ducks No 2’s and that No 4’s work best for medium ducks. However, you also learn that most of the time number four is the sweet spot and if you are only going to carry one size round with you that is the best because it can bring down a larger duck if they land right, but will also not destroy smaller ducks if used to kill them. Now that you know all this you can head out to the range and shoot some clay ducks to get the patterning right for the rounds you are using for the next time you go duck hunting.

The Hunter’s Handbook: All You Need to Know About Pregnant Deer

Some people may have concerns about accidentally hunting pregnant deer. The good news is, U.S. deer hunting seasons are set up around the rut, to avoid having pregnant deer in the firing line. But, if you want to learn more about them, we’ve got you covered!

Deer are seasonal breeders and you can use the deer rutting season as your guide to avoid the problem of ever hunting a pregnant one. All six phases of rut are important parts of the deer reproductive cycle, but they are the best time to take deer without interrupting a successful breeding season. That is, allowing does to deliver fawns.

Understanding more about hunting, and how and why hunting seasons, and bag limits, were created is helpful to all hunters, so we’re going to cover a bit of that first.


A Super-Fast History of How Deer Seasons Came to Be

Once upon a time, many people took pregnant animals, because they were hunting all year round to keep their family’s fed. Deer conservation wasn’t even considered, because they were so plentiful. People have been hunting, after all, for a very long time.

German artifacts, as well as the cave paintings in France, show that deer hunting has been around even before the dawn of modern civilization. And, let’s face it, you cannot talk about American history without taking into account the role of hunting, both good and bad.

Early Native Americans used hunting as a rite of passage for men. It proved that the man was capable of feeding his family. For the Pilgrims of Plymouth, deer, and any other game were considered the property of landowning nobility when they lived in Britain.

The right to hunt was denied to the common man there. You can only imagine their delight when they found out that deer were plentiful in America. There were so many in fact, that as the populations of humans increased, there was a bit of a problem.

Fast forward…

In the 20th century, deer populations threatened forest growth and farms. To make matters worse, there was an increase of Lyme disease in humans where their numbers were high. That was due to deer and the common deer tick, which carries the disease.

By the second half of the 20th century, unrestricted deer hunting resulted in depleted herds. So, responsible hunters came up with a mandate to manage deer populations, so they don’t stress ecosystems. They also placed strict regulations against the hunting of pregnant deer.

Most hunters at this point in time consider themselves stewards of the land, and animals populations. Conservationists at heart, they want land, water, and animal resources to be well cared for and balanced — preserved for the next generation to practice the same natural, sustainable method of feeding their families.

Apart from this treasured hunting tradition, there are other numerous advantages of deer hunting that include:

  • Fresh, organic meat
  • Marksmanship
  • Cultivated survival skills
  • Time spent in nature

None of those advantages are possible if we don’t preserve deer herds. The way that we do that is set up hunting seasons, and to make sure that those seasons correspond to the rut – not during gestation.

What Is the Deer Rutting Season?

The rut is the best time of the year for any seasoned deer hunter. Bucks are usually on the chase for does, and they come out in the open fields during the day. They’re easier to draw to you with estrus scents, buck grunts, antler rattling, and doe in heat bleats.

The rutting season runs between mid-October and early December. When you spot a doe during this time, it’s a clear indication that a buck could be nearby.

How is rutting determined?

There are different theories out there on how you can predict the rut. From moon phases, temperature triggers and daylength.

Studies have dispelled any notions that the moon affects the rut. The rut will also happen regardless of weather conditions such as rainfall because deer get bred at the same time each year. Weather conditions only affect daylight deer movement, which is crucial information for hunters.

The theory of the photoperiod is the most widely proven theory for predicting the rut. It states that daylight length is what drives deer to breed. This happens within a specifically limited window in order to give the fawns the best chance of survival.

The Different Phases of the Rut

Deer display unique behavior during the six phases of the rut. You should use different hunting strategies to your advantage for every phase, of course. We’re going to briefly cover each phase.

The pre-rut phase

The pre-rut phase takes place from mid to late October. At this stage, bucks begin to exhibit rutting behavior, and you’ll likely find rubs and scrapes on tree trunks as well as digging shallow pits.

The best hunting strategy for this period is to find where the bucks are bedding. You can use the scrapes to narrow down the bedding area. Do not use calls during this phase because it will just scare them away.

Seeking phase

The seeking phase takes place between late October to the first week of November. Bucks start to try to find the location of does, and rut signs will be more prevalent. Mature bucks will begin walking in broad daylight while younger bucks go chasing females.

Hunting in the mornings can become more effective — especially around the bedding area. Using calls could work, but you should hold off until the chasing phase.

Chasing phase

Chasing begins when a buck finds the doe in estrus. As it approaches, the does run but still remain in sight. The buck follows her in pursuit, but little actual mating happens because every buck is just in pursuit.

During this peak rutting stage, the bucks will be less cautious, making them vulnerable to hunting. Bucks will use their antlers to fight for mating rights over does. Their high level of distraction is an advantage, giving you a better chance at a clean shot. You can track trails at food sources and open areas. Grunt calls and decoys will also be effective.

Tending phase

The tending phase is also called the lockdown stage. It takes place from mid to late November. Hunting at this stage is tough because most breeding happens in thick vegetation cover.

However, a strategic blind near bedding areas can offer a shot when the buck slips up and breaks cover.

Using doe bleat calls can also be effective as most bucks can still be lured into going after another doe.

The post-rut phase

The post-rut phase begins from late November to the end of the month. At this stage, most does are bred, but some might enter estrus at this stage. What changes here is that elevated hunting might pressure deer to be more cautious.

Hunting near bedding areas and on the trails to and from a water source is usually the most effective strategy to use because most deer hide during the post-rut phase.

Second rut phase

A second rut might occur at the end of the rutting season. Even though it’s not always guaranteed, the second rut phase can take place during the first three weeks of December.

Does not bred during the first rut go through a second estrus cycle. It’s also possible for yearling fawn does to become sexually active and go into estrus.

The best hunting can take place along bedding and feeding trails. And of course, wherever the does go, the bucks will follow, so open fields are once again a good location. Good placement of a stand in any of those locations should give you an opportunity to take a shot as well.

After hunting season ends, then the results of all that frantic rutting will take hold and does will gestate over the winter months.

How Long Are Deer Pregnant?

A pregnant deer will give birth after 180 to 200 days, depending on the species. At the end of the gestation period, the pregnant deer will give birth away from the herd. It is not unusual for a healthy doe to have twins or triplets.

Seasonal breeding in deer during the fall means that fawns are delivered when there is the most food available to them, during the springtime. Fawning takes place at the best time to allow the babies a better chance at survival.

Usually, the pregnant deer will choose an area of dense vegetation, or thicket, to protect the fawn from predators. The mother will also lick her fawn clean to disguise its scent as another protective measure.

The mother will then urge the fawn to its feet after 20 minutes of birth. However, it will be left hidden for the first week of life. Fawns are born with fur and their famous white spots that eventually disappear as it matures.

How to Spot a Pregnant Deer

It’s difficult to spot a pregnant deer until the doe is well into the third trimester. At this point, there is a significant bulging to the lower caudal abdomen.

A pregnant deer also tends to keep cleaning its skin and look around from time to time as a cautionary measure. You will likely find the deer roaming with another female that is also pregnant. Mostly, if it’s a doe, in early spring or late winter, chances are it’s pregnant.

Ethics in the Woods

You must maintain a high ethical standard of behavior when you go out in the woods. Most hunters know that regular practice with their firearm is part of ethical hunting. However, those good practices don’t just apply during hunting season.

If you are in the woods, and spot a fawn, there are some things you should know.

When a fawn is wandering aimlessly and crying, this could be a clear indication that the mother may have been hurt and won’t return. Seek help from your local DNR or wildlife rescue groups, there are right and wrong ways to help a fawn and the wrong way can end up killing it.

However, if you find a fawn lying quietly in the woods, do not disturb it. Their mom is most likely nearby and will get back to get fawn once you’re gone. The only time you can take a fawn to the animal rescue is when it’s ill or injured.

Avoid touching a fawn unless it’s clearly in immediate mortal peril, such as on a highway.

What to do if someone has touched a fawn

Does are keen on keeping their fawns scent-free to protect them from predators. If you have touched a fawn and you’re returning it where you found it, protect it too. Leaving human scent may cause the mother to abandon it, or draw other scavenging animals looking for our leavings, who would happily eat a defenseless fawn.

Put on rubber gloves and place a towel in the grass. Wipe the fawn’s body and get the fawn back to safety with your gloves still on.

Did you learn what you wanted to know when you read this post? Let us know down in the comments, we’d love to improve on future articles!

Making Sense of Shooting-Angle Compensation

Trying to understand shooting angle compensation? Just in case there’s any confusion, this means compensating for shooting uphill or downhill. If you’re going on a hunt in the mountains, you’re going to want to know exactly what this means.

Shooting uphill or downhill can be a little confusing, but it’s really important to understand. I don’t know about you, but I would hate to miss a shot on a mountain hunt because I didn’t properly compensate for the angle at which I was going to shoot.

In this article, we will go over some of the basics to help you understand this concept.


The Basics

There’s been a long-standing rumor about whether you need to aim up or down when shooting uphill or downhill. It’s one of those things that’s been passed through families. I hate to break it to you, but there’s a decent chance that the rumor you’ve heard is inaccurate.

There are a couple things you have to understand before making your shot. The most obvious one is gravity. Obviously, after you fire the gun and the bullet is flying through the air, the bullet will be affected by gravity. Gravity will pull the bullet towards the ground. The effective distance of the round is effected largely by the velocity, because if a bullet is faster, it will be able to fly further before falling.

Next, you have to understand basic angles. Everyone has learned math, so we will keep it at that. However, being able to estimate about 45 degrees up or down is important.

Taking the Shot

Now that you understand the basic forces at play, let’s cover taking the shot.

Hunting in uphill and downhill

Let’s get this out of the way right at the beginning. Your bullet will hit high while shooting both uphill and downhill. Gravity affects the velocity of the bullet more than the trajectory when fired at an angle. Regardless of angle, you will be aiming a little low.

However, if your shot is at a decently close range, you won’t have to adjust your point of aim at all. Within about 175-225 meters, you won’t have to adjust the shot.

You have to start thinking about adjusting your shot if you’re shooting at a greater than 45-degree angle or at a distance greater than 200 meters. At these steep angles or longer ranges, you will have to adjust the distance that you’re shooting.

There are two basic ways to do it, and both of them require you to measure or accurately estimate angles. In order to do this, there are tools you can mount on your weapon, such as an angle cosine indicator.

You’ll need this angle to be able to accurately calculate what range you should be shooting at. If you’re using an angle cosine indicator, it will give you the cosine percentage to shoot at. If your measured range is 500 meters and your angle cosine indicator gives you 10 degrees or 98 cosine percentage, you will multiply 500 x .98 to find out you will hold at 490 meters.

The next way to do this requires less math. It’s essentially just a quick fix based on estimations. Essentially, you will guess or measure your angle. You’ll probably need a reference guide to remember the conversions, but here are a few common ones for you. You’ll shoot 10 degrees at 98%, 20 degrees at 94%, 30 degrees at 87%, and 45 degrees at 70%.

Obviously, the angle cosine indicator will give you a much more accurate reading, so you won’t have to do any guesswork. However, for a quick shot, remembering these few numbers will allow for a much more expedient shot.

Lastly, there are some high-tech rangefinders that will spit all of this information out for you. If you commonly hunt in steep terrain, this may be a worthwhile investment for you!

Conclusion

As you can see, shooting uphill or downhill isn’t as difficult as people make it out to be. There are a few basic principles to keep in mind, and as long as you understand them, you’ll be able to make more accurate shots.

No matter which method you choose, understanding the basics will allow you to be successful.

Estimating How Much Meat From A Deer Will Yield

When hunting, it is important to be able to estimate how much meat a deer will yield before killing it. This is for multiple reasons.

One: You are only allowed to kill so many deer per season, so if you are trying to provide enough food for your family, you need to make sure the deer you are killing will provide enough.

Two: It costs money to get a deer processed by a butcher, so you want to make sure you are getting enough meat for the money that it is costing you.

Three: It takes time to field dress the deer and carry it back to your vehicle, so you want to make sure your time is used on a deer that is worth it.


How Much Meat from a Deer Will You Get? 

Due to these factors having a good estimate of how much meat is important before killing the deer. The factors that go into estimating how much meat from the deer will yield is mostly based on the size or weight of the animal.

With practice you can look at an animal and know close to what it weights. Then you can figure out how much it will weigh after field dressing, which you can then use that number to figure out how much meat it will provide.

After reading this article, you will know what you need to consider to figure out how much a deer weights and then you will be able to have a rough idea of how much meat it will produce for you and your family.

Guessing Weight Based on Girth

So to guess the weight of a live deer you look at the girth.

Depending on where you live the weights can vary slightly, but with practice and experience you can get better at guessing the girth of the deer and knowing the weight before killing it.

For white tailed deer, which are the most common type hunted, a deer with a girth of 24 inches will weight around 55 pounds.

The girth is the distance around the body of the deer at the widest spot.

For each added inch the weight of the deer goes up about five pounds or so. This holds true till you start getting into bigger deer. Then the weight goes up more rapidly.

For a deer that is 30 inches in girth it will weigh around 90 pounds.40 inch girth weight around 182 pounds and so on.

When estimating weight it is also important to consider if it is a doe or buck. Does will pretty much always weigh less than bucks. Also, back to location, northern animals tend to weigh more than southern animals, due to population purposes. When go deer hunting, the best shooting sticks for deer hunting is important, you should have one. 

Finding Weight After Field Dressing

First before figuring out the weight of the animal you have to field dress it. This is not a field dressing guide, so I won't go into detail on how to field dress the deer, but you have to make sure it is dead and then cut it open with a sharp knife.

Cut thru the fur layer, and then the muscle layer separately for best results. You then pull the layers back and pull out the organs. By removing the stomach, intestines, and other organs now, it will make it easier to take back with you and keep the meat fresher, as those parts break down first.

Once you have field dress the deer, removed all the insides, it is time to wrap it up tightly to make sure no contaminants get into the meat as you are taking the deer out of the woods. At this point you can still not guess the weight yet though to get an accurate idea of the yield of the deer.

Their are still a lot of inedible parts such as the bones, head, tail, etc.. that are left attached, but you can start to get a better idea of the final weight of the deer and how much meat it will yield. Field dressing the deer usually causes it to lose about 20lbs from the previous estimate based on girth.

A typical northern doe will weigh around 105 to 120 pounds after field dressing where a southern doe fawn will weigh closer to 45 to 65 pounds after field dressing. Yearling bucks weigh 105 to 125 pounds field dressed, and other bucks weigh more. These are all estimates though and every animal and location is different.

How Much is Lost in Butchering

So how much meat is actually on the animal? How much of the weight is edible?

Well, if you have a butcher that is skilled and minimizes lose, then you can get around 75% of the post field dressed weight as meat. On average the weight is broken down to 71-78% meat, where the difference is 6-9% hide, 11-14% as bone, and 5-6% as blood. This does not factor in damage to meat though from a bullet.

The cuts of the meat are roast from the front end, and butt. Steaks from the middle and bottom of back. Ribs from the rib area and chops from area above that, and flanks from the belly/middle section. With this you can look at the structure of the deer and see how much of each type of cut you will get.

Conclusion

So now you know that the amount of meat you get all depends on the size of the deer after it is field dressed, and completely boned and the hide is removed and blood is drained.

You know that you can use the girth of the chest of the deer to determine a good weight estimate, but that location of the deer depends a lot on how much it weights.

A good formula to use to figure out how much meat you will get is to go by carcass weight which is field dressed weight divided by 1.331.

Then take that number and multiple it by .67 to find the boneless weight, and lastly take the boneless weight and multiple it by .7 to get a realistic idea of the weight of the meat you will get, so using this say the field dressed weight is 100 pounds. Dividing that by 1.331 gets 75pounds.

Then multiplying that by .67 gets 50 pounds for the boneless weight and then lastly multiply by .7 gets 35 pounds for the realistic meat yield. That means a hundred pound field dressed deer gets 35 pounds of meat.

Using this formula and practice, you will be able to figure out how much meat you will get before you even kill the deer.

Should I Go Deer Hunting With an AR-15?

The AR-15 is the rifle of the modern day. It is an extremely popular sporting rifle for quite a few reasons. But you may be wondering, "Should I go deer hunting with an AR-15?"

For starters, it is easy to operate and maintain. They are relatively inexpensive, and there are literally thousands of aftermarket parts available.

Due to all this popularity, it is becoming more and more popular as a hunting weapon.

Many people are using AR-15s for coyote hunting, hog hunting, and other varmint hunting. More and more people are starting to use AR-15s for deer hunting.

Are you wondering whether or not you should deer hunt with an AR-15? Let’s take a look at some of the facts.


Caliber of AR-15

Assuming we are talking about a true AR-15, they shoot 5.56 or .223.

However, AR-frame weapons are available in many calibers, both larger and smaller.

For deer hunting, 5.56 is a little on the small side.

So obviously, a larger caliber AR-frame weapon would be a slightly better choice for deer hunting.

ARs are available in 6.5 Creedmoor, .50 Beowulf, .458 SOCOM, and .300 Blackout, to name a few. These larger calibers would generally be better than 5.56 for deer hunting.

Given how easy it is to customize an AR-15, it would be pretty easy to buy a new upper in a different caliber, and slap it on any AR-15 lower receiver.

However, the point of this article was about using a true AR-15 for deer hunting, so we will focus on 5.56.

Ammunition

Using modern ammunition, 5.56/.223 can be a viable hunting cartridge. Most old-timers will be really reluctant to say that. Based on ammunition of old, most people wouldn’t go smaller than .243, which was still considered small.

However, with modern bonded ammo, available in both 5.56 and .223, these rounds are deadly enough for smaller deer.

A few examples are Federal Fusion in .223, Winchester Power Max in .223, Reaper ammo in 5.56, and Nosler Defense ammo in .223.

All of these are heavier, bonded bullets. For those that are unfamiliar, bonded bullets work by keeping the bullet together. Bonding the projectile together prevents it from separating. As a result, the bullet gets deeper penetration, which translates into damaging more tissue.

Weapon

If you are deer hunting with an AR-15, there are a few key aftermarket parts you should have.

If you are building an AR, or have multiple uppers for your weapon, a longer barrel would be preferential for hunting. The longer barrel can help to increase range and accuracy.

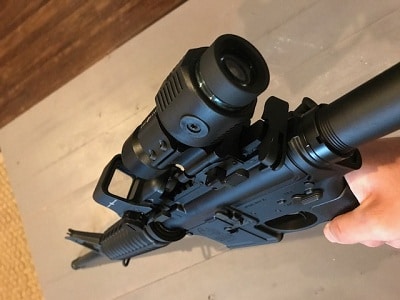
A quality scope is extremely important, as with most types of hunting. You are going to want a durable scope that is preferably waterproof and shockproof, to withstand the damage that can come along with hunting. Best ar15 scope for deer hunting is great way to know which is the best


Sightmark Ultra Shot Reflex Sight-2

Other than that, the standard AR-15 parts will suffice. The standard trigger, collapsible stock, and handguards will likely serve you fine. However, you may wish to change things over time.

Other Considerations

Some states have magazine capacity limitations for hunting rifles. Make sure to look up your local state laws before using a standard 30-round AR-15 magazine.

Additionally, some states have a minimum caliber for game hunting. If your state has this, hunting with an AR-15 may be out of the question, due to the caliber.

Make sure you know your local laws before going hunting!

As I mentioned before, .223/5.56 is an acceptable cartridge for smaller deer. If you live in an area with large deer, such as Wisconsin, Iowa, or Nebraska, you really need a larger caliber weapon. In the more southern states, .223 will work just fine.

Conclusion

So, long story short, yes. You should go deer hunting with your AR-15, as long as it is legal where you live, you are using the correct ammunition, and you aren’t hunting large deer.

As a weapon system, the AR-15 performs extremely well. Due to its customizability, ease of use, and popularity, it is an awesome choice for deer hunting, as long as the correct criteria are met.

Visit Us On FacebookVisit Us On PinterestCheck Our Feed