5 Best Turkey Scouting Tips for Hunters

If you’re looking to get into hunting as a beginner, turkey hunting can be a great introduction to this exciting and passion-filled lifestyle. My first hunting kill was a turkey during the Autumn season in South Dakota, along with my father and uncle. I was hooked after that. I’ve returned almost every year and taken part in many Spring season hunts as well.

Turkey hunting scouting tips are plentiful on the web and we’ll incorporate top tips and my experience here to give you a well-rounded knowledge base for the upcoming season. Make sure you check weapon requirements and bag limits for the state where you hunt and bring your camo gear. Here we go!


The Top 5 Turkey Scouting Tips for Hunters

Without further ado, here are my top five turkey scouting tips for all of you hunters out there.

#1: Identify the best location

Different states and provinces have different regulations, so do research in advance and then get out there to scout the area.

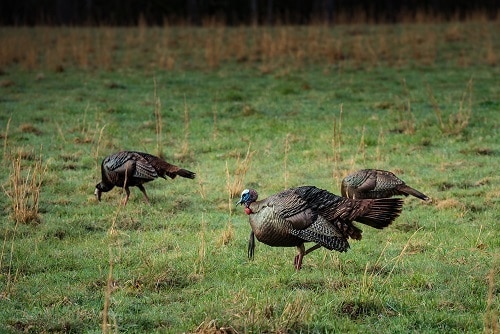
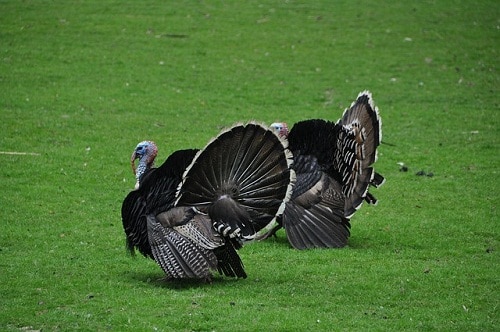
  • The location is the most important of my turkey hunting scouting tips. Ideal turkey habitats are diverse and contain different sources of food, plenty of water, and shelter. Turkeys roost in trees and often drink from streams in more open areas. Much of their food is found in open areas.
  • Note whether you’ll be on public or private land and be sure you have necessary permits and permissions. (Here’s a great video about location)
  • Try planting a food plot heavy with bugs and wood to attract turkeys. I prefer to do this because it gives me the best chance at having nearby, well-hidden ambush areas. If you have the means to do this set it up while turkeys are roosting and be sure not to leave a man-made trace, (for reference, see this article).

#2: Start scouting early!

Turkeys are notoriously feisty and paranoid and without the proper approach you’ll find yourself eating Hormel from the grocery store instead of experiencing that delicious wild game taste and the satisfaction of self-sufficiency. Do your planning and you’ll see the easier side of turkey hunting.

  • There is no reason not to begin your turkey hunting scouting in late winter, like February or March. By finding where the flock is in your target location well in advance, you’ll have the best chance at knowing their habits and ultimately having a successful hunt. (Great article here)
  • As turkeys are very mobile, the longer you are able to observe them during scouting gives you best chance to learn their movements and be prepared for the hunt. Note their roosting and drinking areas on your map and how long they tend to spend there per day.
  • Set up trail cameras across the area and check on them every 2-4 days (checking more often is just extra time out that gives turkeys more chances to see you and avoid the area). Find where they are feeding, and when the season starts to follow the turkey hunting scouting tips in step 3.

#3: Plan to make a day out of scouting before the hunt.

Prep equals perfection. That’s my hunting motto, and the most successful  hunts I’ve done are the ones I prepped for the most. Follow a routine and always take notes of what you’re doing!

  • Break your day up into sections, each with a primary focus to help you achieve the overall goal of bagging a turkey. The night before, make sure you have everything in order and ready to go. Binoculars, topo map, GPS, notes/outlines/research of the target area, weapon, outdoor supplies and clothes. Get on the road by dawn and cruise around the hunting area listening for turkey sounds and keeping an eye out for any hints of turkey presence. (Good discussion here)
  • Later in the morning, patrol the hunt area. Watch for strutting toms in the fields, wooded areas, ridgetops, and crevasses. Blow the occasional owl call to perk their ears. Remember, when in open fields keep quiet always pay stark attention.
  • By afternoon you should have a general idea of where the turkeys are. Look for roost trees, droppings, food, and other signs to mark their trail and start pinpointing your ambush spots based on where they will be later in the evening. Your turkey hunting scouting process is now in full swing.
  • In the evening, follow their track from feeding back to roost spots. Before heading home, make sure you know exactly where they will be when you return the next morning for the hunt. I like to take notes on the map and mark ‘X’ in two to three different places I plan to hide out.

#4: Turkey talk!

Calling the birds reduces the chances that they will run away or remain hidden. Watch some videos of calls and practice while in your vehicle.

  • To call in the turkeys, you’ll want to frequently use the mating noises of young hens. Hopefully, you’ve been practicing all winter! In the fields, stop frequently to make the call and then listen carefully for ruffles, noises, or movement. Turkeys respond to calls and can be surprisingly social. Toms come in easier than the quiet gobblers. (Here is a sample turkey talk)
  • Having a decoy or stage noise maker makes your calls seem more authentic. Try and switch back and forth between your calls and using a decoy, this sounds more convincing!
  • More info on talk and fall prep here.

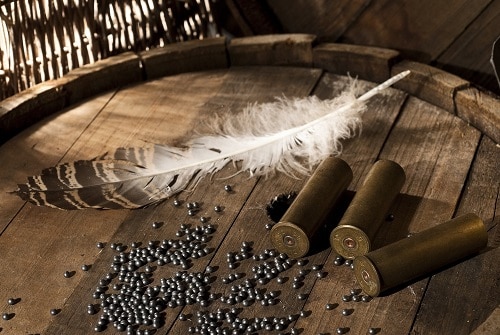
#5: Have your weapon ready to go during scouting.

This makes scouting as realistic as possible and gives you a chance to test visibility in your ambush areas. Just be sure to prep your weapon:

  • To avoid detection of your barrel, it should be camouflaged or at least dulled. Do this before turkey scouting and practice some approaches from your ambush spots. As part of your scouting prep be sure that the gun will shoot a clean shot to the head or neck from 20-40 yards, body shots won’t drop the bird cleanly.
  • For bow hunting, you’ll want to get within 20 yards. Practice your approach during the scouting and use a blind to conceal movement. (For actual hunting guide, see here)

#6: Practice calling

If you’re looking to get a lot of turkeys, you should really be good at calling. This will take practice, it doesn’t come naturally. It’s never to early to start practicing either, and it’s good to start months before the season begins.

#7: Do a ground check

If you find a location and don’t see or hear any turkeys, don’t worry. Search the ground for other clues before leaving, such as droppings or track marks. Feathers may also be around to signify roosts. Do this during midday hours so that you don’t scare off any birds while they get close to roosting areas.

Making the Most Out of Turkey Hunting Season

I hope these turkey hunting scouting tips help you to better prepare for your next hunt! I’ve found turkey hunting to be the most addictive way to hunt because of the unique challenges those feisty birds bring to the table. I’d love to hear your thoughts and stories of turkey hunting- please share in the comments below! When taking new hunters out in the field, have them read up on procedures and take notes of what you are doing. If you found this article useful, share on social media because being prepared and educated about hunting is the best way to keep our passion sustainable for everyone.

How to Determine the Shot Size for Turkey?

When it comes to hunting, you have a few different choices you have to make before you even fire your gun. The first is what are you going to hunt, but if you are reading this, then you have already chosen turkeys. The next is what kind of gun to use, and the final thing is what shot size are you going to use in that gun. In this article, we are going to address the shot size question when hunting turkeys. After reading this article, you will know how to answer the question of what is the best shot size for turkey hunting.


What is shot size?

Before going into what shot size to use for turkey, we will discuss briefly what shot size is. Shot size is the size of the pellets that are in a shotgun shell. In a shotgun shell, it is not like a bullet with one projectile coming out. Instead, it has multiple projectiles that are little bullets. Some call them pellets and others call them BBs but shot size is the size of the little round balls that are coming out of the shell.

How to determine the best shot size for turkey?

So, for turkeys what is the best shot size? Well, a lot of people use No. 6s, No. 5s, or No. 4s. The number six is actually the smallest, and the number four is the largest with number five in the middle. No. 6s measure 2.79-millimeter diameter, No. 5s measures the 3.05-millimeter diameter and No. 4s measure 6.1-millimeter diameter. So, now that you know the sizes which one should you use? Well, the common answer is which one patterns the best in your gun. This answer is pretty accurate, and we will go into detail on it shortly, but this isn’t the only factor to consider.

The other thing you need to consider when choosing a shot size for hunting turkeys is the size of turkey you will be hunting. In some areas turkeys are bigger than in other areas, so you need to choose a shot size that matches the size of your turkeys. If the turkey is large, then you will need the larger pellets to get proper penetration into the turkey, but if the turkey is small, then you can use the smaller shot size. When picking a shot size, you want one that is just big enough to bring down your target, but not so big that it ruins a bunch of the meat.

Patterning your gun.

So, now that you know the turkey size plays a big effect, because if you are hunting small turkeys, then you want a small shot size, but for bigger turkeys, you need a bigger size we will get into what patterning is and how it effects picking your shot size. When you pattern your gun, it is setting in up and practicing with the rounds to see how the pellets are going to come out of the shell.

You want the shot to hit the target. It doesn’t matter if you are firing larger number fours if none of the shot hits the target. The same can be said about number sixes. If you can get a bunch to land on the turkey, then you can get a kill even though they are smaller.

When patterning your gun, you will want to fire multiple rounds thru it at targets of varying distances. Normally twenty feet, forty feet, and sixty feet are used. The targets are turkey pictures, and after shooting them, you look at the target and see how many pellets made it into the target. If the pattern is a good cluster at all the ranges, then your gun is patterned, but if they aren’t on the target, you will need to make adjustments and fire some more. Due to how guns work more pellets will hit the target at a closer distance than at farther away ones. That is because the pellets spread out as they travel. Once you have your gun pattern and have around that you like how it fires from your gun that is normally the right shot size for you.

Gun Gauge

Most of the time for the size recommendations on here we are assuming you are firing a twelve gauge gun. Some people like using different sizes though so again this stress the importance of picking the shot size that works best for your gun. Generally, though each shot size has some advantages no matter the gauge, so to help you decide we will cover the advantages of each shot size.

No. 6s

Number six shot size is great for if you are shooting birds that are close. This is especially true if that are smaller birds. No. 6 shot gives great density in your patterns, but since they are small, they lose their ability to penetrate deep enough to kill quicker than the other sizes.

No. 4s

Number four shot, on the other hand, is great for distance because they are bigger and keep their killing power farther. However since they are bigger less come out and they also spread wide when traveling, so they might not provide the density you need sometimes. Also, some guns just don’t pattern No. 4 shot good.

No. 5s

Number five shot is in the middle. It can travel relatively far and keep its penetrating power, but also it stays tight. This makes it good for most hunting situations.

Conclusion

So, which shot size is best for turkey hunting? Well, the answer is that a lot of times you should carry all three between No. 6s, No. 5, and No. 4 because you don’t know the situations you will face, but if you just want to carry one then go with number 5. That is because it offers good distance while also keeping tighter patterns. However, the best thing to do before hunting is pattern your gun so you know how each shot will work in your gun and then choose the one that is best for the situation. If you have a large turkey at a long distance, you can use your number 4, but if you got a smaller turkey that is close, you could use your number 6. The key is to be prepared when turkey hunting so you can get the kill when the opportunity arises, and the best shot size for turkey hunting is the one that you have practiced with. The saying that the best shot size is the one that patterns the best is pretty true because if you get the pellets to land right, it doesn’t matter their size, you will get the kill.

Shot Size for Ducks: Which to Use for Hunting

When hunting any animal, it is important to use proper shot size. That is because you don’t want the meat ruin from using too large of a round.

In this article, we will look at hunting waterfowl and discuss the proper shot size for when you are hunting duck.

Read on to learn all you need to know when it comes to selecting the right size round to use the next time you hunt ducks so you can bag a nice one and possibly have it mounted.


What does shot size mean?

Before getting into the details of how to pick the proper shot size when hunting duck we will look at what is meant by shot size.

Well, shot size is generally given as a number, and the number indicates how big each pellet or bb is in each shell or round.

The bigger number rounds when it comes to shot size are actually the smaller rounds, and the larger numbers are the bigger rounds.

This means that a shot size of 6 which is .110 is smaller than a shot size of 2 which measures slightly bigger at .180 but even though it is only a slight difference size wise, it can make a big difference when hunting because of the force behind them and the pattern it gives.

Rifle with the best ar10 scope is good choice for duck hunting too.

How to pick around?

So, now that you know what the number means when it comes to shot size and that the larger numbers are smaller rounds, how do you pick the right size shot size for your needs? Well, wisdom says that you should only use a round that is big enough to kill the animal you are hunting and not to use anything bigger than that. That is because once you have something big enough and enough force to kill the target, you are not gaining anything by going to a bigger round.

There is actually a chance to cause more harm. That is because you want the impact wound on the animal to be as small as possible because generally, the meat that the bullet goes through is not edible. Also, you don’t want the target torn to pieces because then you can’t display it if you are hunting for that purpose. So, what are some recommended shot sizes for ducks then? Well, the answer depends on the size of duck you are hunting, but read on to find out some suggestions for varying sizes of ducks.

Small Ducks

Small ducks include species such as teal. For small ducks, you don’t need that big of the round at all. That is because they are small and they have less meat for your round to penetrate before it gets to an important organ to be able to kill them. No. 6’s is a great round size. This is because smaller ducks fly fast and you need to be able to hit them. With these loads, you get wider denser patterns that make it easier to hit the smaller faster ducks.

Also, these size shells are commonly used and readily available making them affordable which is always nice. Another benefit to these size rounds is since the pellets are small there is less recoil meaning you can fire faster and also have less wear on you after a long day of shooting because with smaller ducks you will need to kill more to get the same amount of meat as with a larger duck if you are hunting for dinner.

Medium Ducks

Medium ducks are ducks such as Gadwalls, Wood Ducks, Wigeon, and Scaup. For these, you need slightly larger rounds because they are bigger and have thicker tissue than smaller ducks. The best round size to use for medium ducks is No. 4’s that is because they are big enough to put the medium duck down, but not too big to damage the bird. Actually, number fours are a great all-around round to use especially if you are hunting a variety of species of duck. That is because they can be used on teal and work out fine most of the time.

No. 4’s can also be used on mallards and bring them down as well. Size 4 rounds are fast enough to for the teal and work even better on the slightly slower medium ducks. The patterns they give work out well and if you are only going to take one round size with you when duck hunting it should probably be a number 4.

Large Ducks

Last we have the large ducks which are most commonly your mallards but can also include canvasbacks, Small Sea Ducks, and Small Geese. For these larger ducks to be most effective, it is when you should start bringing in the bigger rounds. For best results No. 2’s work great. That is because these large ducks are slower and have a lot more muscle and tissue than their smaller family. This makes it, so you need larger rounds and more force to bring them down.

Pattern

Not only is shot size important, but also the pattern is important like we have already mentioned. It is important to get used to the pattern that the round is going to have in your gun before hunting and to see how well it strings. This can be done at a range and should be down when trying new rounds because even though the pellets might be the same size, different brands of a round can pattern differently.


Gauge

Does, the gauge of round matter or just the size? The gauge matters to some extent because if you are using a weaker load, then you will need a larger pellet. These recommendations are all based on using a 12 gauge shotgun. Twelve gauge works great for ducks because it doesn’t have too much power, but it isn’t too weak either. It has the perfect balance of force and works the best for each size of duck for the size of round specified.

Conclusion

So, now you know how to pick what size round for duck hunting. You know that for small ducks you can use No 6’s and for large ducks No 2’s and that No 4’s work best for medium ducks. However, you also learn that most of the time number four is the sweet spot and if you are only going to carry one size round with you that is the best because it can bring down a larger duck if they land right, but will also not destroy smaller ducks if used to kill them. Now that you know all this you can head out to the range and shoot some clay ducks to get the patterning right for the rounds you are using for the next time you go duck hunting.

3 Best Duck Decoys on the Market


The best duck decoys will work in your favor with minimal effort, instilling confidence in the ducks that the area you are trying to lure them to is a safe, habitable, and enjoyable environment for them.

Decoys are also meant to reduce the hunter’s need to overcall in order to lure ducks by giving the feel of a natural environment.

When implementing duck decoys into your hunting strategy, plan to assemble a collection of them – potentially up to a dozen or more, and practice setting them up in a realistic fashion.

The more natural your decoy setup, the better it will work, leading to more fowl.

Guy Huntley

Here, we’ll look at three of the best duck decoys on the market.

Top Our Pick For Best Duck Decoys On The Market

Top 3 Best Duck Decoys On The Market

This is my review about 3 duck decoys in the market, it will help you find the best for hunting. Check out it:


1. Greenhead Gear Pro-Grade Duck Decoy, Mallards/Butt-Up Feeder Pack, Pair

Greenhead Gear Pro-Grade Duck Decoy,Mallards/Butt-Up Feeder Pack,Pair

This is one of the most effective duck decoys on the market because it simulates the ducks in feeding position.

This makes it harder to detect as phony and gives the impression of the area being a suitable feeding environment.

Ducks traverse environments seeking safe and popular feeding grounds, and by portraying that image you will greatly increase your odds of bringing them in.

Some great insight on Greenhead decoys can be found here:

  • Minimal movement reduces your chances of losing them out in the water, especially if you rig up a jerk string.
  • Realistically colored and designed, and built to last for a long time.

  • Great appearance in the water, enough to fool the uncanny hunter who hasn’t seen them before

But there are a couple down points:

  • I’ve heard about leakage issues. While this is likely a rare defect or result of misuse, be careful to follow installation instructions.

  • Butt-up feeders don’t resemble the full duck and must be used alongside other types of decoys.

Overall, these are a great addition to your decoy collection and help complete a well-rounded decoy scene.

2. Mojo Outdoors Teal Duck Decoy

Mojo Outdoors Teal Duck Decoy

The Mojo Outdoors decoy is a master of its intended purpose: luring in fast-moving fowl.

This is the best spinning wing duck decoy on the market. The wings spin incredibly fast and will catch the attention of nearly any ducks moving through your hunting area.

Mallards, teal, gadwall, pintails, and other ducks are attracted to the ‘strobe effect’ created by the wings and are likely to have the interest piqued enough to check out the situation. Here are the best things about this duck decoy:

  • Single speed and simple operation are If you encounter and issues, replacement wings are readily available online and at outdoors retailers.

  • Despite the three-piece support pole, this duck decoy is surprisingly light weight. For me, that was a big selling point because I already have a large collection and didn’t want to add much weight to it, but it compacts well for transport and storage and makes it one of the best duck decoys
  • Batteries last for several hours, so there is no need to replace them in the middle of a day hunt. They claim 16 hours, and I have no reason to argue with that.

There are a couple of improvements that could be made for future models, such:

  • Making the wings easier to screw off. After a long day in the blind, the last thing I want to deal with is prepping for storage, and this decoy can take a few minutes.

  • The wings are built with thumb screws instead of magnets. While this makes it more durable, it also (at least to me) appears to make it slightly less realistic and modern.

3. MOJO Outdoors Baby Mojo Mallard Duck Decoy

MOJO Outdoors Baby Mojo Mallard Duck Decoy

Mojo has another strong offering here with the Mallard Decoy.

This is another great addition to your arsenal of action-depicting decoys because it gives the appearance of a curious duck coming in to peruse a new feeding ground or piece of terrain.

When spread, this decoy is about 20 inches wide, starkly resembling a green head. Because it looks as though it is landing on water, if you set it up to your left, other birds will want to land in front of it and thus will be coming down right in front of you.

Here are the things I like best about this decoy:

  • Batteries last for several hours, so there is no need to replace them in the middle of a day hunt. They claim 16 hours, and I have no reason to argue with that.

  • The battery can be charged in your truck with disassembling the product.

  • The wings on this baby are a magnet, so no screwing and unscrewing are

  • The legs can be taken off, a feature unique to decoys like this. I personally like to keep them on, but depending on the location of your setup it may suit you better to remove them

On the downside:

  • Magnets can come unattached, especially during high wind. Be sure you have aligned the wings correctly onto the magnetic part to minimize the chance of this happening

  • Don’t use it in salt water as it will rust the product after time. Just something to be aware of if you plan to be a long-term duck hunter.

Head To Head Comparison Of 3 Best Duck Decoys

My favorite product here is the MOJO Outdoors Baby Mojo. I’ve never had a decoy so effective at drawing in birds to land right in front of it. While all three of these are different and are a great addition to your hunting setup, this one is the best buy. I recommend having a couple of them set up with one closer to you and the other further away. Throw a couple of Greenhead Pro-Grades in the water along with some generic duck decoys on top of the water, and you’ll have a great setup. Here is my guide about how to set up duck decoys, read carefully before you do it.

Conclusion

Using the best duck decoys has greatly improved my hunts. I’m able to lure in more birds and be more specific about where they are coming down (hopefully right in my line of sight!) and the results have been incredible. If you found this article helpful, please share on social media, and let’s get a conversation going in the comments.


How to Set Up Duck Decoys for More Effective Hunting


Now that you have put together a collection of duck decoys, the obvious question comes up: How to set up duck decoys and decoy spreads.

This is where the artist in you gets to come out, as you develop a strategy to create a spread that optimizes both the surroundings and your collection.

Here in this article, we will look at the basics for how to set up your decoy spread, what to look out for, and I’ll re-emphasize the importance of patience.

How to Set Up Duck Decoys the Best Way

These are the basic introductory steps:

1. Identify your surroundings.

If you’re hunting in a swamp or shallow water basin, keep everything as versatile and mobile as you can. Don’t make it hard to break down and pack out. Keep your ducks clean and shiny to maximize realism. If you are setting up a permanent spread, try to create a scene. Place your decoys where you have seen ducks congregating in the past, and don’t just focus on one area. Get the whole spread as thorough as you can using a couple of hundred decoys, if possible.

2. For non-permanent spreads, use light-weight anchors.

In swamps and shallow backwater, you won’t need more than 6oz anchors. Or, use over-the-head anchors or neck ring anchors. For larger bodies of water, upsize to 12-16oz neck rings or over-the-heads.

3. Make your mallards a prominent attention-grabber.

Mallards are the universal duck, found in many locations and known to socialize with other species. Thus, having your mallard decoys spread around isn’t going to intimidate approaching ducks (in fact, it should help draw them in). When planning how to set up a duck decoy spread, start here.

4. Then, place pintails and black ducks.

The white tails and all-black bodies add another touch of realism to your display. Place them in highly visible areas, preferably around the perimeter of the spread with one or two in the center. These are the two primary decoys you should employ in addition to the mallards. Unless you already own other decoy species, don’t worry about obtaining them because you’ll get the added attention-grabbing out of pintails and black ducks.

5. For permanent spreads with high visibility, use standard size decoys.

They are easier to pack in and set up. Because the ducks will see the spread as they approach, there is no need to use larger decoys. Save these for low-visibility spreads. While you’ll want to have some ducks in clusters, be sure to spread ducks out throughout the available area so that approaching fowl will be enticed no matter the direction, height, or angle they are approaching from.

6. Use the most attractive decoys to lead into the preferred landing zone.

This should be set up so that you’ll have maximum visibility from the blind or shooting spot without having to move and potentially scare the ducks.

7. Put a line of ducks on a log.

Then, float the branch out into the water (with a jerk string to pull it back in). Ducks love to lounge on floating logs, and a bit of an active touch like this can really increase the attractiveness of your spread. Leave space on either end of the setup for incoming ducks to land – try to leave enough room for a few ducks, so that the approaching fowl has plenty of space without overcrowding.

8. Use wing-spinners and butt-up feeders.

These help your spread touch on as many triggers of a duck’s senses as possible. Feeding, flying, resting, and calling (of course you still need to be a good caller!) will help make your spread irresistible.

Additional Thoughts About  How To Set Up Duck Decoys

californiadfg

Remember, always keep a positive attitude! No matter how good your spread is, some days the ducks just aren’t going to bite. The important thing is not to let this get you down, or to think you aren’t good enough to attract them. Even the best big league hitters have a slump now and then, and it isn’t because they aren’t working hard.

Part of hunting is luck and the mood of the fowl. If you catch them on the right day, your learning how to set up a duck decoy spread will be the icing on the cake luring them into your arms.

After setting up your spread, hunker down and wait. Be patient, bring beer and lunch, and accept the fact that you’re working on their schedule, not yours. Be prepared for periods of overwhelming activity as well as periods of mind-numbing boredom (that’s what the beer is for!).

Conclusion

Setting up a duck decoy spread is a fun and worthwhile activity, and if it’s your first one you still have the benefit of feeling it out and seeing what works for your setup. Remember- don’t get discouraged. Do some rearranging and try slight alterations. If you enjoyed this article, please share on social media and feel free to comment! Let’s get a conversation going.

3 Best Duck Call for the Money — Reviews

Now that we’ve covered the basics of duck calls, you should have an idea of what is the best duck call for your situation.

Duck calls emit different noises based on how they are used, and take practice to master, but are the single most effective hunting accessory for increasing your chances of bagging a duck.

I’ve used many different calls over the years, and have compiled my favorites in this list. Obviously, I’m a big fan of Duck Commander. Their products have been the most consistent and well-rounded that I’ve ever used.

Here, we’ll take a look at three of their best duck calls and their pros/cons, helping you make a decision on which one is best for you.

Best Duck Call Reviews

Things to consider when buying a duck call

  • There are some cheap options out there, but many of these will stick and become clogged with spit very quickly, leaving you high and dry just when need to make that killer call. By spending a little more upfront you’ll save time and stress immediately, and money down the line as you won’t have to buy a replacement very often
  • Consider the type of duck, the length of hunting days/trips, and experience level of the hunter before making a purchase. I strongly recommend a two or three reed duck call for most circumstances, although there are some decent one reeders

Top Our Pick For Best Duck Call For The Money 2017

Top 3 Best Duck Call For The Money 2017

This is my review about 3 duck call for hunting, it will help you find the best for the money. Check out it:

1. Duck Commander- Triple Threat- Duck Hunting Call New

Duck Commander ~ Triple Threat ~ Duck Hunting Call New

This three-reed device is ideal for two groups of hunters – beginners who need multiple reeds to practice the pitch, and experienced hunters looking for multiple calls to track a mallard hen.

The system is easy to learn and tune, ideal for camping and long days out in the field. Because the call is so easy to blow, it doesn’t require much practice before actual use It’s consistency and accuracy make this call an industry standard because as it holds a tune with little maintenance.

I recommend cleaning out the spit every few hours to prevent the call from sticking and clogging. Also, be careful of blowing too hard – this can make a high-pitched squeal sound that will annoy both you and the ducks.

If you’re in the middle of some action and it starts sticking, try using different reeds because odds are that only one or two of the reeds will be sticking and the others will work just fine.

This can also happen during cold weather, so do your best to apply some body heat to the call when not in use. It works well in rain, unlike many calls. That’s the benefit of buying this call instead of a cheaper one, it has more durability and versatility.

2. Duck Commander Wood Duck Call

Duck Commander Wood Duck Call

First and foremost, this best duck call for the hunting is meant to emulate the ‘wood duck’, it is not made of wood. It’s made of durable plastic and intended to be very specific. Hence only one reed. As far as versatility, this is not the best product, but if you’re going after ”woodies”, it’s call is incredibly accurate and consistent, you can’t beat it.

Duck Commander is a reputable brand that has mastered their niche, and it shows with this call. The sound is high pitched and replicates the sounds made by the wood duck as they sit on the water.

It does not require an immense amount of air pressure to call, but you’ll want to be consistent with how hard you blow if you’re calling differently each time the woodies won’t come in.

I frequently tell people to buy this as a gift for children or new hunters, because woodies are so common that they can practice at home or a nearby lake before heading out on a hunt.

3. MOJO Outdoors Baby Mojo Mallard Duck Decoy

Duck Commander Uncle Si Duck Call

The Uncle Si is perhaps the easiest call to blow on the market.

With moderate force, this call is extremely loud and great for big lakes or wide open areas. The volume level also makes it best duck call for beginners, because it doesn’t take much practice to perfect. If you are hunting in an area where there may be other noises (from animals or otherwise), this is a great call because the ducks will be able to hear it no matter what. It’s raspy, giving it an authentic flare that will beckon to ducks anywhere in the nearby vicinity.

What makes this one of the best duck calls is that you get exactly what you pay for. A sharp call, that is easy to clean and performs well in all types of weather. You’ll be replicating the call made while the duck is sitting, attracting it in to your decoys.

Because it is a single reed duck call, it can become clogged with spit, but it’s easy to clear out and only takes a moment. If you are a collector of duck calls or have several of them on a lanyard, the Uncle Si duck call is definitely a good add-on.

Duck Commander makes their products in Louisiana, meaning they are built with American quality and standards and will ship quickly. It comes apart easily, which is good when cleaning but just be sure it is secured when you’re out in the field so as to avoid having issues.

Head To Head Comparison Of 3 Best Duck Call

These three Duck Commander calls are diverse, and best for different situations. I’ll break those down real quick here:

  • Use the Triple Threat for chasing mallard hens. Master, it’s three reeds and enjoys its versatility in the field. This is the best duck call for experienced hunters who have a routine down.
  • Use the Wood Duck for practice, and generic field uses. It’s also a great gift because any duck hunter will be able to find a use for it. No duck call collection is complete without a wood duck call.
  • Use the Uncle Si for big lakes and the wide-open spaces that surround them. It’s great for beginners and louder situations.
  • Overall, the best duck call reviewed here is the Triple Threat. It offers features that the other two don’t, putting it in a class full of calls that are much more expensive than this one. Also, it will last a long time. Because these products are made in the USA, if you buy now it will be yours within a week’s time. This is good duck call from Duck Commander or otherwise.

Conclusion

The best duck calls are the ones that you can count on to perform even in inclement weather, bringing ducks in quickly. A good call will bring them right to you. I’ve used the Triple Threat from my back porch and had ducks walking right up through the lawn.

You can learn how to use a duck call to know about it.

Don’t overuse the call, study what the ducks do and replicate it. I’d like to hear about your favorite duck calls, please post here in the comments so we can keep this discussion going! If you found this helpful, please share on social media as well. Thank you!

How to Use a Duck Call for Beginners

Using a duck call allows for a bit of artistic improvisation in your hunting game.

As a reed-based instrument, duck calls take practice to master but are one of the most effective ways to call waterfowl into your hunting area and increase your chances of a successful hunt. It should be treated like a musical instrument – experience and knowledge of how it is built and how it works will help you get the proper pitch.

By combining these tips with plenty of practice, you’ll have a solid grasp on how to use a duck call for the beginners. And you should have the best duck call for the money to use these tips.

How To Use A Duck Call For The Beginners: Step By Step Guide

  • Know the instrument. There are three main types of duck calls: wood, polycarbonate, and acrylic. While all basically doing the same thing, each takes its own tweak to get the perfect call as they each emit slightly different sounds. For example, wood duck calls make soft, appeasing noises very easily, and are the best way to attract a duck’s attention if you can’t see them or are a beginner. Wood calls work best in optimal weather, especially if you are using decoys. Acrylic calls emit a higher pitched, sharp noise and take more practice to master.

That said, they are much more effective in situations where the sound is disturbed by factors such as the wind, cliffs, or long distances.

They will last for a long time, and are easy to clean, unlike wood calls. Finally, polycarbonate duck calls are like a cross between the two. As far as cleaning, maintenance, and learning curve, they are similar to acrylic calls, but the general noise they emit is closer to that of the wooden duck calls. A great sarcastic take on this can be found here.

  • Hold and blow the right way. A common mistake made by beginning duck hunters is that they whistle into the call instead of blow. The object is not to add any of your own influence into the call, make it as natural as possible, and a whistle throws everything off. Blow thoroughly and forcefully into the chamber and the noise emitted will be much more realistic. Also, be sure you hold the instrument by the sound chamber with pinky and ring fingers around the hole . This is the best advice I can give on how to use a duck call.

  • Know what you’re after. There are different kinds of ducks, and they make different sounds. Pintails have a different sound than wigeons, who make a different noise than mallards and blue or green wingtails. If you’re calling the wrong variety, you’re going to have a bad time. I suggest loading some duck photos onto your phone to easily identify what you’re spotting in the field.
  • Know the calls. Duck language is more complex than the basic ‘quack’ that is associated with the animal, although this is the basic call and the root of all other calls. Master that noise first, then work on the feeding call, which is more like a ‘taca-taca-taca’ following a short introductory quack. Also, try a ‘KAK KAK KAK’ type noise if trying to bring the ducks in from far away. These sounds signal feeding time and may be taken more seriously than just a quack.

An extended quack, kind of like “qqqquuuuaaaacccccckkkkkkKKKKKK!” is the sound of a sorrowful, lonely hen, and can be used to draw other ducks in for comfort. But it shouldn’t last more than a couple seconds at the most. When practicing, make each noise separately. Ducks do not link noised together, there is a noticeable pause between each one. Check out this video for examples.

  • Don’t get in over your head. While the ultimate goal of duck calls is always the same (getting you to bag a duck!), there are different instruments for different ability levels. I always recommend that beginners start with a double reed duck call, as it is easier to control the pitch and sound and produces a more accurate call with minimal effort. You’ll notice that double reeds aren’t as loud as single reed calls and take more breath to power. While this may seem annoying, it will help you master the calls and feel more confident out in the fields. I never even tried a single reed until I had called in several hens with the double, and had built up enough confidence that I was posting up in less secure places that needed a louder call.

When moving to a single reed duck call, you will immediately notice a difference in sound accuracy and projection. Mastering the technique of using single reed duck calls is tough. You have to blow just the right way to get audible noise and it is even more important that you hold the instrument correctly. They are tougher at impulse blows. I recommend getting set up in your location and being quiet for a few minutes before calling (which should always be done anyway) because you may attract attention on your way in. If hunting with another person, I suggest having two different instruments so that it appears there are multiple ducks in the area, I’ve had more success this way than with two people using the same call. That tends to scare ducks off.

Conclusion

As a lifelong duck hunter, I could go on and on about tips, but everything you need to know to get started is right here in this article. The satisfaction of bagging your first duck is unparalleled, it really helps you feel like a sustainable human being that is capable of fending for themselves. Read carefully my guide about how to use duck call. And if you can, let’s consider my article about best shooting sticks 2017.

My last piece of advice is to dress the part- wear your camo and hunting gear, and try to blend in with the environment. I hope this article has helped you if you have tips to add please share them in the comments below, and if you’ve enjoyed reading I’d appreciate a share on your social media accounts. Take care, and good luck out there!

Featured Image via EastCoastHunting

Where to Shoot a Turkey? Shoot With a Bow or Rifle?

You would certainly think that hunting a turkey is a walk in the park considering the fact that turkey seems to be a better target than big game, such as bear, elk, or even a bison.

You may have underestimated the prowess of turkey, for despite the fact that the turkey may have a pea-sized head, it may be quite difficult to hunt it, especially if you are just tyro in the art of hunting. It will be easy if you are hunting a domesticated turkey; however, it will definitely be preposterous to hunt a domesticated turkey.

On the other hand, it will surely be a rough adventure if you are going to hunt wild turkeys. Wild male turkeys usually weigh around 6 to 11 kg, and is barely 125 cm in length. The female turkeys however are a bit smaller than the male with a weight that ranges from 2 to 5.4 kg. The habitats of wild turkeys include the hardwood and conifer forests, although sometimes, they inhabit the fields, orchards, marshes, and even the pastures.

The behavior of turkeys are quite predictable. Despite their heavy weight as compared to other birds, they are capable and agile fliers. They can even fly and perch at the canopy top, although they usually prefer to fly very near the ground, and they can fly for almost half a mile.

You will definitely sense the presence of wild turkeys by the different sounds they make. They usually produce many types of sounds, and there are several terms associated with turkey sounds such as those of clucks, gobbles, putts, yelps, cuts, cackles, kee-kees, and purrs. If you want to be a great hunter of turkey, you should be cognizant of these different sounds created by turkeys and of the usual behavior of turkeys.

Turkeys are usually foraging anywhere they would find food. They can climb small trees, and they eat various types of food such as nuts and acorns. Hence, you will surely encounter one or two of them in the wild. It is however good to know the different tips on how to hunt a turkey for you to be successful in your hunting spree.

These tips include the best season to hunt turkeys. Likewise, as a hunter, you should know the behavior of your target game, and should also be knowledgeable of the best tools and weapons you should use to hit your target. In the case of hunting turkey, you got to carry with you your best weapons and know your range of efficiency in hitting a turkey.

How to Attract your Turkey?

Plant food Plot

Just like in any hunting game, you need to draw out your target to a specific location where in you can have a good shot at it. To draw out turkeys, you need to plant lush http://wildlifeseeds.com/foodplots/turkey/“>food plot for the unsuspecting turkeys, for surely, turkeys want abundant forage.

Learn the Turkey Calling Sounds

Turkeys, as mentioned earlier, create different types of vocalizations. They usually use these vocalizations for different reasons such as attracting or calling their mates or simply informing their mates about their locations. Two of the most popular turkey vocalizations that you can make use of is the hen yelp and the simple cluck. If you master these two calling sounds, you may end up with a lot of killed turkeys when you go back home. You can also learn the turkeys’ slate call and the locator calls.

Wear the Best Camouflage while hunting

If you really want to be almost invisible to the gobbler’s eyes, it is imperative that you wear a total camouflage. Your camouflage should be appropriate to the specific season for hunting, and your camouflage should match the color of the place.

Your Best Weapon in Hunting Turkey

Where to Shoot a Turkey with a bow

http://i.imgur.com/HQpQfBO.jpg” alt=”Where to Shoot a Turkey with a bow” width=”567″ height=”272″ /> Where to shoot a turkey with a bow

It is of course quite difficult to hunt a turkey with a bow, for turkeys become easily aware of any imminent or actual danger. They immediately take flight at the first sense of danger. For this reason, it is very difficult to use a bow or even to take aim at the turkey using a bow. In fact, at the sight of a turkey, it would really be quite difficult for you to even come to a full draw without the turkey immediately sensing you. However, if you have properly set up your decoys, you can have enough time to take a good aim at the turkey. The best distance to hit a turkey is around 15 yards away, although you can still hit it from around 20 yards. You should also find the different of single https://www.dailyshooting.com/singlecamvsdualcambows/“>cam vs dual cam bow, learn about advantage and disadvantage of them!

The bow that you should use for turkeys should have lighter drawing weight with a higher let off. The reason for this is that you need higher accuracy with turkey because you got a smaller target space with a turkey. You should also use highly specialized broadheads for turkey, because you want to immediately impart a fatal wound on a turkey target.

Aim for the head, neck, heart, and spine, and liver

If you aim for the head or neck, you may fatally wound the turkey; however, hitting these areas is quite challenging and there is a strong likelihood that you would miss on these targets. Hence, it is also good to aim for the midrib; and obviously, with the midrib as your target, you may also hit the heart, lungs, spines, and even liver. It is definitely not good to aim for the legs for that is tantamount to driving the bird to become airborne.

Where to Shoot a Turkey with a shotgun

http://i.imgur.com/Sz0e3cO.jpg” alt=”Where to Shoot a Turkey with shotgun” width=”400″ height=”266″ /> Where to Shoot a Turkey with a shotgun

One of the best weapons to hunt turkey is with the use of a shotgun. A https://www.quora.com/Whataretheprosandconsofasemiautomaticshotgunvspumpaction“>single-shot shotgun may be your best option because it is the less expensive among shotguns. You can use a single pellet that can readily hit the head and deliver a deadly blow. Likewise, you can also opt for the popular Mossber 835 or Remington 870. Moreover, you can also use semi-automatic shotguns if you want a follow-up shot with minimal recoil.

When using a shotgun, it is good to aim for the neck with a single pellet shot. However, if you want a more decisive hit, you can swarm your target for a more efficient hit.

Where to Shoot a Turkey with a Rifle

http://i.imgur.com/wqc7WZL.jpg” alt=”Where to Shoot a Turkey with a rifle” width=”400″ height=”266″ /> Where to Shoot a Turkey with a rifle

https://www.dailyshooting.com/unlimitedguideriflescopeneedknow/“>Choosing a rifle is somewhat a personal choice, as long as you are comfortable with your rifle. There are plenty of turkey rifles to choose from depending on the budget that you have. The .22 Hornet, for example, is a good rifle for beginners.

Just like when using bows and single-shot shotguns, you should also aim at the neck or the head of the turkey to deliver a fatal shot on it when using a rifle. However, the head and neck is quite difficult targets to hit using a rifle. Hence, you can also opt to hit the turkey on its spine and heart; but surely you wouldn’t want to leave a gaping wound on the chest of the bird.

Conclusion:

Hunting turkey is one of the most exhilarating and exciting hunting games you can engage in in the wild. As long as you have the right weapon and know the habitat of wild turkeys, you will always be amply rewarded with many hits in the end.

Oh i have a post about https://www.dailyshooting.com/bestbiometricgunsafereviews/“>best biometric gun safe, check it out if you are planning buy a gun safe

Lastly, as long as you are cognizant of the usual behavior of turkey, you can always draw out the turkey to your target location and effectively and efficiently take an aim at it. Hope you find the best place to shoot a turkey.

Visit Us On FacebookVisit Us On PinterestCheck Our Feed