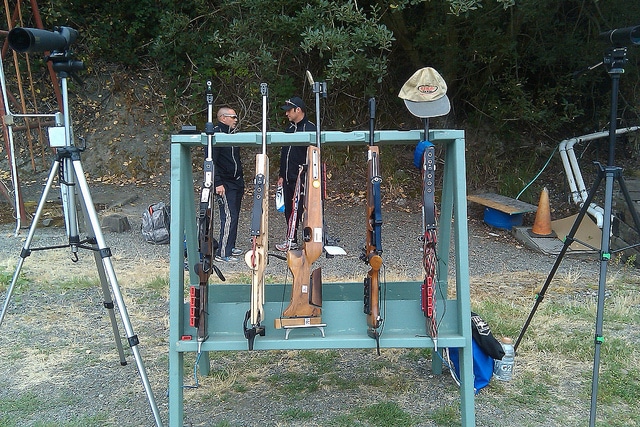
Perhaps the best part of using a rifle like the Ruger 10/22 is its sheer popularity among American shooters. The gun is very popular, and because of this, there are a variety of scopes and mod options that have become popular as well.
Best scope for ruger 10/22 David Yonehara
I’ve been using a Ruger since my Dad first took me out hunting as a kid, and have become very familiar with the different scope options available.
Today, we’ll take a look at three options that are the best scope for a Ruger 10/22 and why they stand apart from others.
Top Our Pick For Best Scopes For Ruger 10/22 In 2017
Product Name | Quality | Our Rating |
|---|---|---|
Vortex Optics Crossfire II 6 - 18x44mm AO Riflescope, DEAD-HOLD BDC (Editor's Choice) | A+ | |
UTG 3-9X32 1" BugBuster Scope, AO, RGB Mil-dot, QD Rings (Good in price range) | A+ | |
A | ||
A- | ||
A | ||
A |
Top 6 Best Scopes For Ruger 10/22 On The Market
| PRODUCT | DETAILS | ||
|---|---|---|---|

Editor's Choice  |
Vortex Optics Crossfire II 6 - 18x44mm AO Riflescope, DEAD-HOLD BDC
|
CHECK ON AMAZON | |
|
Good in price range 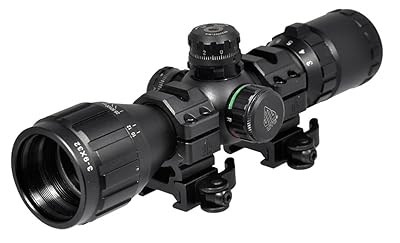 |
UTG 3-9X32 1" BugBuster Scope, AO, RGB Mil-dot, QD Rings
|
CHECK ON AMAZON | |
 |
Nikon P-RIMFIRE BDC 150 Rifle Scope
|
CHECK ON AMAZON | |
 |
TascoRimfire Series 3-9x 32mm 30/30 Reticle
|
CHECK ON AMAZON | |
 |
Simmons 511039 3 - 9 x 32mm
|
CHECK ON AMAZON | |
 |
Bushnell 613510B Rimfire Scope Matte Black Finish
|
CHECK ON AMAZON |
This is my review about 6 scope for ruger 10/22 takedown on the market, it will help you find the best for hunting. Check out it:
1. Vortex Optics Crossfire II 6 - 18x44mm AO Riflescope, DEAD-HOLD BDC

Vortex Optics Crossfire II 6 - 18x44mm AO Riflescope, DEAD-HOLD BD
If you’re looking for a best Ruger 10/22 scope that holds zero like an absolute rock, this is the one for you.
Many Ruger fanatics spend years looking for that extra bit of accuracy and momentum in the field, and Vortex Optics answered by taking a 12 and making it doable from further than a football field away.
They are also protected under caps, allowing for longevity and durability that entry level scopes can’t offer.
Compared to other good scopes in its class, this one is the king. It easily stands its ground against top-notch offerings from elite manufacturers
This is what you’re getting with this product:
- Strong handling of recoil and any vibrations
- Seamless performance in inclement weather
- One of the most consistent eye pieces on the market, even with rapid fire and movement with ruger 10/22 takedown
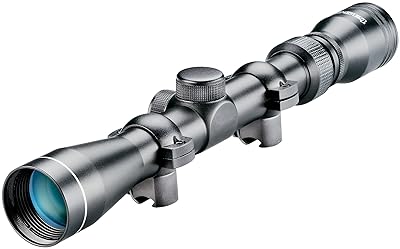
2. UTG 3-9X32 1" BugBuster Scope, AO, RGB Mil-dot, QD Rings

UTG 3-9X32 1" BugBuster Scope, AO, RGB Mil-dot, QD Rings
There has been much debate about what is the best scope for a Ruger 10/22. We’re here to put an end to this argument. Hands down, the best scope for a Ruger 10/22 is the UTG 3-9X32 1" BugBuster Scope, AO, RGB Mil-dot, QD Rings.
Let’s break it down for any unfamiliar with the product:
- If you find yourself setting up visibility for a particular situation only to find adverse weather or a change in plans, this scope is adjustable on the fly. It allows for simple and quick adjustable objectives for any range you’re shooting
- Those needing to improve their aim will find this scope tightens any missteps in their process. The reticle is specifically built to eliminate aiming issues, with the added bonus of helping your overall performance
- It upholds through rain, fog, direct sunlight, or just about any other weather condition
Among the scopes for a Ruger 10/22, this one stands apart for long-lasting, dependable performance.
Take it from a pro: there’s no sense wasting time and resources on flimsy pieces of crap. Go with the UTG BugBuster, hands down the best scope for a Ruger 10/22
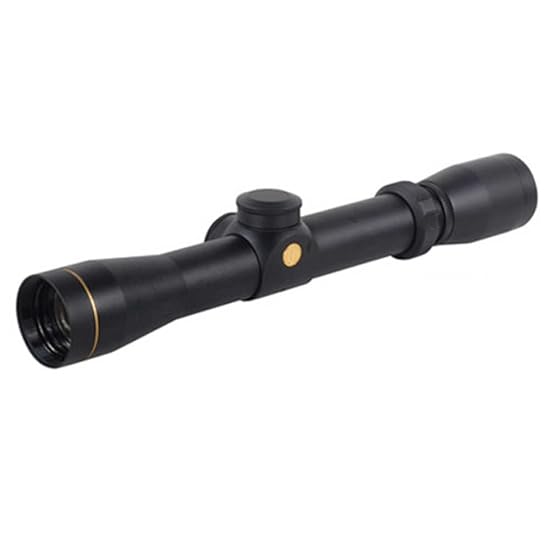
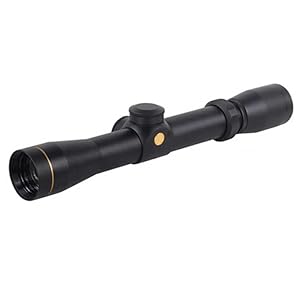
3. Nikon P-RIMFIRE BDC 150 Rifle Scope, Black

When looking to step up the scope game significantly, this best scope from Nikon for ruger 10/22 takedown is the perfect piece of equipment.
Open circle aiming points are very accurate from 50 to 150 yards (I’ve actually used it for shots that I estimated were up to 200, but not with the accuracy of under 150).
The crosshair is right in the line of vision and never blurry or faded, something that is frequently a problem with cheaper scopes.
- The Nikon Eco-Glass lenses are arsenic-free. They also are incredibly vibrant when in front of the eye – I’ve never had any issues with reflection or fog
- Zero reset is required on elevation and windage. After you’ve zeroed the scope, there shouldn’t be any adjustments necessary to keep it accurate unless the mounting is altered. Move a click up, and it can be easily reset
- Nikon has perfectly engineered this scope for .22 ammunition, and there is no better weapon for .22 than the Ruger 10/22. It is the perfect combination
Make sure your on-hand mounts are made for the Ruger 10/22 – special order them if not.
Mounting and zero issues may result from mounts that are not for this specific rifle. Other than that, this is a solid scope and worth the spend.
My friend has bought a few of them for different .22s and always have been satisfied. If you’re looking to impress with a great gift, this is the best option available.
This is a good scope for ruger 10/22
4. Bushnell 613510B Rimfire Scope with Dropzone 22 Reticle Matte Black Finish

Bushnell 613510B Rimfire Optics Scope
In varied weather conditions, accuracy and ease of use remain largely unaltered.
Visibility is strong as well, although they reach the mid-level in this field at best.
This scope is ideal for rim fire and quick adjustments for moving targets, even in changing conditions.
No other brand beats them on that front.
If Bushnell really wanted to conquer the market, they’d address this issue – but they’ve got their niche down and a following that stands by their products. In its class, this scope is a solid addition.
- Field-of-view range at 100 yards
- Bushnell’s incredible Quantum Optical System, which optimizes imagery sighting from one side of vision thru the other
- This scope is built for windage and weather will work perfectly with ruger 10/22
This is a good choice for your ruger 10/22 takedown
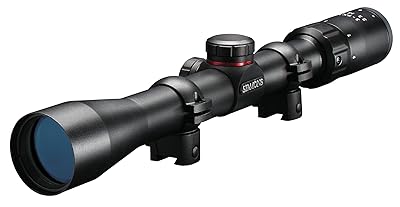
5. TascoRimfire Series 3-9x 32mm 30/30 Reticle .22 Riflescope (Matte Finish)
The TascoRimfire Series is top of the line, all the way. You won’t find a better scope for the Ruger 10/22 in its price range
The HD vision is superb. It really hones in on far-away targets and holds the view long enough to pull the trigger and get a good shot. I’m a fan because of these features:
- The ruger 10/22 optics are fully coated. I’ve never had any sight problems with this scope, even after using it in multiple lighting scenarios and times of day
- The 50-yard parallax setting is standard and functional. Experienced shooters will find lines of sight to be as expected based on distance, terrain, and weather
- The accuracy is spot on. Take it to the range once before heading out on a hunt and you’ll be completely comfortable with it
One thing I always suggest with this scope is to purchase a separate weaver rail to go along with it. You can get one that is of much higher quality, and will last longer, than the one that Tasco makes. Also, buy additional scope rings if you don’t have any on hand. They will be necessary for proper and secure mounting.
Another hint is to make sure everything is properly mounted and fastened, so that the reticle doesn’t move.
If you’re using this scope regularly, check the security of the mounting each time you head out.Be sure to test it at both close up and further away shooting distances to get comfortable before forming your final opinion on the scope. I found that it took a couple different scenarios before I fully grasped what it has to offer.
6. Simmons 511039 3 - 9 x 32mm .22 Mag(R) Matte Black Riflescope

The Simmons Riflescope is built with optical glass lenses that, in my experience, are incredibly functional.
For an economical .22 scope such as this one, that feature really stands out.
Their HydroShield lens coating that they brag about is optimized as well. Two of the three scopes we’re talking about today are far from the high-end market, proving that best Ruger 10/22 scopes don’t have to break the bank.
The eyepiece is bright and vibrant, allowing for easy target sighting and zero fatigue when following a target or working to find the best shot location on the target. The clarity cannot be beat.
Here are the best features:
- The mounting rings that come with the Simmons Riflescope are not well-suited to the Ruger 10/22. As typical, I suggest buying additional rings and weaver rail. It can be mounted
- The rubber surface is easy to adjust, even in rain, heat, or damp conditions. Once zeroed, the scope is as accurate as anything on the market
- It mounts to other options, but seems to be specifically designed for the Ruger 10/22 due to its popularity
Above all other scopes, this one gives the most bang for the buck. In the hunting world, that goes a long way because it allows more flexibility for other add-ons and modifications.
Conclusion
There are a variety of best scopes for a Ruger 10/22 on the market . These three are all well-suited for action, whether that be the range or out in the hunting field. The trendiness of rimfire shooting has led to the development of a lot of new scopes, but I always stand by the old classics. For mounting help, check out this great video.:
If you will reference this article in your upcoming scope purchase, we’d love it if you shared what you found helpful via social media. That way, others can learn more about the scopes as well.
I’d love to hear which one you ended up going with. Feel free to leave a comment here with thoughts and we’ll get a conversation going.