Blog

Are You Ready to Make the Most of Deer Season?

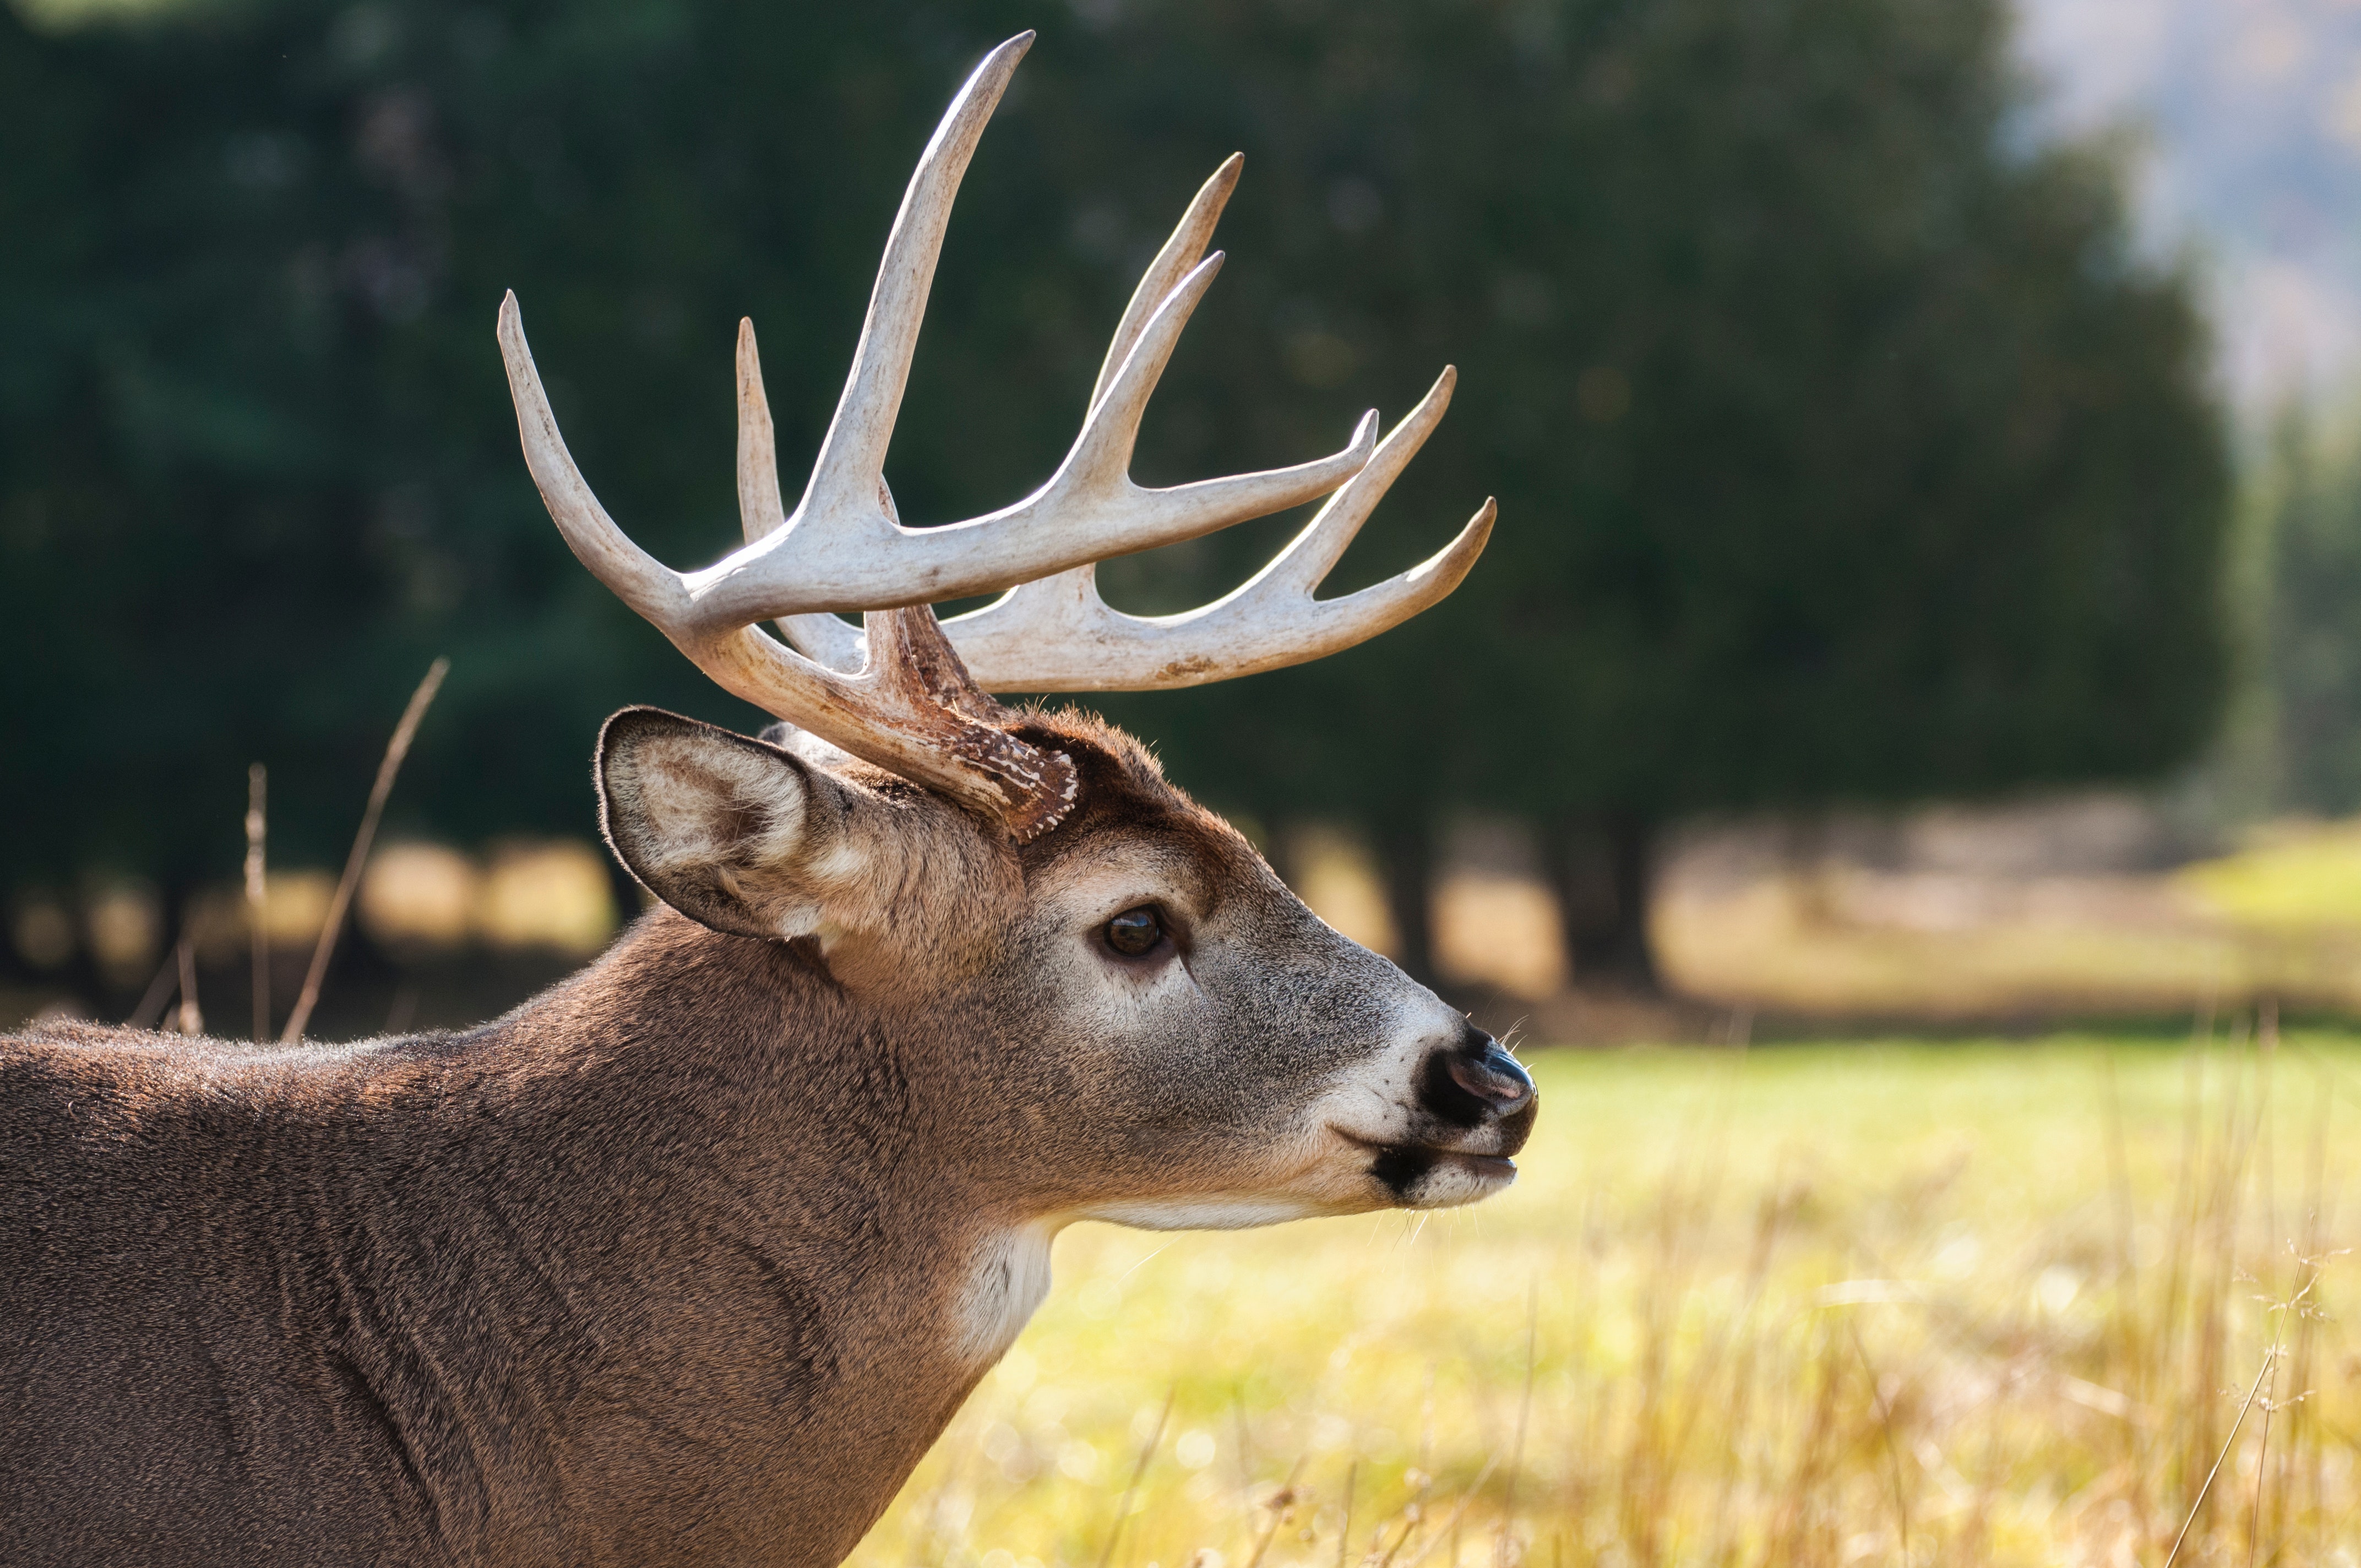
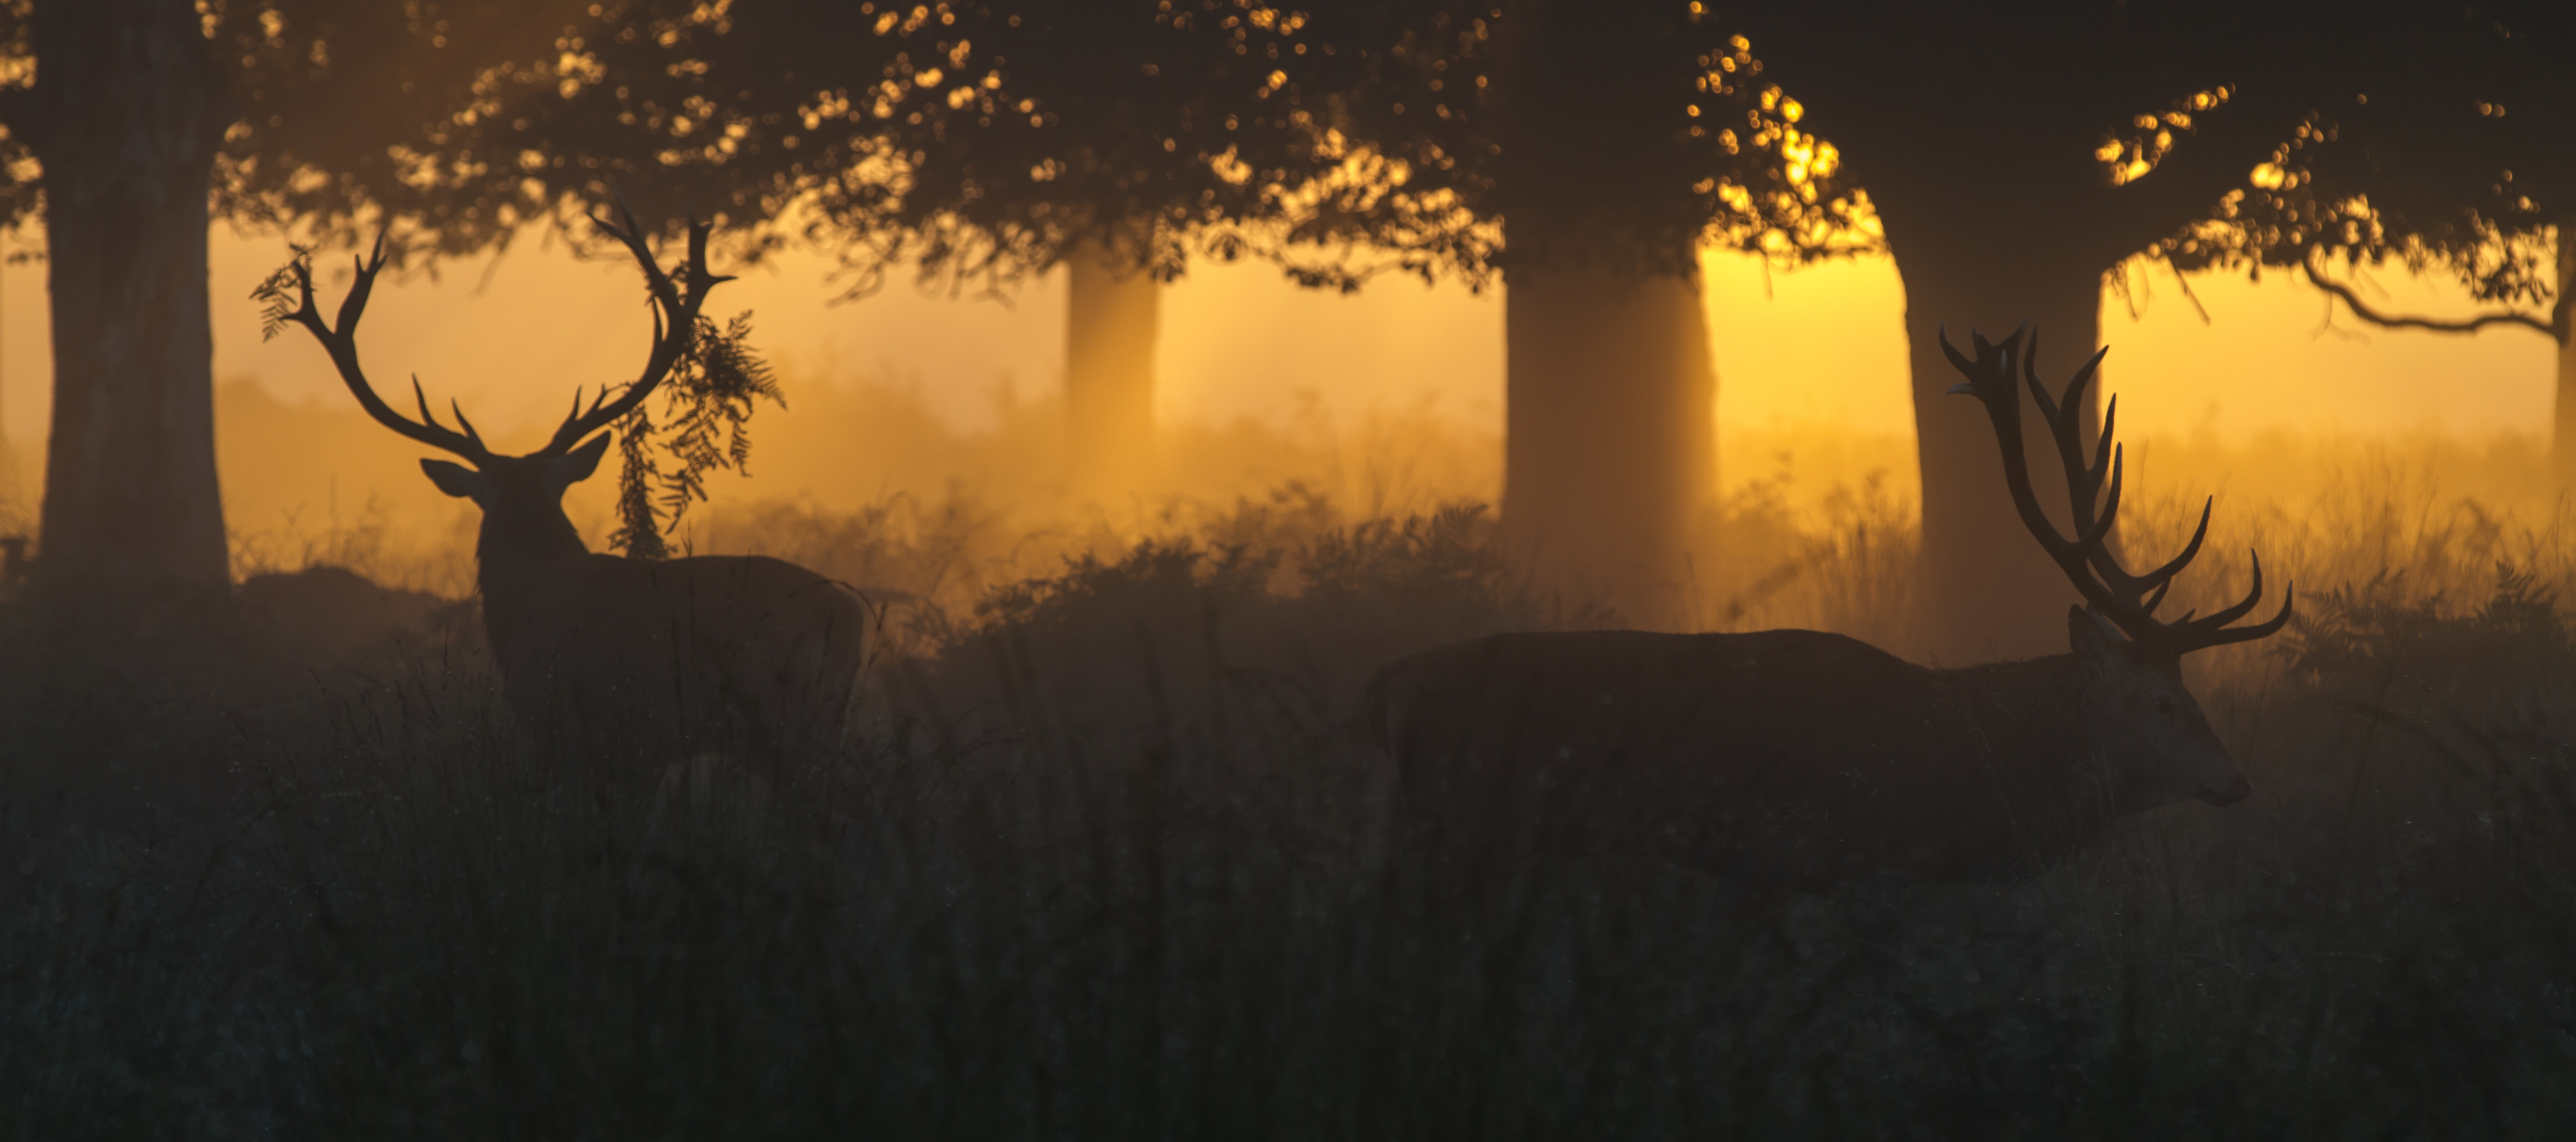
Deer hunting is a beloved tradition throughout much of the United States. While numbers overall https://www.washingtonpost.com/national/huntingisslowlydyingoffandthathascreatedacrisisforthenationspubliclands/2020/02/02/554f51ac331b11eaa053dc6d944ba776_story.html” rel=”nofollow”>https://www.washingtonpost.com/national/huntingisslowlydyingoffandthathascreatedacrisisforthenationspubliclands/2020/02/02/554f51ac331b11eaa053dc6d944ba776_story.html” target=”_blank” rel=”nofollow noopener” data-wpel-link=”external”>https://www.washingtonpost.com/national/huntingisslowlydyingoffandthathascreatedacrisisforthenationspubliclands/2020/02/02/554f51ac331b11eaa053dc6d944ba776_story.html” rel=”nofollow”>https://www.washingtonpost.com/national/huntingisslowlydyingoffandthathascreatedacrisisforthenationspubliclands/2020/02/02/554f51ac331b11eaa053dc6d944ba776_story.html” target=”_blank”>have dwindled, each deer season sees plenty of new hunters trying out the sport for the first time.

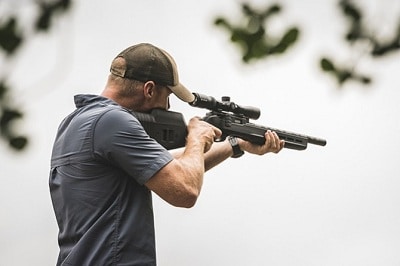
As any experienced deer hunter knows, taking the shot is just one piece of a much bigger puzzle. Tons of prep work goes into a successful hunting season, much of it taking place long before the deer opener itself.

Whether it’s your first or your fiftieth, it’s never too early to start getting ready for the upcoming deer hunting season.

Recommended Read: http://www.dailyshooting.com/turkeyscoutingtips/” rel=”nofollow”>http://www.dailyshooting.com/turkeyscoutingtips/” rel=”nofollow” data-wpel-link=”internal”>http://www.dailyshooting.com/turkeyscoutingtips/” rel=”nofollow”>http://www.dailyshooting.com/turkeyscoutingtips/“>5 Best Turkey Scouting Tips for Hunters


10 Things to Check Off Your To-Do List Before Deer Season


In prepping for the hunting season, it’s easy to overlook the little things. Once you’re out in the field, however, the little things are what matter most.

Here’s what to do in the weeks and months leading up to your next deer season:

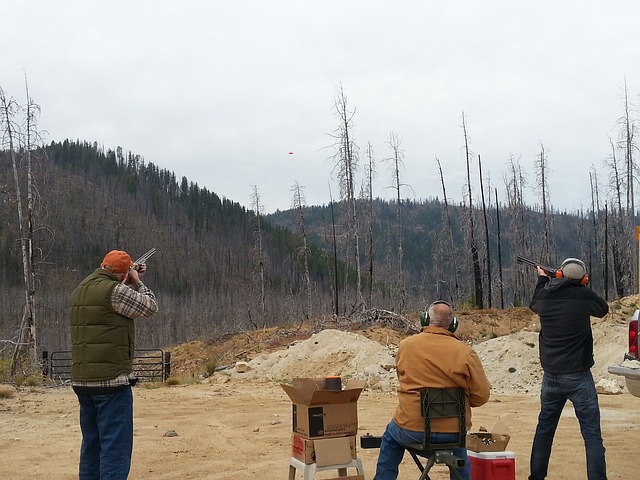
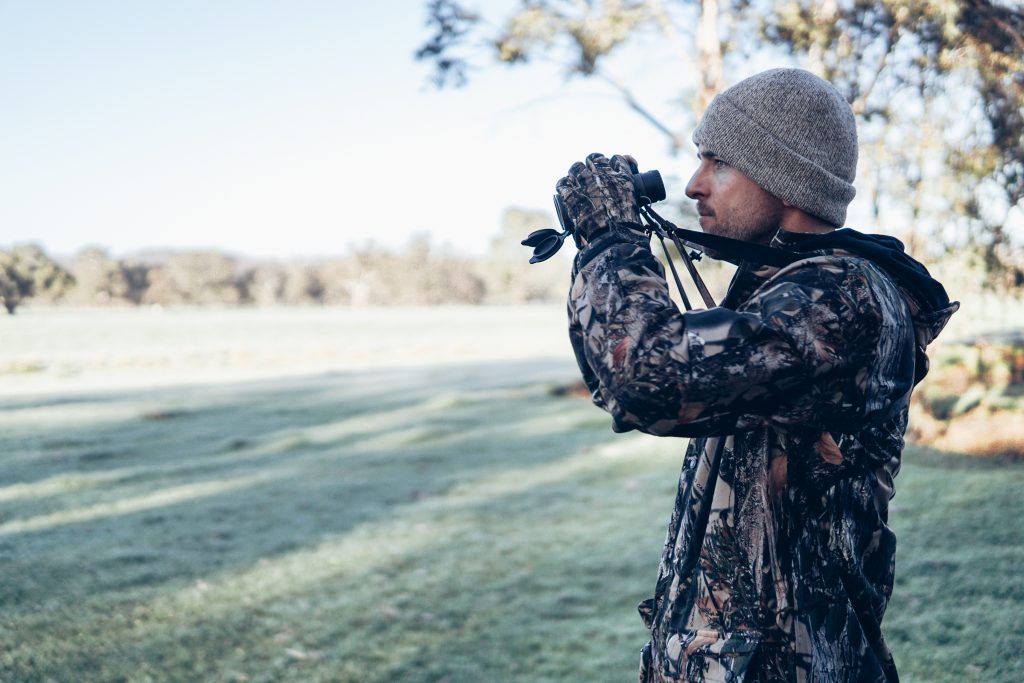
1. Scout your location

Unless you hunt in the same spot each year, it’s never too early to find a good location. Don’t be that hunter desperately trying to gain access to private land the week before hunting season kicks off.

Many landowners are https://www.fieldandstream.com/5typeslandownersyoullaskpermissionfromthishuntingseason/” rel=”nofollow”>https://www.fieldandstream.com/5typeslandownersyoullaskpermissionfromthishuntingseason/” target=”_blank” rel=”nofollow noopener” data-wpel-link=”external”>https://www.fieldandstream.com/5typeslandownersyoullaskpermissionfromthishuntingseason/” rel=”nofollow”>https://www.fieldandstream.com/5typeslandownersyoullaskpermissionfromthishuntingseason/” target=”_blank”>happy to host hunters as long as they are safe and responsible.

Waiting until the last minute not only pits you against other hunters who are location-scouting but can also leave a bad impression on your local landowners.

If privately owned land isn’t an option, check out your local https://www.doi.gov/blog/everythingyouneedknowabouthuntingpubliclands” rel=”nofollow”>https://www.doi.gov/blog/everythingyouneedknowabouthuntingpubliclands” target=”_blank” rel=”nofollow noopener” data-wpel-link=”external”>https://www.doi.gov/blog/everythingyouneedknowabouthuntingpubliclands” rel=”nofollow”>https://www.doi.gov/blog/everythingyouneedknowabouthuntingpubliclands” target=”_blank”>public access land. Some, but not all, public land is open to hunting.

Keep in mind that public land often comes with its own set of hunting guidelines. Not all publicly owned land is open for the entire deer season. There may also be restrictions on what time of day you can hunt.

2. Monitor the trails prior to deer season

When you plan ahead and have access to your hunting location long before the season starts, you also gain access to a whole host of information related to the native wildlife.

Trail cams may have turned into a hobby all on their own, but these https://www.bowhuntingmag.com/editorial/howtousetrailcamerasthroughouthuntingseason/327379” rel=”nofollow”>https://www.bowhuntingmag.com/editorial/howtousetrailcamerasthroughouthuntingseason/327379” target=”_blank” rel=”nofollow noopener” data-wpel-link=”external”>https://www.bowhuntingmag.com/editorial/howtousetrailcamerasthroughouthuntingseason/327379” rel=”nofollow”>https://www.bowhuntingmag.com/editorial/howtousetrailcamerasthroughouthuntingseason/327379” target=”_blank”>little gadgets are invaluable to novice and experienced hunters alike.

By setting up https://amzn.to/3cwQocd” rel=”nofollow”>https://amzn.to/3cwQocd” target=”_blank” rel=”nofollow noopener” data-wpel-link=”external”>https://amzn.to/3cwQocd” rel=”nofollow”>https://amzn.to/3cwQocd” target=”_blank” rel=”nofollow”>trail cams in your planned hunting area, you can get a better idea of the local deer population and its movement patterns.

Some hunters set up trail cameras as soon as winter begins to turn into spring. For the average deer hunter, though, installing a few cameras at the end of summer should be plenty.
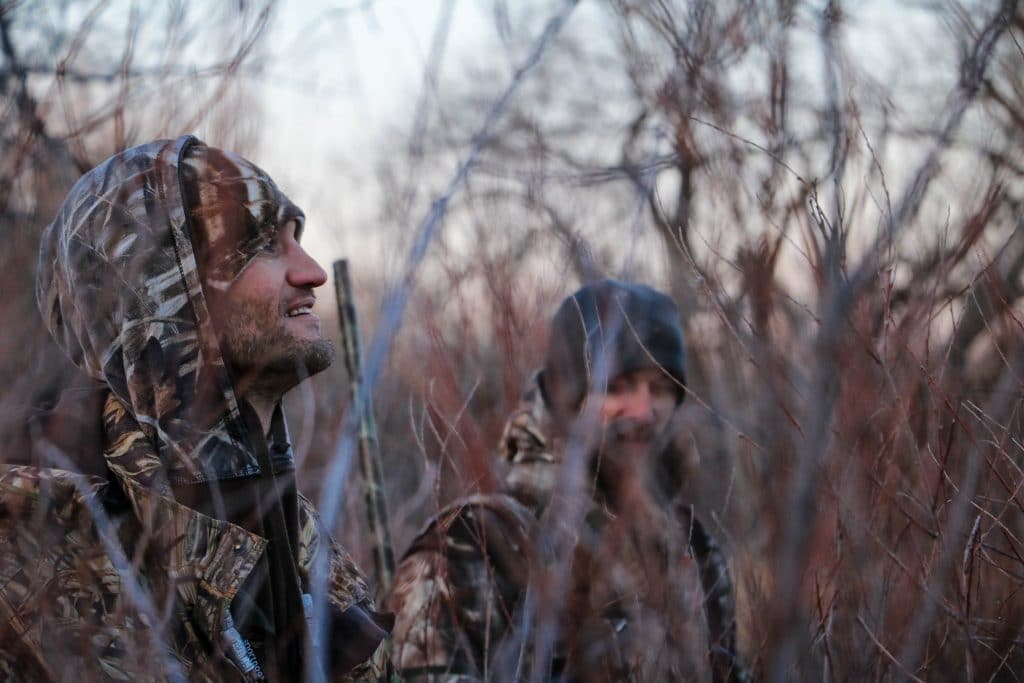
3. Prep your cover

Your https://www.amazon.com/RhinoBlindsR150RTEHuntingRealtree/dp/B07KXQ8VPM/?tag=dailyshooting0820” rel=”nofollow”>https://www.amazon.com/RhinoBlindsR150RTEHuntingRealtree/dp/B07KXQ8VPM/?tag=dailyshooting0820” target=”_blank” rel=”nofollow noopener” data-wpel-link=”external”>https://www.amazon.com/RhinoBlindsR150RTEHuntingRealtree/dp/B07KXQ8VPM/?tag=dailyshooting0820” rel=”nofollow”>https://www.amazon.com/RhinoBlindsR150RTEHuntingRealtree/dp/B07KXQ8VPM/?tag=dailyshooting0820” target=”_blank” rel=”nofollow”>hunting blind or tree stand is home base when out in the field. Achieving the perfect set up is a must for a great deer season. It can also be tedious, time-consuming, and super noisy.

Once you have your hunting locale narrowed down, get out there and prep your https://www.amazon.com/SummitTreestandsSU81119ClimbingTreestand/dp/B00K0LISF8/?tag=dailyshooting0820” rel=”nofollow”>https://www.amazon.com/SummitTreestandsSU81119ClimbingTreestand/dp/B00K0LISF8/?tag=dailyshooting0820” target=”_blank” rel=”nofollow noopener” data-wpel-link=”external”>https://www.amazon.com/SummitTreestandsSU81119ClimbingTreestand/dp/B00K0LISF8/?tag=dailyshooting0820” rel=”nofollow”>https://www.amazon.com/SummitTreestandsSU81119ClimbingTreestand/dp/B00K0LISF8/?tag=dailyshooting0820” target=”_blank” rel=”nofollow”>stand or blind. Ensure everything is sturdy and well-disguised. Be sure to account for any upcoming seasonal changes like falling leaves.

Ideally, you shouldn’t need to make any changes or adjustments on your first day out. Just show up and hunt.

Checking this off your to-do list early isn’t just about convenience. If you mess with your stand or blind too close to the deer season-opener, you’re going to scare away the exact animals you plan to hunt.

4. Clear all bait before deer season starts

Does your area permit deer bait or salt licks? More than half of all states https://www.gameandfishmag.com/editorial/baitingdeercontinuesdwindlemidwest/370173” rel=”nofollow”>https://www.gameandfishmag.com/editorial/baitingdeercontinuesdwindlemidwest/370173” target=”_blank” rel=”nofollow noopener” data-wpel-link=”external”>https://www.gameandfishmag.com/editorial/baitingdeercontinuesdwindlemidwest/370173” rel=”nofollow”>https://www.gameandfishmag.com/editorial/baitingdeercontinuesdwindlemidwest/370173” target=”_blank”>ban this practice. But if your state is one that does allow baiting, be sure to remove all bait before your state’s cut-off date.

Most states require removal of bait one month before hunting season begins. Always check with your local Department of Natural Resources (DNR) for exact cut-off dates.

Deer baiting laws can change drastically from year to year. It’s a good idea for all avid hunters to stay up-to-date on the latest rules and regulations in their area.

Baiting laws can also vary greatly between private and public land. If you are hunting in a new location this deer season, double-check which laws apply.

Recommended Read: http://www.dailyshooting.com/howmuchmeatfromadeer/” rel=”nofollow”>http://www.dailyshooting.com/howmuchmeatfromadeer/” rel=”nofollow” data-wpel-link=”internal”>http://www.dailyshooting.com/howmuchmeatfromadeer/” rel=”nofollow”>http://www.dailyshooting.com/howmuchmeatfromadeer/“>Estimating How Much Meat From A Deer Will Yield

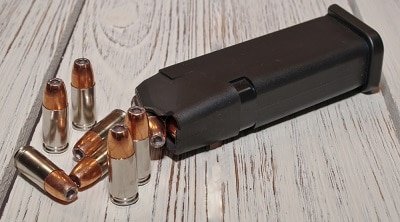
5. Take annual inventory

Even if you hunt every year, a lot can happen during the off-season. Start each new deer season by checking all your gear and supplies.

The most obvious thing to look at is your weapon and ammunition of choice. But that’s just the tip of the iceberg.

Check your hunting apparel and cold-weather gear for damage or excessive wear-and-tear. The earlier in the season you can replace these items, the easier it will be to find them in stock.

Once the big-ticket items are sorted out, make sure you have ample amounts of small necessities like https://www.amazon.com/HotHandsBodyHandSuperWarmers/dp/B0007ZF4Q8?tag=dailyshooting0820” rel=”nofollow”>https://www.amazon.com/HotHandsBodyHandSuperWarmers/dp/B0007ZF4Q8?tag=dailyshooting0820” target=”_blank” rel=”nofollow noopener” data-wpel-link=”external”>https://www.amazon.com/HotHandsBodyHandSuperWarmers/dp/B0007ZF4Q8?tag=dailyshooting0820” rel=”nofollow”>https://www.amazon.com/HotHandsBodyHandSuperWarmers/dp/B0007ZF4Q8?tag=dailyshooting0820” target=”_blank” rel=”nofollow”>hand warmers, first aid supplies, duct tape, and anything else you regularly use during the hunting season.

6. Noise-proof your gear

It’s difficult to describe the sheer silence of the undisturbed wilderness. No amount of visual camouflage will prevent the local deer population from hearing your every movement.

First, ensure all of your wearables are as quiet as possible. This is also a good time to trial-run any brand new gear for the season. Better to discover that noisy zipper pull or creaking pair of boots now rather than out in the field.

Second, address any sound issues with your shelter (this is just another reason why setting up early is so important!).

You can DIY your noise-proofing with insulation tape, https://amzn.to/3pEutVT” rel=”nofollow”>https://amzn.to/3pEutVT” target=”_blank” rel=”nofollow noopener” data-wpel-link=”external”>https://amzn.to/3pEutVT” rel=”nofollow”>https://amzn.to/3pEutVT” target=”_blank” rel=”nofollow”>rubber paint, pool noodles, and tons more https://midwestoutdoors.com/hunting/summerprojectsoundprooftreestands/” rel=”nofollow”>https://midwestoutdoors.com/hunting/summerprojectsoundprooftreestands/” target=”_blank” rel=”nofollow noopener” data-wpel-link=”external”>https://midwestoutdoors.com/hunting/summerprojectsoundprooftreestands/” rel=”nofollow”>https://midwestoutdoors.com/hunting/summerprojectsoundprooftreestands/” target=”_blank”>household items for cheap.

7. Eliminate odors at the source ahead of deer season

Even if deer can’t see or hear you, they can http://www.dailyshooting.com/10tipsscentfreehunting/” rel=”nofollow”>http://www.dailyshooting.com/10tipsscentfreehunting/” rel=”nofollow” data-wpel-link=”internal”>http://www.dailyshooting.com/10tipsscentfreehunting/” rel=”nofollow”>http://www.dailyshooting.com/10tipsscentfreehunting/” target=”_blank”>smell you. And it’s much easier to kill odors at the source than to try and cover them up out in the field.

The best prep starts when you stow away last season’s gear. Storing everything in a garage or closet won’t be enough — invest in an airtight tote or sealed bag for everything.

When you pull out your gear for the season, give everything a good wash. Do not use any scented laundry products. You might want to clean your washer and dryer first to remove any residual odors.

8. Know your entrance and exit strategies

Good hunters know that even the best location is useless if you can’t get https://nclandandfarms.com/treestandentryandexitroutes/” rel=”nofollow”>https://nclandandfarms.com/treestandentryandexitroutes/” target=”_blank” rel=”nofollow noopener” data-wpel-link=”external”>https://nclandandfarms.com/treestandentryandexitroutes/” rel=”nofollow”>https://nclandandfarms.com/treestandentryandexitroutes/” target=”_blank”>in and out undetected. Don’t sacrifice a great season for the sake of an unrealistic tree stand or blind setup.

There’s only one rule to nailing the perfect entrance and exit strategy: Steer clear of the places in which deer spend their time.

If you set up trail cams earlier in the year, use them to identify deer hangout spots and paths. This can take much of the guesswork out of getting to and from your shelter.

Of course, you should also use line-of-sight to hide your movements — even if you’re a good distance away from any deer.

Use dense tree lines and small hills to your advantage. An aerial view of your hunting spot can reveal a lot about which routes to try and which to avoid.

9. Monitor the forecast

Hunting in inadequate gear isn’t just uncomfortable. It can also be quite dangerous for those hunting in northern states or at high altitudes.

If you’re hunting in an unfamiliar climate, reach out to local hunters. You’ll be surprised just how valuable their advice can be, especially when it comes to braving harsh weather.

10. Know the process

Prepping for deer season often feels like a bunch of build-up to that perfect bow or gun shot. But there’s a lot you’ll need to do after landing that star buck or doe.

Will a successful hunt happen every season? No. But you need to assume you’re bringing home a deer regardless. Without a solid plan for processing, you’ll be left scrambling.

Many deer hunters https://www.fieldandstream.com/howtobutcheryourowndeer/” rel=”nofollow”>https://www.fieldandstream.com/howtobutcheryourowndeer/” target=”_blank” rel=”nofollow noopener” data-wpel-link=”external”>https://www.fieldandstream.com/howtobutcheryourowndeer/” rel=”nofollow”>https://www.fieldandstream.com/howtobutcheryourowndeer/” target=”_blank”>process their own animals, but not all have the necessary space or resources. If you’re in a popular hunting area, some professional processors are so busy that getting in a last-minute deer isn’t always possible.

Before the season begins, know exactly where you’ll be transporting your kill for processing (and how you’ll get it there).

You’re One Step Closer to Landing the Perfect Shot

If you’re like many hunters, the days leading up to deer season are hard to patiently sit through. Fortunately, there’s nothing stopping you from getting started right now with some important planning and prep work.

Do you have any of your own must-do tasks for the hunting pre-season? Let us know about them in the comments below!


Featured Image by Steve from Pexels

What’s The Best Ear Protection For Shooting? Top 10 Revealed

Today, ear protection for shooting goes well beyond earplugs. Hunters and other outdoorsmen do not want 100 percent silence when enjoying their favorite hobby the same way they may want it when they are going to bed.

Modern protective muffs monitor sounds based on decibel range. Sounds in certain ranges, such as gunshots, can be protected against while sounds in other decibel ranges are amplified. This allows hunters to enjoy peaceable conversation while being spared from ear-damaging gunshots.

Those who want to can purchase ear protection for shooting with auxiliary inputs for cell phones or MP3 players. The best ear protection for shooting can spare you from a musket rifle while allowing you to hear a squirrel chew on his acorns.


Product FAQ

1. What Is Noise Reduction Rate?

The Noise Reduction Rating (NRR) is a unit of measurement labeling the effectiveness of ear protection for shooting or other activity. Noise reduction is measured in decibels (dB). Decibels categorize the power and density of sound.

Ear protection for shooting should be approved by the American National Standards (ANSI). Generally, the higher the NRR, the more noise reduction you can expect from your ear protection for shooting.

2. Why Use Ear Protection for Shooting?

Generally, people should wear ear protection for shooting when sound levels exceed 85 decibels. Gunshots register 140dB to 190dB depending on the type of firearm.

The effectiveness of ear protection for shooting is reduced when muffs or other protectors do not fit properly. It is important that shooters find properly fitting ear protection and do not modify it for any reason.

It is always also important to wear your ear protection for shooting and never remove the muffs when in ear-range of shooters.

3. What Is Ambient Noise?

Ambient sound is basically background noise. Sometimes, individuals want to reduce ambient sound. Often, in seeking the best ear protection for shooting, ambient noise is not meant to be eliminated entirely. Hunters often want to be able to enjoy conversation with other hunters while being protected from loud gunfire.

Common ambient sounds include wind, water, background conversation, birds, and traffic.

4. How Do Decibels Relate to Real Life?

Do you enjoy hearing leaves rustle in the fall? The leaves comfort and relax you at about 20dB. Sitting in busy traffic is likely exposing you to around 70dB while that one very loud semi truck that rumbles by you as you sit with your window down may hit 90dB.

As a rule of thumb, a sound loud enough to keep you from comfortably hearing a nearby friend is at least 80dB. If you have to speak directly into your neighbor’s ear, the noise level is over 90 decibels.

5. What Are the Types of Hearing Protection?

Hearing protection is passive or active. Passive hearing protection provides constant, unchanging amounts of sound reduction. Passive hearing protection is great for individuals who are in a consistently loud environment, such as a large factory or production plant.

Gunshots do not fit this type of noise. Unlike a factory, gunshots are short, sudden noises. An active hearing protection system can instantaneously react to reduce gunshot noise. Some can even amplify ambient background noise in the meantime.

How We Reviewed

We reviewed some of the best ear protection for hunters based on their features, pros and cons, and availability. We tried to approach this review from a crucial viewpoint, because loud noises, such as gunshots, can impact a person’s hearing.

Noises at 100dB can damage your ear in as little as 15 minutes of exposure. Gunfire is usually at least 140dB, so heading to the range without ear protection is perilous. We set out to identify some of the best ear protection for shooting.

Once microscopic hair cells of the inner ear are destroyed, they never grow back. Science cannot recreate them. Hearing loss is frustrating and often accompanied by tinnitus — that annoying ringing in the ears.

Without ear protection for shooting, exposure to gunshots can cause stress, reduced concentration, difficulty communicating, and general nervousness. So, take a moment to consider our review of the best ear protection for shooting and consider protecting your ears the best way possible.

Overall Price Range

We reviewed an array of ear protection ranging from around $10 all the way to about $185. The wide variety of prices was expected due to our wide variety of products reviewed, but it also demonstrates the amazing range of choices among ear protection for shooting.

Some individuals may be looking for a simple protective muff to be used a few times per year. In that case, a $185 investment may be more than needed.

Others may spend excessive time at the range — some may even teach shooting classes or something similar—and longevity and durability are critical. To such folks, an investment of over $100 could be wise in the long run.

It is important that you understand your own budget as well as your individual preferences to find the best ear protection for yourself and understand the investment you will need to make.

What We Reviewed

[amazon box=”B0052G5UK2, B007BGSI5U, B01AAH8CRU, B06ZY6GMYD,  B071P29YYB, B000Q04MRG, B00RPBCFA0, B002CZQ1TA, B01BEENYCQ,” template=”table”]

Pro Ears – Pro-Mag Gold

Only from Pro Ears can you find dual, fully enclosed, military-style circuit boards with gold connectors. Their Pro-Mag Gold earmuffs offer ear protection with independent volume control.

You can set each ear at an individual level for your needs. They offer hearing protection as well as amplification. DLSC Technology protects your hearing while still allowing you to hear softer sounds.

With a noise reduction rating of 30, Pro Ears leads the industry. They also have a 1.5ms response time.

The earmuffs’ services come alongside a comfortable fit. ProForm leather ear seals and visco-elastic foam padding offer a comfortable experience with easy adjustments. A low-battery indicator keeps you aware of your power, and an auto-shutoff preserves the battery’s life. The earmuffs include 3.5 mm input jacks.

They are commonly used by hunters, construction workers, and individuals with hearing complications. Users love the five-year warranty offered by a veteran-owned business.

Pros

  • Offering protection as well as amplification
  • Five-year warranty
  • Noise-reduction rating of 30

Cons

  • Earmuffs do not fold and can be bulky during transportation

[amazon fields=”B0052G5UK2″ value=”thumb” image_size=”large”]
[amazon fields=”B0052G5UK2″ value=”button”]


Howard Leight by Honeywell

Honeywell’s Howard Leight Impact Pro Sound Amplification Electronic Shooting Earmuff features built-in directional amplification functions at a safe 82dB for a natural experience.

The earmuffs amplify and block noises as necessary, and rubberized pressure points prevent gunstock scratching. The headband is padded and adjustable to offer a secure and comfortable experience.

A 3.5 mm connection cord opens possibilities for your MP3 player or other devices. After four hours, an automatic shutoff will help save battery life; Polaroid AAA batteries are recommended.

These earmuffs also offer a noise reduction rating of 30.

Pros

  • Noise reduction rating of 30
  • Usable with MP3s and other devices

Cons

  • Large size could get in the way of rifle shooting

[amazon fields=”B007BGSI5U” value=”thumb” image_size=”large”]
[amazon fields=”B007BGSI5U” value=”button”]


Walker’s Razor Slim Electronic Hearing Protection Muffs

Walker’s Game Razor Slim Electronic Earmuffs feature their special Razor ultra-thin rubberized cups. The slim product offers a noise reduction rating of 23dB.

The Razor muffs are meant to have a compact design with pro-level hearing protection and amplification. Two omni-directional microphones and sound-activated protection with a 0.2 reaction time. The earmuffs function with two AAA batteries that are included.

Pros

  • Sleek design
  • Compact build does not hinder performance

Cons

  • Some users report sound location is hard to identify, despite omni-directional features

[amazon fields=”B01AAH8CRU” value=”thumb” image_size=”large”]
[amazon fields=”B01AAH8CRU” value=”button”]


Walkers Game Ear Walker’s Razor Slim Electronic Muff

Another slim, low-profile design, the Walker’s Game Ears Razor Slim Electronic Muffs offer 23dB noise reduction with sound-activated compression to protect your ears from loud gunfire. The slim design does not obstruct your cheek weld, and the muffs can fit easily in your range bag.

The muffs have two high-gain omni-directional microphones for amplification and full dynamic range speakers for clear, balanced sound. Independent volume controls allow you to find your customized level for each ear.

An audio input jack invites MP3 use for your favorite sounds. An external battery door houses two AAA batteries included with your purchase. An automatic shut-off protects your battery life.

Pros

  • Slim model easily transported
  • Independent volume controls
  • MP3 compatible

Cons

  • Perspiration can affect the seal around your ear and the relevant noise protection

[amazon fields=”B06ZY6GMYD” value=”thumb” image_size=”large”]
[amazon fields=”B06ZY6GMYD” value=”button”]


TRADESMART Shooting Earmuffs

TRADESMART’s Shooting Earmuffs are offered in a combination pack along with safety glasses, ear plugs, and other items. The muffs utilize a six-piece noise filtration system to block low-, mid-, and high-range frequencies as needed.

The safety glasses are made to fit while wearing the muffs. They have anti-fog and scratch-resistant features for clear vision and an unobstructed aim.

The earplugs use a German BASF composition that is soft and expandable. When used with earplugs, the pack offers 33dB of noise reduction.

Pros

  • Complete kit with muffs, eyewear, and earplugs
  • 33dB noise reduction with earplugs

Cons

  • Noise reduction level is measured with earplugs

[amazon fields=”B071P29YYB” value=”thumb” image_size=”large”]
[amazon fields=”B071P29YYB” value=”button”]


Peltor 97451 3M Tactical Sport Earmuff

The 97451 3M Tactical Sport Earmuff from Peltor Tactical Sport uses a digital chip for fast shutoff and recovery. They protect your ears from sudden noises, such as gunshots, while the sound amplification allows the user to hear conversational noises.

The muffs offer 20dB of noise reduction from ergonomic, contoured ear cups. An audio jack allows you to use tech accessories, such as cell phones and MP3 players.

The muffs are powered by two AAA batteries in an external battery compartment. The product features an automatic shut-off.

Pros

  • Digital chip technology
  • Fast shut-off
  • Accessory options

Cons

  • The auxiliary jack uses a proprietary input instead of a 3.5 mm

[amazon fields=”B000Q04MRG” value=”thumb” image_size=”large”]
[amazon fields=”B000Q04MRG” value=”button”]


Walker’s Game Ear Ultimate Power Muff Quads

Walker’s Game Ear Ultimate Power Muff Quads feature four powerful omni-directional microphones with low noise and frequency levels tuned for natural sounds.

The volume control is independent for each ear, as is the frequency tuning. The muffs’ design features sound-dampening composite housing. With a 0.02-second reaction time, the muffs offer 27dB of noise reduction and sound-activated compression.

Walker’s Game Ear Ultimate Power Muff Quads can fold into a compact unit for easy travel. Low-profile ear cups are on a comfortable headband with a wire metal frame.

Pros

  • Sound-dampening housing
  • Independent volume and frequency levels
  • Foldable for travel

Cons

  • The black plastic clips that attach the black wire loop to the muff are reported to break easily

[amazon fields=”B00RPBCFA0″ value=”thumb” image_size=”large”]
[amazon fields=”B00RPBCFA0″ value=”button”]


Mutt Muffs DDR337 Hearing Protection for Dogs

Mutt Muffs offer hearing protection for dogs. For those who have four-legged friends considered as family, Mutt Muffs are a noise-reducing option.

Remember, dogs’ ears are more sensitive than ours to many noises. Think about a dog’s reaction to fire sirens. Anything that hurts your ears is probably worse for your dog.

Mutt Muffs use the same inner foam used in many muffs designed for humans. The noise reduction for dogs is estimated between 21 and 24dB when properly fit to your animal. Remember, 21 to 24dB in human measures is even more for man’s best friend.

Pros

  • Materials and measurements fit for a human
  • Special design to fit and remain on your dog

Cons

  • Securing a tight and proper fit on an animal is no exact science

[amazon fields=”B002CZQ1TA” value=”thumb” image_size=”large”]
[amazon fields=”B002CZQ1TA” value=”button”]


Decibel Defense Professional Safety Ear Muffs

Decibel Defense Professional Safety Ear Muffs offer a promoted noise reduction level of 37dB. However, the muffs will not consistently provide 37dB noise reduction. The box reads 34 NRR, and even that is questioned by many of its buyers.

Perfect for the shooting range, the muffs come with a comfortable headband and padded cells. It is foldable and compact while offering sturdy construction.

The Decibel Defense muffs can fit in your gun bag. Some use the muffs for work sites, while mowing the lawn, and of course while shooting their firearms. A “Double-D Guarantee” promises your money back if you find a pair that is better.

Decibel Defense muffs are designed to allow for shooting glasses to fit comfortably while wearing the muffs.

Pros

  • Comfortable design
  • Money-back guarantee

Cons

  • Multiple reports on actual NRR
  • Largely plastic construction

[amazon fields=”B01BEENYCQ” value=”thumb” image_size=”large”]
[amazon fields=”B01BEENYCQ” value=”button”]


The Verdict on the Best Ear Protection for Shooting

We looked at a variety of ear protection products in an attempt to find ear protection for shooting that would meet a wide array of individual needs and budgets. When being forced to identify one standout product, we gave our official nod of approval to the Peltor 97451 3M Tactical Sport Earmuffs.

This product is sturdy and well made with a headband that is truly secure and comfortable. They can be worn with a hat because of the close fit, and their rubber coating sold us on their durability.

We love the individual buttons for volume and power. The two AAA batteries are a simple way to power the product, and in this day and age, we think the audio and MP3 options will be much appreciated.

The Peltor product’s ability to respond quickly to impulse noises was probably its most critical mark in the plus column because protecting our ears from gunshot sounds is the most important thing.

Honorable Mention

We also feel compelled to mention the TRADESMART Shooting Earmuffs as an economical and efficient option for budget shooters. We appreciate the kit nature of the product. For a low price, any shooter can achieve ear protection and eye protection.

With TRADESMART’s earplugs, a high level of noise reduction is possible, and the six-level noise filtration system is impressive at its price point. The product’s ability to differentiate decibel ranges and manage sounds accordingly is critical and welcomed.

The addition of scratch-resistant glasses to keep your eyes safe gives buyers in almost any budget range the opportunity for quality noise reduction, and ear and eye protection.

How to Carve a Pumpkin with a Handgun (Or an AK-47)

Ready to learn how to carve a pumpkin with a handgun (or AK-47)? We’ve got you covered with a bunch of great video examples all gathered in one place! Thanks to hickock45 for the bulk of these great videos!

With fall gearing up, that means it is time for cooler weather and outdoor fall activities. It is time to get that fire pit going, get ready for deer hunting, and to start thinking about carving those pumpkins with your handgun.

Combine two fall favorites into one activity. Most people carve their pumpkins with knives but why not take the opportunity to show off your precision skills with your gun?

Related Read: How Often Should I Clean My Gun?

You only need a couple of items for this activity; grab your gun and a pumpkin.

Your Setup for Carving a Pumpkin with a Handgun

Your typical pumpkin carving setup involves drawing your ideal expression on the front of your pumpkin. Afterward, you find yourself a sharp enough knife and stab through the shell and carve as artfully as possible.

For some, this task is easy and artistic. For others, it is a safety hazard and involves stitches. However, there is another way. You can carve your pumpkins from a safe distance with your handgun or rifle.

In these demonstrations, you will notice some details. In the first several videos, the pumpkins are already scooped out and ready for carving. However, instead of using a dangerously sharp blade to carve the ominous features of your jack-o-lantern, you use your every day and ordinary handguns and rifles to perform this task.

You need a safe place to practice, once you learn how to carve a pumpkin with a handgun, along with all the safety gear you might expect. Be sure you have a suitably sized pumpkin and your gun.

You can get relatively close to your pumpkin to do the carving, but feel free to challenge yourself with some distance. Maintain a proper distance, have ear protection, and shoot safely! When you are done, make sure to unload safely, too.

Ideally, you can place your pumpkin off the ground while shooting. Lastly, consider bringing a few extra pumpkins. This task has the potential to create some pumpkin casualties. Plus, it is fun, and you will want to keep going.

How to Carve a Pumpkin  with a Colt 1911

In this video, the carver is using a Colt 1911 Series ’80. You will notice he is not that far away from the pumpkin, and he is wearing ear protection. He starts with the nose before moving onto the eyes, followed by the mouth. His shots are precise, and it turns out pretty good. In fact, the back of the pumpkin looks like a face, as well. It was not torn out all that much.

You can watch this unfold in the video below:

https://www.youtube.com/watch?v=mThUfYcea3I

How to Carve a Pumpkin with a .44 Magnum S&W

This video demonstrates the use of a .44 Magnum Model 29. With the pumpkin on a stand and while sitting close by, the shooter takes out the face of the pumpkin. The .44 Magnum is a double-action revolver. It has six shots, and its chamber holds the .44 Magnum cartridge. The pumpkin’s face turns out great, although there is some curiosity about the look of the back of the pumpkin.

Related Read: Which’s Better Between .45 Long Colt vs .44 Magnum Ammo?

You can watch the video below for a guide on how to carve a pumpkin with a handgun.

https://www.youtube.com/watch?v=5m7VBtkdpW4

How to Carve a Pumpkin with a Desert Eagle

A Desert Eagle is a semi-automatic pistol designed by Magnum Research. The pistol is magazine-fed and considered a powerful handgun.

The pumpkin carving demonstration has the shooter laughing as he carves his pumpkin with his gun, and the pumpkin ends up with a suitable and charming smirk.

Related Read: Understanding Handgun Calibers For Everyone

Catch the video below:

https://www.youtube.com/watch?v=BNiwpUewbCY

How to Carve a Pumpkin with a Henry Rifle

In this video, the shooter is carving a pumpkin with a Henry Rifle. The Henry Rifle is a lever-action rifle that dates back as far as the 1860s. The shooter carves a fantastic face in the pumpkin in this video.

Surprisingly, the pumpkin does not blow apart too much. It helps if the shooter is exact with his shots, however. Although, we do not get to see what the back of this pumpkin looks like.

You can watch the video here:

https://www.youtube.com/watch?v=5n9Ebx-bXLI

How to Carve a Pumpkin with an AK 47

Yes, you read that right. The shooter is carving a pumpkin with an AK 47. The AK 47 is an assault rifle. The AK of the name stands for Avtomat Kalashnikova because of the Russian designer. Also, the AK 47 is simple to use and reliable.

In this video, the shooter takes a seat and carves the nose and both eyes with several shots. The last shot to the mouth almost destroys the pumpkin, but it ends up working out for both the shooter and the carved pumpkin. While the AK 47 is not common as a household tool as described, it looks more fun than having to clean up pumpkin parts off the kitchen table.

You can watch the video here:

https://www.youtube.com/watch?v=O2uVS0XXAyE

How to Carve a Pumpkin with a Glock 23

A Glock 23 is either a compact or mid-size .40 caliber handgun. In this video, the shooter has his pumpkin set up and ready to go. He wastes no time with some pretty tight groupings shooting out the features of the pumpkin’s face. Again, this is another time we would love the see the back of the pumpkin after carving.

Be sure to watch this video to the very end after the shooting. You will see what it looks like lite up at night. You can see the video here:

https://www.youtube.com/watch?v=qGH8Af9Hdb0

How to Carve a Pumpkin with a Volquartsen Semi-Automatic .22

For this final video, the pumpkin is not scooped out in advance. Also, the shooter is more concerned with the back of the pumpkin rather than the front. The shooter is using a 10/22.

The 22 bullets do not cause holes with a large diameter, so she has to use more than one shot to create her shape in the pumpkin. She is not trying to shot in the same spot but instead grouping to make the necessary shape. In the end, it looks great both front and back.

Related Read: Why You Should Own a Ruger 10/22

You can check out the video below.

https://www.youtube.com/watch?v=YzZeWanq2Ck&feature=youtu.be

Ready, Aim…

You could carve your pumpkin the same way as everyone else.

However, those store-bought carving kits are difficult to work with and the stencils are often boring.

There are other ways to create your spooky features on your pumpkin: you could carve a pumpkin with a handgun.

Grab a few pumpkins, your safety gear, and your guns, and challenge yourself with some fun with precision shooting by practicing how to carve a pumpkin with a handgun.

How did your pumpkin carving with a gun turn out?

Featured image via YouTube

A teacher by trade, Victoria Caine splits her free time between freelance writing, her camping blog, and (frantically) guiding her teenagers into becoming functional adults.

What Does Grain Mean in Ammo and What Grain Should I Be Using?

For many firearms users, this question can be a little confusing. Grain isn’t exactly commonly used anymore. So, in this article, we will clear up some of the confusion about what exactly a grain is, and then make some recommendations about what grain is best to shoot.


Continue reading to learn more about grains in ammo.

Recommended Read: How to Choose the Right Bullet Weight for Your Weapon!

Grain – The Basics

A grain is a unit of measurement for mass. It is an extremely small unit. In fact, 1 ounce is equal to 437.5 grains, just to give you an idea of how small it is.

For another comparison, 1 gram is equal to 15.43 grains. Since 1 gram is approximately a paper clip, I’m sure this gives you an idea of how small a grain is.

Many people think that grain refers to something with the gunpowder or propellant used. However, it really has nothing to do with that. In ammunition, grains are used to say how large the projectile of the cartridge is.

So, when ammunition says it is 55 grain FMJ, it means that the actual bullet that will fly downrange weighs 55 grains.

Recommended Read: What’s the Best Conceal Carry Gun? Top 10 Revealed

Choosing the Right Grain

Now that you know exactly what a grain is, and what it refers to in ammunition, let’s talk a little about how to choose which bullet size you will shoot.

Each caliber of ammunition generally has quite a few different choices for grain size. This number is only increased if you are handloading your own ammunition.

Before making a decision, it’s important to know about all of the options available in the caliber you are thinking about.

When you’re trying to decide the size of the ammunition, there’s a couple things to keep in mind. First of all, what exactly are you shooting for?

If you’re hunting, you want a different round than if you are just shooting at the range.

Recommended Read: 4 Things You Need to Know When Buying a Used Gun

Hunting/Defense

For hunting and any kind of defense shooting, a larger grain is generally better. Larger grain, heavier bullets, generally perform better inside a target. However, there’s a lot more to consider.

For example, jacketed hollow point ammunition performs extremely well inside of a live target, while full metal jacket ammunition will not do as well.

If the choice is between heavier full metal jacket and lighter jacketed hollow point, I would go with jacketed hollow point every time. It expands on impact, and damages more tissue.

However, if there are multiple grains of jacketed hollow point ammunition, heavier is generally a little better. Just to caveat that, it’s not a set in stone rule. Your best bet is to try and find some ballistics testing or gelatin testing that others have done to see which performs better.

Precision Shooting

Precision Shooting

If you’re doing any type of competition or long range accuracy shooting, the exact projectiles can play a huge factor in the accuracy of the weapon. Most people choose match grade ammunition, but there are a couple things to keep in mind.

First, the shape of the bullet plays equally as important of a role. Aerodynamics are extremely important, especially over distance.

Next, there are some weapons that just don’t shoot some ammunition well. For whatever reason, some weapons seem to prefer some types of ammunition. The only way that you’ll know this is by testing and shooting multiple types of ammo.


Range Shooting

If you are just plinking at the range, your bullet weight really doesn’t matter. If you’re going to be using the weapon for anything other than range shooting at other points in time, we recommend putting some of your actual choice of ammunition through the weapon, just to make sure it handles the ammunition well.

Conclusion

Now that you understand what grain means in ammunition, you will hopefully be able to make some better choices with what ammunition you are shooting. Unfortunately, there isn’t one exact answer since most calibers have so many different choices, but we have given you some recommendations to consider.

Essentially, just make sure you test out different kinds of ammo, and see which one offers the best performance for your use for your weapon.

What is the Legal Barrel Length for an AR-15

If you are trying to build an AR-15 and avoid having to go through the process of getting an ATF-approved tax stamp, you’re going to need to know the legal barrel length for your weapon.

In the military, M4 barrels are 14.5 inches long. This was a vast reduction in size and weight compared to the 20-inch barrel of the M16.

However, what barrel length is legal in the civilian world?

The Simple Answer for the Legal Barrel Length for an AR-15

Putting it as simple as possible, the answer to this question is 16 inches. However, as with many things in the firearms world, there are some workarounds to this.


Muzzle Device

The first workaround is a permanently attached muzzle device, such as a flash suppressor.

In this situation, you are able to buy a 14.5-inch barrel and a specific muzzle device and have a gunsmith pin-and-weld the muzzle device to the barrel.

In most of these flash suppressors, it will be specifically stated that you are able to have it pinned and welded, so be sure to check if it’s possible before buying the muzzle device.

Essentially, pinning and welding the muzzle device makes it permanent, which in turn makes it part of the barrel. For that reason, you are able to count the extra length of the flash suppressor as part of your barrel length.

Keep in mind that this will come at an added cost, since you’ll have to purchase the muzzle device and also pay to have it welded on for you.

AR-frame Pistol

Black Pistol with High Capacity magazine full shot
With High Capacity Magazine Full Shot

The 16-inch barrel length only applies to rifles, NOT pistols.

You are able to build an AR pistol in various pistol and rifle calibers, which would eliminate the need for the 16-inch barrel. If it is technically a pistol, the barrel can be much shorter.

However, when building an AR pistol, there are a few laws that you need to keep in mind. Since that isn’t the point of this article, we won’t go too much into them. It basically boils down to the buttstock of the weapon, and there are some specific design features that must be accounted for. Make sure you know your laws if you take this route!

Get the Tax Stamp

Lastly, if you want a shorter barrel, you can always just get the tax stamp from the ATF. Once your weapon is classified as a short-barreled rifle (often called SBR), the length of the barrel won’t be a problem.

This is a somewhat length and time-consuming process, but it is the only way to legally have an AR-15 rifle with a barrel less than 16 inches. Related that, if you are intending to buy a scope for your ar 15, you should choose Nikon or Vortex, it’s my favorite.


Looking for AR-15 parts? Check out these from Brownell’s

We found a collection of great AR-15 parts and accessories that may interest you, check them out:

Conclusion

To make a long story short, the answer to the question is 16 inches. Your AR-15 barrel must be at least 16 inches in length to be considered legal by the ATF. Anything shorter than that, and you will have to get an SBR tax stamp from them.

However, as we mentioned in this article, there are a couple of workarounds you could pursue to avoid having to get the tax stamp. But, like with anything, make sure you know the laws about what you are doing.

Sig P320 Review [2020]

The SIG Sauer is a handgun originally designed with military use in mind. Given its popularity among law enforcement and the general public, we wanted to undertake a SIG P320 review to see what the weapon is really all about.

Our SIG P320 review takes a look at the popular handgun’s modular design that lets you change the caliber and size of the gun to meet your individual needs. This gun is large enough for home defense while being small enough for many individuals to conceal and carry.

We also looked at some of its features, such as the three-point take-down safety system that keeps the piston from breaking down when a magazine is still inserted or if the slide is locked to the rear.

This SIG P320 review will demonstrate that this is a customizable pistol that meets a variety of needs; but how does it compare to similar competitors?


Recommended Read: What’s the Best Conceal Carry Gun? Top 10 Revealed

What Is the SIG P320?

The SIG Sauer P320 pistol is used by government agencies as well as sportsmen for its efficiency, adaptability and customization. The SIG Sauer P320 comes in four different sizes: Full Size, Carry, Compact and Sub Compact. For our SIG P320 review, we looked at the full-size and compact model, each chambered for 9mm cartridges. The models also come in .40 and .45 as well.

The SIG Sauer P320 is a striker-fired pistol with a polymer frame. The polymer is fiberglass-reinforced, and the full-size SIG offers a sturdy rail for accessories. The SIG system has a barrel and chamber titled downward from the slide at the time the gun is fired. The striker is cocked every time you rack the slide. The full-size SIG comes with 17-round magazines, while the compact offers 15 rounds.

Recommended Read: 4 Things You Need to Know When Buying a Used Gun

Grip and Feel

SIG’s grip options come in a variety of sizes and switching grips in the SIG P320 review was easy to do. Changing the caliber is also user-friendly with the SIG P320, as the pistol offers guaranteed modularity.

Textured panels are round on each side of the handle as well as the frontstrap and backstrap. The magazine release is reversible for right- and left-handers. All the SIG’s features are ambidextrous. The trigger guard features an upward curve with a deep undercut for a high, comfortable grip. This also helps control recoil.

Recommended Read: How Often Should I Clean My Gun?

Durability and Performance

The slide is made of a high-grade stainless steel with bevels that run the length of the unit, and it features slide serrations on the front and rear. The slide has a Nitron finish to defend against corrosion. The Nitron finish involves heat treating the steel with a chemical bath in order to create a very hard oxidized surface.

A sturdy three-dot sight system sits atop the slide. Windage can be adjusted by drifting the dovetail sights. Both models of the SIG Sauer P320 consistently scored well on accuracy in a range of weather conditions. Recoil is minimal in both models, and the iron sights useful to most shooters.

Product Specs

Depending on the size of your SIG Sauer P320, the striker-fired autoloader has a magazine capacity of 12 to 17 rounds.


The length of the gun ranges from 6.67 inches to 8.05 inches. The barrel length runs from 3.55 inches to 4.7 inches, and the gun’s height range is 4.29 inches to 5.51 inches with a maximum width of 1.38 inches.


Unloaded, the SIG Sauer P320 weighs from 24.9 to 27.6 ounces. The trigger pull weight tests at about 6.88 pounds. Safety features in the SIG P320 review included an integrated trigger safety and automatic firing pin block.

Pricing

The manufacturer’s suggested retail price for the SIG Sauer P320, depending on the model, ranges from $597 to $679. During our SIG P320 review, we found a number of SIGs for sale around $530, and one listed near $500.

Prices of similar competitors ranged from around $450 to near $630.

How It Compares

We picked a few similar products available on the market to see how they compare.

  • Glock 19 Gen5

  • HK VP9

  • Ruger SR 9

Sig P320

Price $$

Ease of Use [***]

The SIG Sauer P320 is comfortable in the hand with grip panels that feel like non-slip floor tape. Serrations in the slide help with gripping and pulling, but it can still be difficult for weaker shooters to pull. During SIG P320 reviews, sweaty hands also caused problems despite the serrations.

The magazine floor plate is actually a piece of the grip. Some shooters with bigger hands accidentally prevent the magazine from dropping while gripping the gun.

When using the weapon, the SIG Sauer P320 handles very well.

Design Quality [****]

The SIG Sauer P320 modular design lets you customize your gun. The handguns made in 9mm, .357 SIG, and .40 S&W calibers can be converted from one to another using a caliber exchange kit. Some switches require only a barrel change.

SIG Sauer P320 features a lightweight polymer frame with interchangeable grips. It uses contrast sights for accuracy. The front and rear sights are fixed.

Warranty [****]

The SIG Sauer comes with a limited lifetime warranty covering defects in material, workmanship and mechanical function.

Pros

  • Consistent trigger
  • Customizable
  • Good warranty

Cons

  • Expensive magazines
  • Slide pull can be difficult

Glock 19 Gen5

Glock is a heralded name in the firearm industry, and the Glock 19 was already one of the best handguns on the market before the Gen 5 updates. For starters, the finger grooves were removed, making the grip a better fit for a larger number of people.

The G19 Gen 5 slide is ambidextrous. The slide-release lever is more pronounced and offers a smooth release. The finish on the barrel and slide is durable, but in extreme conditions or with sweaty hands it can be slippery. A Marksman barrel offers a recessed crown, and they have eliminated the polygonal rifling.

Price $$

Ease of Use [****]

The Glock 26 Gen 5 utilizes a dual recoil spring to absorb recoil. It features a 10-round magazine capacity.

An ambidextrous slide stop lever allows users to manipulate the slide as right- or left-handers. Further personalization is available in the customizable frame size. The Gen 5 comes with backstraps in two sizes, with and without beavertail. The customizable frame allows users to adjust the circumference of the grip for individual hand size.

A safe-action system features three safeties that disengage as the trigger is pulled and automatically reengage the trigger after release. A loaded chamber indicator assures the user the chamber is empty.

Design Quality [****]

At least 20 changes improve the Glock19 Gen 5 over predecessors. Among these changes are the elimination of finger grooves, a glared mag well, ambidextrous slide stop, and a Glock marksman barrel.

The overall length of the Glock 19 is 7.28 inches including a 4.02-inch barrel. Trigger pull weight ranges from five to 6.5 pounds. With an empty magazine, the gun weighs about 24 ounces. It has a width of 1.34 inches.

Warranty [**]

Glock handguns have a one-year warranty, but Glock consistently services their guns beyond one year.

Pros

  • Improved trigger from the Gen 5
  • Internals from Gen 4 can be used in Gen 5
  • Marksman barrel
  • Good accuracy for a small gun

Cons

  • Addition of the ambidextrous slide release may not work with your previous holster

HK VP9

The Heckler and Koch VP9 features a unique striker-firing system and light-pull trigger. It offers some of the best trigger quality available for striker-fired handguns. The trigger has a short, light pull with a crisp, single-action break and a clear reset.

The Heckler and Koch hammer-forged barrel of canon-grade steel ensure long life.

Price $$

Ease of Use [***]

An extended Picatinny rail is molded into the frame allowing users to add lights or other accessories they need.

A proprietary captive flat recoil spring efficiently reduces recoil when shooting and helps the shooter better control the gun. It also helps enable more rapid fire. The polygonal bore has no grooves or similar features.

The most user-friendly feature of the VP9 is the custom striker-fired system and top-of-the-line trigger.

Design Quality [****]

An ergonomic hand grip features three changeable backstraps and six side panels sure to service all hand sizes. The front of the grip has finger grooves. All VP9 controls are ambidextrous with slide releases on each side of the gun. The magazine release is placed for right- or left-handed access.

The rear slide has components on each side to offer better grip and leverage for racking the slide. They also serve shooters with less hand strength. Ten and 15-round magazines are available. A rail can support accessories up to five-and-a-half ounces.

The gun is 7.34-inches long and 5.41-inches tall. Its width measures 1.32 inches. The barrel is 4.09 inches with a sight radius of 6.38 inches. The trigger pull weight is 5.4 pounds. With an empty magazine the gun weighs 25.56 ounces.

Warranty [***]

Heckler and Koch offers a limited one-year warranty.

Pros

  • Customized grip system
  • Top-notch trigger
  • Ambidextrous options
  • Unique striker-fire mechanics

Cons

  • Some do not like the paddle-style magazine release
  • Some do not like the unique gripping

Ruger SR 9

The Ruger SR9c is a compact pistol with a 1.27-inch-width grip; the same as its full-sized counterpart, the SR9. It includes a 10-round magazine, a finger grip extension, and an extra 17-round magazine.

The pistol has is a 3.5-inch barrel with noticeable three-dot sights. The slide is serrated for a better grip and an easy way to check the chamber. Other safety features include an ambidextrous manual safety, internal trigger bar, striker blocker, and loaded chamber indicator.

Price $

Ease of Use [***]

The SR9c handles nicely for a small gun with very little recoil. The gun gives the shooter 9mm power with very little effort on the shooter’s end. Shooters do experience a bit of muzzle climb, but it is subtle. Short distance accuracy is attainable without the need for extra optics. The gun is point-and-shoot-ready from the box, and it assembles and disassembles easily.

Design Quality [***]

With a thick grip and double-stack magazine, the firearm has been used by law enforcement and is popular among concealed carry options for the public.

The 9mm pistol has a polymer stock with a Nitride finish accomplished by heating in the presence of ammonia or other nitrogenous material to increase durability and corrosion resistance.

The gun has on overall length of 6.85 inches with a 3.5-inch barrel. The gun’s width is 1.27 inches, and it measures 4.61 inches in height. The overall weight of the gun is 23.4 ounces. It includes two 17-round removable magazines. All the gun’s sights are fixed within a three-dot scheme.

Warranty [**]

This gun comes with a one-year warranty for the original owner.

Pros

  • Sights are easy to use and do not snag on clothes or holster
  • Loaded chamber indicator
  • Nitride finish
  • Minimal recoil

Cons

  • The grips are sticky enough to catch debris
  • Some users report difficulty racking the slide

Conclusion: SIG P320 Review

After completing our SIG P320 review, we confidently give the SIG Sauer P320 four stars. Its incredible adaptability and customization are as good as any in the business, from calibers to sizes to grips.

A shooter never again has to worry about the width or circumference of grip with SIG’s interchangeable modules. Convertible calibers include 9mm, .357 SIG, or .40 S&W. Even the pistol sizes range for your preference from full-size all the way to subcompact.

This SIG P320 review also alerted us to the accessory rail. This is one of the most stable systems we have seen and great for lights, lasers and other needs.

Also, it should not go unnoticed that SIG went out of its way to put safety first. The Striker safety does not allow the pistol to release until the shooter pulls the trigger. SIG worked hard to make a great pistol, and they have succeeded.

5 Best Turkey Scouting Tips for Hunters

If you’re looking to get into hunting as a beginner, turkey hunting can be a great introduction to this exciting and passion-filled lifestyle. My first hunting kill was a turkey during the Autumn season in South Dakota, along with my father and uncle. I was hooked after that. I’ve returned almost every year and taken part in many Spring season hunts as well.

Turkey hunting scouting tips are plentiful on the web and we’ll incorporate top tips and my experience here to give you a well-rounded knowledge base for the upcoming season. Make sure you check weapon requirements and bag limits for the state where you hunt and bring your camo gear. Here we go!


The Top 5 Turkey Scouting Tips for Hunters

Without further ado, here are my top five turkey scouting tips for all of you hunters out there.

#1: Identify the best location

Different states and provinces have different regulations, so do research in advance and then get out there to scout the area.

  • The location is the most important of my turkey hunting scouting tips. Ideal turkey habitats are diverse and contain different sources of food, plenty of water, and shelter. Turkeys roost in trees and often drink from streams in more open areas. Much of their food is found in open areas.
  • Note whether you’ll be on public or private land and be sure you have necessary permits and permissions. (Here’s a great video about location)
  • Try planting a food plot heavy with bugs and wood to attract turkeys. I prefer to do this because it gives me the best chance at having nearby, well-hidden ambush areas. If you have the means to do this set it up while turkeys are roosting and be sure not to leave a man-made trace, (for reference, see this article).

#2: Start scouting early!

Turkeys are notoriously feisty and paranoid and without the proper approach you’ll find yourself eating Hormel from the grocery store instead of experiencing that delicious wild game taste and the satisfaction of self-sufficiency. Do your planning and you’ll see the easier side of turkey hunting.

  • There is no reason not to begin your turkey hunting scouting in late winter, like February or March. By finding where the flock is in your target location well in advance, you’ll have the best chance at knowing their habits and ultimately having a successful hunt. (Great article here)
  • As turkeys are very mobile, the longer you are able to observe them during scouting gives you best chance to learn their movements and be prepared for the hunt. Note their roosting and drinking areas on your map and how long they tend to spend there per day.
  • Set up trail cameras across the area and check on them every 2-4 days (checking more often is just extra time out that gives turkeys more chances to see you and avoid the area). Find where they are feeding, and when the season starts to follow the turkey hunting scouting tips in step 3.

#3: Plan to make a day out of scouting before the hunt.

Prep equals perfection. That’s my hunting motto, and the most successful  hunts I’ve done are the ones I prepped for the most. Follow a routine and always take notes of what you’re doing!

  • Break your day up into sections, each with a primary focus to help you achieve the overall goal of bagging a turkey. The night before, make sure you have everything in order and ready to go. Binoculars, topo map, GPS, notes/outlines/research of the target area, weapon, outdoor supplies and clothes. Get on the road by dawn and cruise around the hunting area listening for turkey sounds and keeping an eye out for any hints of turkey presence. (Good discussion here)
  • Later in the morning, patrol the hunt area. Watch for strutting toms in the fields, wooded areas, ridgetops, and crevasses. Blow the occasional owl call to perk their ears. Remember, when in open fields keep quiet always pay stark attention.
  • By afternoon you should have a general idea of where the turkeys are. Look for roost trees, droppings, food, and other signs to mark their trail and start pinpointing your ambush spots based on where they will be later in the evening. Your turkey hunting scouting process is now in full swing.
  • In the evening, follow their track from feeding back to roost spots. Before heading home, make sure you know exactly where they will be when you return the next morning for the hunt. I like to take notes on the map and mark ‘X’ in two to three different places I plan to hide out.

#4: Turkey talk!

Calling the birds reduces the chances that they will run away or remain hidden. Watch some videos of calls and practice while in your vehicle.

  • To call in the turkeys, you’ll want to frequently use the mating noises of young hens. Hopefully, you’ve been practicing all winter! In the fields, stop frequently to make the call and then listen carefully for ruffles, noises, or movement. Turkeys respond to calls and can be surprisingly social. Toms come in easier than the quiet gobblers. (Here is a sample turkey talk)
  • Having a decoy or stage noise maker makes your calls seem more authentic. Try and switch back and forth between your calls and using a decoy, this sounds more convincing!
  • More info on talk and fall prep here.

#5: Have your weapon ready to go during scouting.

This makes scouting as realistic as possible and gives you a chance to test visibility in your ambush areas. Just be sure to prep your weapon:

  • To avoid detection of your barrel, it should be camouflaged or at least dulled. Do this before turkey scouting and practice some approaches from your ambush spots. As part of your scouting prep be sure that the gun will shoot a clean shot to the head or neck from 20-40 yards, body shots won’t drop the bird cleanly.
  • For bow hunting, you’ll want to get within 20 yards. Practice your approach during the scouting and use a blind to conceal movement. (For actual hunting guide, see here)

#6: Practice calling

If you’re looking to get a lot of turkeys, you should really be good at calling. This will take practice, it doesn’t come naturally. It’s never to early to start practicing either, and it’s good to start months before the season begins.

#7: Do a ground check

If you find a location and don’t see or hear any turkeys, don’t worry. Search the ground for other clues before leaving, such as droppings or track marks. Feathers may also be around to signify roosts. Do this during midday hours so that you don’t scare off any birds while they get close to roosting areas.

Making the Most Out of Turkey Hunting Season

I hope these turkey hunting scouting tips help you to better prepare for your next hunt! I’ve found turkey hunting to be the most addictive way to hunt because of the unique challenges those feisty birds bring to the table. I’d love to hear your thoughts and stories of turkey hunting- please share in the comments below! When taking new hunters out in the field, have them read up on procedures and take notes of what you are doing. If you found this article useful, share on social media because being prepared and educated about hunting is the best way to keep our passion sustainable for everyone.

12 Tips for Scent-Free Hunting

Although deer are not as aggressive as other species, deer possess a level of adaptability and defensive skills that allow them to protect themselves – their strongest asset being their noses. Over the years, there have been numerous types of gear and products that are specially created to help hunters control scent.


12 Tips for Scent-Free Hunting

Here are a few easy tips that will keep you scent free:

1. Use Odorless Detergents

Once you’re finished hunting, make sure that you use a detergent product that is manufactured specifically for hunting. Some of the best choices that you can find online or at local sporting stores include Scent A Way and Dead Down Wind.

2. Wash your clothes in baking soda

An alternative to store-bought hunting detergents is detergent you can make in your own home. Washing your clothes in baking soda can help eliminate odors picked up by deer. You can also make large quantities of simple DIY detergent composed of peroxide, baking soda, and distilled water.

3. Dry your clothes outside

After you’ve washed your hunting clothes, dry them outside. Hanging them outside to dry prevents indoor scents from clinging to your clothes like cleaning products, baking/cooking scents, etc.

4. Store your washed hunting clothes

Once your clothes are completely dry, place them in a large air tight container for storage until your next usage. For an added measure, you can leave odorless dryer sheets in the container with your clothing.

5. Use scent-free products

Take a scent-free shower before heading out into the field. Use scent-free body wash, shampoo, tooth paste, and deodorant. You can also use scent-sealed hunting gear to eliminate human scent, like scent-sealed slings, bags, and more.

6. Use scent-eliminating spray

Using scent-eliminating spray will help mask any remaining scents you have or you’ve picked up on the way to the field.

7. Scent-free baby wipes

For easy, inexpensive, and fast cleanup in the field, use scent-free baby wipes. An alternative for this is bringing rags that have also been washed in scent-free detergent, but they are harder to pack around than a package of scentless baby wipes.

8. Use an Ozonics Unit

Although some hunters may think that Ozonics Units are unnecessary if you’ve taken enough precautions to cover up scent, they still can help hide human scent in the field. Ozonics Units mask your scent in ozone and continuously work to neutralize scent throughout the time that you’re out in the field.

9. Wear rubber boots

Use knee-high rubber boots and tuck your pants into them. Make sure they are placed in an air tight container beforehand. Do not wear your boots at home or in any location to and from the hunting area.

10. Keep your stand site downwind

One of the most basic yet important rules for preventing the spread of scent in the field is to stay downwind. Check the direction of the wind before setting up your stand site to make sure the wind won’t be blowing in the direction of your target and their bedding/feeding areas. You can check predicted wind conditions on weather websites and apps beforehand, but be prepared to double check the direction of the wind once you have arrived. It’s best to have the direction of the wind blowing towards a cliff, lake, pond, etc.

11. Use the bathroom

Make sure to use the bathroom before you get a shower. This will give you a chance to clean off from any urination or defecation smells.

12. No smoking

It’s crucial to stay away from any smoking or chewing before, during, and after your hunt. If you go through the motions of showering and properly washing all of your clothes, just one cigarette will completely ruin all of that. Chewing tobacco will also make you detected easily — there’s generally a strong wintergreen odor in many varieties of it.

Making the Best Out of Your Scent-Free Hunting Experience

These are all excellent tips and techniques that can make you successful when scent-free hunting. If you use them, you’re much more likely to beat some of the big game’s strong sense of smell!

What’s the Best Survival Knife? Top 10 Revealed

From hunters to parents building a family emergency kit, to extreme sports participants, it is important to have a good survival knife. But among the many choices, what is the best survival knife for your needs?

We attempted to review a list of the best survival knives to help you see the types and options available for your consideration. From blades choices to special features, we believe there is a survival knife for every individual.


[amazon box=”B07HWBWPL3,B00BT49UVG,B0049TYBL2,B004WN5CT0,B001DZM482,B000E3QUB6,B00HOMJZJY,B004GVT2Z8,B001H53Q6M,B00AU6H3UY” template=”table”]

Product FAQ

1. What Are the Main Uses for a Survival Knife?

2. What Are the Basic Types of Survival Knives?

3. Are Survival Knives Safe?

4. What Does Tang Mean?

How We Reviewed

Gray and Knife folding pocket knife

Image source: pexels

In searching for the best survival knife, we reviewed a wide variety products based on features, price, and availability. We also took a close look at things like blades, durability, performance, safety, and portability.

To find the best survival knife, an outdoorsman needs to understand his specific needs as a hunter or other outdoor enthusiast to find the knife that is best for him or her as an individual. We began with the blades and attempted to look at some crucial aspects of the best survival knife.

Fixed Blades


Some knives have blades built as one piece, and the blade is always open. It protrudes from a handle and is always exposed. These knives use a sheath to keep the blade from being unsafe or causing an accident when not in use.

An advantage of fixed blades is their strength. with no moving parts or hinges that need locked, it is a strong survival knife option.

Another advantage is that fixed blades are always ready for use on quick notice, but they take up more space than folding blades.

Folding Blades


Survival knives with folding blades are considered a safe option and are easily portable. The blade folds to be stored in the knife's handle.

When opened, the blade is held in its outright position by a locking mechanism to prevent it from folding during use and harming the hunter. However, the locking mechanism is less sturdy than its fixed blade counterpart.

Clip Knives


A clip knife is essentially a folding blade knife with an attached clip to be fastened to the inside of a pocket or other convenient location. Clip knives offer a convenience of easy portability. Their compact nature is useful for general jobs, however, they often lack the sturdiness for bigger jobs.

Aside from whether knife blades are fixed or folding, there are different types of blades to choose from.

Drop Point


Drop point blades are the most recognizable blades. They have a slow convex curved drop in the point to make the point of the knife strong. This is helpful when opening the rib cage or similar area on your prey.

These blades also have a number of general uses and can be effective for skinning animals.

Clip Point


Knives with clip point blades are perfect for hunters looking to use their knife on a daily basis for things other than hunting. A clip point resembles a drop point, but the point is thinner and easier to more detailed tasks–though it would be less effective at opening a ribcage.

It can still accomplish most necessary tasks while hunting, but it is less efficient at certain tasks than the drop point blade.

Trailing Point


A trailing point blade also has similarities to the clip point and drop point. The back edge of the trailing point blade trails upward for a larger curve on the cutting side. It is also usually stronger than the clip blade

Many hunters love trailing point blades for slicing meat.

Gut Hook


Featuring a hook design on the top side of the blade, a gut hook blade is useful to open the prey's abdominal cavity when you remove the innards.

Serrated Blades


Serrated blades have small teeth while plain blades do not. Most folks understand the difference between the two from common sets of kitchen knives.

However, serrated blades have recently become more popular among survival knives. They act like a saw to cut through difficult areas of the animal. They are useful for cutting hide and other stubborn areas.

They do not allow the same precision and finesse as traditional blades, however, and many hunters feel they afford less control. Straight blades are also better for skinning the animal.

Blade Size


Blade size is often a matter of personal preference, though at some point they become too long to use precisely or too short to exercise a safe grip during hard jobs. A general rule is to avoid blades longer than six inches or shorter than three inches.

Skinning Knives


Skinning knives often use trailing point blades or similar sweeping blades able to peel the skin from the meet of your prey. They are able to perform other general uses and can be used to field dress large kills.

Caping Knives


Caping knives are a must for hunters lucky enough to land a trophy prize. They are able to quickly and accurately cut the skin around the shoulders with an upturned point.

Caping is the process of skinning the head and neck of an animal to create a hunting trophy. Caping knives are designed to cut the skin away from the shoulder, neck, and chest to preserve the trophy portion of the animal.

Dagger knife

Image source: unsplash

Blade Materials


There are many different materials used to make knife blades, and each offers its own degree of durability. Some rust or corrode sooner than others. Some can withstand drops and impacts without shattering as soon as others.

The most common blade material today is alloyed stainless steel. Stainless steel is efficient at resisting corrosion, but it does not hold its edge as long as other materials. Carbon steels keep a sharp, defined edge for a long period, but they often rust.

Alloyed stainless steels can be engineered to combine the best of both. Another option is to coat your carbon steel blade with products to prevent rust. This is accomplished by cleaning the blade thoroughly, allowing dry time, and then applying the product.

Rust preventative products are usually a silicone wax. If the wax is effective, you have a sharp survival knife not prone to rust.

Performance Points


To have a knife that performs the best way possible, hunters need to understand their individual needs. A skinning knife will not perform as well in projects that really require a gutting knife, etc.

Overall performance of the best survival knife will include its ability to bone, skin, and cap meet. For survival or sport, you need to be able to properly prepare your meet in order to eat it the right way.

The blade needs to be sharp enough to cut in a way that can skin the animal without spoiling the meat. The shape and curve of the blade factor into the equation for each hunter.

Sometimes the best survival knife is small and performs better than larger knives by getting the work done simply and efficiently. They are also more compact than some unwieldy knives that are hard to perform precision food preparation.

Durability


Survival knives need to last, especially if you are investing more than a small amount of money. That is why it is important to understand the type of steel your knife blade utilizes and be sure to prepare it accordingly.

The durability of many good knives is directly related to the care a hunter takes of it. It is also important to be sure you purchase a knife that can withstand the outdoor elements. Moisture and extreme temperatures can do a lot of damage to a survival knife resulting in rust or lose its edge.

Safety


Safety is another element of survival knives that is often related directly to the actions of its owner. If you are diligent to keep your blade clean, do not compromise safety by cleaning it in a way that is not careful.

It takes a lot of courage to kill an animal with a knife, but that courage has to be complemented with safety.

Holsters


It is important to have a holster for your knife, especially longer fixed-blade knives. Do not rely on keeping a knife in your pocket or hanging it from your belt. You are not John Rambo.

It is a practical idea to combine your knife and holster into one investment and purchase them simultaneously. Holsters make your adventure safer for you and those you are with.

Be Careful What You Cut


Survival knives can motivate you to cut the strangest things, from leather to tin cans. You may even see commercials where knives are shown to cut through shoes or other bizarre items.

It is important to use your knife for hunting and survival instead of recreational cutting. Not only will you dull your knife prematurely, but you will also jeopardize safety. One slip of the knife while trying to cut a pop can and you can be badly lacerated by the blade or even the freshly cut can.

Sharpen Carefully


When it is time to sharpen your survival knife, be sure to do it carefully. A knife intended to plunge through the rib cage of a large animal can surely do damage to your hands, fingers, and other body parts.

Sharpen your knife slowly and with the utmost attention to detail. On the other hand, your knife provides safety, because not only is useful in hunting, it can also be useful in protecting yourself.

So, it is wise to keep your blade very sharp, but do it wisely.

Handles


When it is time to sharpen your survival knife, be sure to do it carefully. A knife intended to plunge through the rib cage of a large animal can surely do damage to your hands, fingers, and other body parts.

Sharpen your knife slowly and with the utmost attention to detail. On the other hand, your knife provides safety, because not only is useful in hunting, it can also be useful in protecting yourself.

So, it is wise to keep your blade very sharp, but do it wisely.

Handles are a very important factor that affects the use of your blade. You need a handle that is comfortable to use and gives you a secure grip that makes you feel confident.

Get comfortable with the contours and surface of your knife. To some degree, it is a matter of preference, but a secure grip and the best contours can add to the knife's efficiency as well as its safety.

Overall Price Range

Best Knife

Image source: pixabay

In searching for the best survival knife, we looked at knives ranging from under $50 to over $300. Variables included the materials used to fabricate the knives, their overall durability, and a few that offered lifetime warranties.

If you know the sort of material you want for your blade or handle, that can go a long way in determining the sort of budget you set for yourself. Also consider how often you will use your survival knife and the sort of tasks you plan to use it for.

If you get a good idea of your needs and amount of wear you plan to put on the knife, you can get a reasonable idea of what you want to spend.

What We Reviewed

  • Tom Brown Tracker #3

  • Ka-Bar BK-22 Becker Companion Fixed Blade Knife

  • ESEE Knives 6P Fixed Blade Knife

  • SOG Force Fixed Blade

  • Fallkniven A1 Fine Edge Fixed Blade Knife

  • Gerber LMF II Survival Knife

  • Schrade SCHF9N Fixed Blade

  • Spyderco Bushcraft G-10 PlainEdge Knife

  • KA-BAR Full Size US Marine Corps Fighting Knife

  • Gerber Bear Grylls Ultimate Pro Knife

Tom Brown Tracker #3

[amazon box=”B07HWBWPL3″]

Features

Tops' Tom Brown Tracker is a popular blade has been a favorite of outdoorsmen for many years. It is a multi-tool that was featured in the movie, The Hunted.

This Tom Brown Tracker #3 is the next, slightly larger knife in the series beyond the Tom Brown Tracker #2. The Tracker #1 is still the largest of the line.

The Tracker #3 is ideal for chopping, skinning, carving, gutting, scoring, and other cutting needs. The handle is made of black canvas Micarta.

Blade

The Tom Brown Tracker 3 is a 10.75-inch knife, with a blade that consumes 5.75 inches of the weapon. The cutting edge runs 5.5 inches with a blade thickness of 0.190 inches.

The blade is steel RC58-60 and is cryo treated with a tumble finish.

Durability

With many high carbon alloys, the Tracker 3 blade offers strong durability while maintaining a sharpness that is also very impressive.

Performance

Owners have consistently cut through rope, meat, branches, and even rubber. Throughout the processes, the blade remains relatively sharp.

Safety

As a fixed-blade knife, the Tom Brown Tracker 3 comes with a Kydex style sheath for safety. The only thing lacking on a very stylish sheath is a mechanism to keep the blade inside. If jostled, the knife is able to come freely from the sheath.

Portability

Under 11 inches long, the knife weighs in at under 14 ounces, and just over 18 ounces with the sheath. The sheath has a rotating spring steel clip that is useful for portability, just be sure the knife stays in the sheath.

Ka-Bar BK-22 Becker Companion Fixed Blade Knife

[amazon box=”B00BT49UVG”]

Features

The Ka-Bar Becker BK22 Companion knife is a lightweight knife featuring a Cro-Van steel blade that is sharp and durable. The handle is very comfortable and made of Grivory material, a Polyphthalamide synthetic resin relevant to nylon.

The knife's blade and tongue are well balanced; the tongue is large and bolted to the handle.

The butt of the blade is also large and very effective. It comes with a durable sheath.

Blade

The drop point blade on this Ka Bar Becker product has a 20-degree edge angle. The blade is 1095 Cro-Van steel, a high carbon steel used in heavy duty tools.

The blade is a quarter-inch thick for stability. It is a sharp and heavy blade and is covered with a powder coating to protect it.

Durability

Like all carbon steels, Cro-Van steel is prone to rust if not treated. However, it is a strong steel. The Grivory handle is made of a heavy-duty polymer durable throughout heavy use. Ka-bar Becker stands by the product with a Limited lifetime warranty

Performance

The Cro-Van blade keeps its edge after extended cutting and wood chopping. The knife isn't light, but if you do not mind a slightly heavier product for chopping and cutting, it is incredibly efficient.

For delicate jobs, the BK22 can fit the bill at a slow pace with great precision, but its wheelhouse is the big, less precise job like chopping wood.

Safety

Ka-Bar's sheath is well made and offers suitable protection on this fixed-blade knife. It has strong clips to secure the knife and keep it tightly on your belt.

The sheath also has a Velcro belt strap and a handy compartment.

Portability

The sheath clips also lend themselves to portability. This knife is 10.5 inches long, so when securely fastened to its owner, it is easily portable. The knife weights in at 1.5 pounds complete with a sheath.

ESEE Knives 6P Fixed Blade Knife

[amazon box=”B0049TYBL2″]

Features

The Ka-Bar Becker BK22 Companion knife is a lightweight knife featuring a Cro-Van steel blade that is sharp and durable. The handle is very comfortable and made of Grivory material, a Polyphthalamide synthetic resin relevant to nylon.

The knife's blade and tongue are well balanced; the tongue is large and bolted to the handle.

The butt of the blade is also large and very effective. It comes with a durable sheath.

Features

This 11.75-inch knife with a 6.5-inch blade is made of 1095 steel. It features a stylish gray Micarta handle in a molded polymer sheath.

Blade

The blade on this knife is 1.56 inches long. It is small but very sharp, and it holds its edge for a long time. A backer provides even more security, and the blade does not come out of the sheath unintentionally.

The blade is manufactured with 1095 high carbon steel. The carbon steel is razor sharp and keeps its edge, but it rusts easily. Owners must lubricate and wax the blade as needed.

It comes with textured coating from the factory to resist corrosion and wear. Even with the coating, the blade maintains a smooth feel unlike blades coated in phosphate or oxide coatings.

Durability

When properly cared for, the 1095 steel is durable and long-lasting. A great feature noting the product's quality construction is its transferable warranty. No matter how often the knife is sold or gifted, the warranty remains valid.

No receipt is needed, and they will either fix or replace the knife. However, the warranty does not cover rust and corrosion.

Performance

The 3/16-inch 1095 steel blade is full flat ground. This knife can perform as a primary survival knife or as a tactical weapon.

If you are confident and efficient with a smaller knife, this is definitely a survival knife to consider.

Safety

Offering a black polymer sheath, the ESEE 6P-B Plain Edge Knife comes with durable protection. The sheath also is ambidextrous, meaning it can be used a right or left-handed person.

A friction-resistant mechanism keeps the knife securely in its sheath, and the sheath screws are stainless steel.

Portability

The sheath comes with a removable for your carrying convenience. The knife, at just under 12 inches, also features a lanyard hole on the rounded pommel. The belt clip is the most convenient way to get maximum portability, but the cord option is also a favorite of many owners.

SOG Force Fixed Blade

[amazon box=”B004WN5CT0″]

Features

The Ka-Bar Becker BK22 Companion knife is a lightweight knife featuring a Cro-Van steel blade that is sharp and durable. The handle is very comfortable and made of Grivory material, a Polyphthalamide synthetic resin relevant to nylon.

The knife's blade and tongue are well balanced; the tongue is large and bolted to the handle.

The butt of the blade is also large and very effective. It comes with a durable sheath.

Features

The SOG Force fixed knife comes with a Ti-Ni coating on the blade and a pointed pommel. The grip features good checkering on both side and finger notches on the bottom.

It is a slip-resistant weapon with a six-inch AUS-8 steel blade.

Blade

The blade is marked as a clip point blade, but some argue it is more of a drop point. It has a false edge that is very minimal. It is hollow ground for improved sharpness, but that may wear on its durability over time.

The blade is coated with a smooth coating that has no impact on slicing but does provide rust protection. The AUS-8 steel is not overly prone to rust, however, and the coating also serves to keep the sun from reflecting off the blade, reminding us of its military heritage.

Durability

AUS-8 steel is a commonly used mid-range stainless steel. It has good corrosion resistance and has a very good edge. The knife is well built and durable.

There is always a question of durability with a hollow-grind knife. You are essentially removing metal at the cutting edge, and to a lesser extent the spine.

Performance

For a six-inch blade at a quarter-inch thick, users find the SOG Force to be a surprisingly nimble knife. The product is also easy to hold.

The lightweight handle is a bit narrower than the blade, and the blade has a reduced mass because of the hollow grind. When you put them together, it is a nimble knife that keeps its edge well for a knife that is not carbon steel.

Safety

The SOG Force comes with a nylon/polyester sheath. Some users find it a bit difficult to secure the knife, but the stiffened nylon is better than some competitors.

The blade guard is durable and offers a friction fit. It has a small pouch on the front.

Portability

A wide lanyard hole is available. A belt loop is provided as well as Molle straps and connectors. Two eyelets provide additional lashing options. The knife is 11.25-inches long.

Fallkniven A1 Fine Edge Fixed Blade Knife

Features

The Ka-Bar Becker BK22 Companion knife is a lightweight knife featuring a Cro-Van steel blade that is sharp and durable. The handle is very comfortable and made of Grivory material, a Polyphthalamide synthetic resin relevant to nylon.

The knife's blade and tongue are well balanced; the tongue is large and bolted to the handle.

The butt of the blade is also large and very effective. It comes with a durable sheath.

Features

The Fallkniven A1 offers top-of-the-line design, ergonomics, and value. The knife exceeds international standards for its strength and value for money.
The Fallkniven A1 is a large, multiple-purpose knife capable of heavy-duty use.

Blade

Another reflection-free blade, the black CeraKote coating is a surface coating that protects the blade from rust and with a combination of Teflon and ceramics in a military-style combination.

This coating is applied much like paint is applied to a metal car, meaning that in time it can be scratched through, exposing the metal. The more durable the coating becomes to resist scratches the harder it may be to sharpen.

At just over 6 ¼ inches, the blade is made of a quality VG10 steel. This is a particular type of stainless steel, and the G stands for “gold”, implying it is the “gold standard” that this level of stainless steel.

Durability

A full tang goes entirely through the knife handle to keep the grip from breaking on any hard strike. The handle is made of a durable Kraton, a high-performance elastomer.

The blade and handle are unaffected by water or extreme temperatures.

Performance

This all-purpose knife is large and meant for big jobs. It combines a powerful blade of hard steel with an ergonomically designed handle to withstand the stress of chopping. It is also capable of finer jobs, such as daily cuts.

Safety

This fixed-blade knife comes with your choice of a Zytel sheath or a black dangler leather sheath. Zytel is a DuPont trademark used in items with high strength, abrasion and impact resistant sort of nylon.

Portability

By choosing he Zytel you can attach the knife to your belt or backpack. The knife is safe and secure for travel in the Zytel sheath, even upside down.

Gerber LMF II Survival Knife

[amazon box=”B000E3QUB6″]

Features

The Ka-Bar Becker BK22 Companion knife is a lightweight knife featuring a Cro-Van steel blade that is sharp and durable. The handle is very comfortable and made of Grivory material, a Polyphthalamide synthetic resin relevant to nylon.

The knife's blade and tongue are well balanced; the tongue is large and bolted to the handle.

The butt of the blade is also large and very effective. It comes with a durable sheath.

Features

The Gerber LMF II offers a textured rubber grip and handle on a knife weighing three-quarters of a pound, just under 1-and-a-half pounds with the sheath.

Blade

From the moment you take it out of the box, the knife has a sharp blade. It is a heavy blade that is made from 420 steel. The 420 steel is stainless steel with higher carbon than other types. It contains at least 12 percent chromium, so it has corrosion-resistant properties.

The five-inch blade is nearly full tang.

Durability

The durable knife is about 80 percent tang, but it was built for wartime use. So, the blade is strong and durable enough for United States Special Operations in times of war.

It can easily cut through power cords and other items that might be useful to a soldier.
For practical purposes, it is a full-tang knife, but maybe closer to ⅘ tang.

Performance

The knife's high-performance blade and excellent grip make the weapon perfect for chopping wood and similar tasks. Using the Gerber LMF II is lighter than a hatchet, but can outperform a hatchet as a chopping tool.

Moreover, the base of the knife can serve as a hammer, and it also offers a glass-breaking mechanism.

Safety

The Gerber's sheath holds the knife in place well enough to be used by military parachuters. It also comes with a built-in knife sharpener.

Sometimes the sheath can grip the knife too firmly and force the user to use a firm enough grip to risk pulling too hard and cutting his hand.

Portability

The sheath comes with attachments designed for Molle straps or ALICE packs. ALICE, meaning All-purpose Lightweight Individual Carrying Equipment, is an equipment system adopted by the military in 1973.

Snap closures also hold the six-inch handle to the sheath for more pleasant portability. The knife is 11 inches long altogether and weighs 11.7 ounces.

Schrade SCHF9N Fixed Blade

[amazon box=”B00HOMJZJY”]

Features

The Ka-Bar Becker BK22 Companion knife is a lightweight knife featuring a Cro-Van steel blade that is sharp and durable. The handle is very comfortable and made of Grivory material, a Polyphthalamide synthetic resin relevant to nylon.

The knife's blade and tongue are well balanced; the tongue is large and bolted to the handle.

The butt of the blade is also large and very effective. It comes with a durable sheath.

Features

This Schrade knife is a close relative of the Schrade SCHF9. The Schrade SCHF9N is just over a foot long with a 6.4-inch blade. It is a full tang knife with a quarter-inch blade width made of 8Cr13MoV High Carbon Stainless Steel. The handle is Kraton and features a lanyard hole on one end.

Blade

The 8Cr13MoV High Carbon Stainless Steel is a strong cutting steel. This steel retains its cutting edge for a long time and is also corrosion resistant. Stainless steel's resistance to rust and corrosion make it a great product for outdoor and wet jobs.

The drop point blade features a hollow grind for a sharp edge able to do more finesse maneuvers when chopping, slicing, or skinning prey.

Durability

The 8Cr13MoV High Carbon Stainless Steel is a top choice among serious outdoorsmen, and along with a high-end handle, the knife is built for durability.

Performance

The scaled handle provided excellent grip to increase the product's performance. The Schrade SCHF9N can handle almost any job with its sturdy design and razor-sharp blade.

Safety

While the fixed blade knife comes with a sheath, the sheath is not as snug as it could be. It offers a strap across the handle, but if the strap was forgotten or did not function properly, the knife would have a strong likelihood of coming out of the sheath.

A loose sheath is not a great safety measure.

Portability

Despite its shortcomings, the ballistic sheath can attach to the waist for portability. The overall length of the knife is 12.3 inches, and it weighs exactly one pound.

Spyderco Bushcraft G-10 PlainEdge Knife

[amazon box=”B004GVT2Z8″]

Features

The Ka-Bar Becker BK22 Companion knife is a lightweight knife featuring a Cro-Van steel blade that is sharp and durable. The handle is very comfortable and made of Grivory material, a Polyphthalamide synthetic resin relevant to nylon.

The knife's blade and tongue are well balanced; the tongue is large and bolted to the handle.

The butt of the blade is also large and very effective. It comes with a durable sheath.

Features

This Bushcraft survival knife is inspired by traditional Bushmen and their need to understand wilderness survival. It features high-quality materials and full tang. It also utilizes a Scandinavian grind.

Blade

Offering a carbon steel blade, the Spyderco Bushcraft G-10 survival knife has a Scandinavian-inspired single bevel grind. Even with heavy use, the carbon blade will hold its edge.

The length of four inches, 3.9 inches are available for cutting. The blade is fully tanged and strong enough to cut just about anything that comes your way.

Durability

The 0-1 high carbon content tool steel is strong and sharp. If proper care is taken to avoid rust and corrosion, this Bushcraft knife should have great durability.

The handle is made of a polished G-10 material that is durable against consistent use and extreme weather. G-10 is a high-pressure fiberglass laminate.

Performance

The Bushcraft G-10 knife performs well dressing out game, and it can also chop wood, slice meat, and cut down brush. Users are consistently pleased with its performance.

Safety

The fixed-blade knife comes with a leather sheath with a right-handed design. The leather is imprinted and able to withstand all kinds of weather.

Portability

For portability, a lanyard hole is available in the handle and another lanyard hole is in the blade. At only 8.75 inches long and less than a half pound, the knife is easily portable.

KA-BAR Full Size US Marine Corps Fighting Knife

[amazon box=”B001H53Q6M”]

Features

The Ka-Bar Becker BK22 Companion knife is a lightweight knife featuring a Cro-Van steel blade that is sharp and durable. The handle is very comfortable and made of Grivory material, a Polyphthalamide synthetic resin relevant to nylon.

The knife's blade and tongue are well balanced; the tongue is large and bolted to the handle.

The butt of the blade is also large and very effective. It comes with a durable sheath.

Features

The KA-BAR Full Size US Marine Corps Fighting Knife was designed as a military knife and was prominent during World War II. With a seven-inch blade and five-inch leather handle, an optional handle is also available in a Kraton version.
The knife if often used both as a modern convenience and a meaningful gift for military veterans.

Blade

The blade on this knife is coated in black and flat ground. It comes to a clip point.

The weapon is made from 1095 Cro-Van steel. With chromium and vanadium, the five-inch blade stands up to the elements and keeps its edge well.

A two-and-a-half-inch fuller is built into the blade's spine making the knife feel lighter. The blade is .17 inches wide.

Durability

This full tank knife has a secure steel pommel that can sustain a lot of use. Stainless steel pins secure the blade at the pommel.

The 1095 Cro-Van steel is a high carbon, heavy duty material complimenting a 100 percent leather handle option.

Performance

Tested over time from WWII through today's serious outdoorsman, the KA-BAR Full Size US Marine Corps Fighting Knife is a high-performing knife for cutting, chopping, fighting, and surviving.

Safety

A 100 percent leather sheath is available when you choose the leather handle option. This keeps your blade safely covered while helping to maintain its sharpness.

A contoured crossguard protects your hand from danger.

Portability

The knife's portability can be deduced by its use with fighting marines. Overall it is just under 12 inches with a weight of 11.2 ounces.

Gerber Bear Grylls Ultimate Pro Knife

[amazon box=”B00AU6H3UY”]

Features

The Ka-Bar Becker BK22 Companion knife is a lightweight knife featuring a Cro-Van steel blade that is sharp and durable. The handle is very comfortable and made of Grivory material, a Polyphthalamide synthetic resin relevant to nylon.

The knife's blade and tongue are well balanced; the tongue is large and bolted to the handle.

The butt of the blade is also large and very effective. It comes with a durable sheath.

Features

The Gerber Bear Grylls Ultimate Pro Knife was designed by Bear Grylls, a wilderness survival expert known for mountain climbing and parachuting. He also starred in a wilderness survival television program.

Produced by Gerber, Grylls styled this fixed-blade knife with 7Cr17MoV stainless steel and a 3/4 tang. It features a rubberized handle, and a fire starting with a notch to strike the and spark the fire.

Blade

The 4.8-inch drop point blade features a fine edge with a portion of serrations. The serrated section is an efficient saw, and the fine edge section cuts cleanly.

The 7Cr17MoV stainless steel blade is more than adequate for cutting through rope and small branches.

Durability

7Cr17MoV stainless steel is a best-of-both-worlds material because it is affordable but also a high-performance material. It is essentially modified stainless steel with more vanadium than other steels.

Extra vanadium gives the blade strength and wear resistance. With three-quarter tang and a long-lasting edge, the Gerber Bear Grylls Ultimate Pro Knife is a durable option.

Performance

The 7Cr17MoV stainless steel performs well as a saw and a fine cutting blade. The butt of the knife has a textured cap made for hammering, and it is more than capable of cracking nuts or driving stakes into the ground.

Also, an included whistle on the lanyard is a small but surprisingly loud tool.

Safety

The whistle is a safety feature, and the lanyard also includes a foldable guide that can be tucked into the sheath.

A separate plastic sleeve holds the blade within a nylon sheath. The tight fit keeps the knife secure, and a diamond sharpening blade is included on the back of the plastic sleeve.

Portability

A supplementary Velcro strap secures the knife handle close to the body. Overall, the knife is only 10-inches long and weighs less than a pound.

The Verdict on the Best Survival Knife

We attempted to review a wide variety of knives in order to find the best survival knife. At the end of the day, each unique outdoorsman has unique needs and preferences. The best survival knife is a subjective label.

We attempted to look at the list of knives and pinpoint one that fit a wide range of budgets and needs. We gave our nod of approval to the KA-BAR Full Size US Marine Corps Fighting Knife. If it is good enough for fighting soldiers, it is good enough for us. The option between two different handles to compliment a black coated, flat ground blade of 1095 Cro-Van steel and a 100-percent leather sheath unquestionably has a place on any list of candidates for the best survival knife.

Featured Image source: pexels


How to Sight in a Red Dot Scope Without Shooting

learning how to sight in a red dot scope without shooting

Are you interested in learning how to sight in a red dot scope without shooting? Sighting in a scope is the act of aligning where the scope is pointed with the barrel of the gun. The flight or direction of your bullet is dictated by your barrel, and there are no adjustments for a barrel. The reticle in your scope is the traditional crosshairs, so to speak. You need the reticle to be aimed where the bullet will hit, but the reticle cannot control the bullet in any way.

A red dot sight is an optic that uses a red laser as the reticle, and this offers shooters an easy way to learn how to sight their rifles. Learning how to sight in a red dot scope without shooting is easy to do if you take it one step at a time.

Why Do You Need to Sight In Your Rifle Scope?

preparing to use a rifle

Image Source: Pixabay

Sometimes we just assume that we should eye our target and the bullet will travel in a straight line from the rifle to the target. Even though our naked eyes can't perceive it, rifle bullets travel in an arc as gravity pulls them downward.


Sighting your rifle ensures the bullet meets the target where the scope is aimed. If your rifle is sighted at 100 yards, the arc of the bullet will meet dead on with the target from 100 yards out. Deciding a good shooting distance for your particular needs will help you decide what distance to sight in your rifle scope.


You may use your rifle for different tasks and types of hunting. If so, you should sight in your scope before every outing. Ammunition choices also play into the sight adjustments, so it is important to re-sight your weapon any time you change ammunition.


Benefits

Sighting in your scope accounts for all these variables and makes accurate shooting possible. It can also help identify problems with your weapon or with your own shooting technique.


Sighting in the scope will also help you determine the greatest distance at which you can accurately shoot based on your skill level and the weapon you are using. Understanding this limitation will also make hunting safer. You must always know where your bullet is traveling.


Finally, sighting your weapon should give you confidence that it will fire accurately. Shooting with a lingering doubt about whether the rifle will properly do its job can take the fun out of any type of shooting.

Why Sight in a Scope without Shooting?

sight in a scope but no shooting

Image Source: Pixabay

By now you understand the importance of sighting your rifle scope, but why would somebody want to sight the scope without shooting? Some folks sight without shooting in order to ensure safety when they are not at a proper range. Remember, you must always think about your target but also the area behind your target.


A more practical reason is that some thrifty shooters do not want to waste ammunition on sighting. You may have your own reasons for wanting to sight in your rifle scope without shooting, but this process, also known as bore sighting, is a quick and easy method to adjust your sight so it is aligned with the barrel of your rifle.

How to Sight In a Red Dot Scope Without Shooting

military aiming with a rifle

Image Source: Pexels

You may be learning how to sight in a red dot scope without shooting because you are a new to red dot scopes or shooting in general. Others may be reviewing how to sight in a red dot scope without shooting because you've acquired a new rifle or recently changed scopes. Either way, here's what to do:

Loose Installation

Stability

Line It Up

Make Adjustments

Tighten It Down

Key Hints and Tips

two military men aiming before shooting

Image Source: Pexels

Remember, learning how to sight in a red dot scope without shooting comes down to aiming the bullseye. If the rifle is properly sighted, you can hit almost any target. Within the unit, an LED light shines onto a specially designed piece of glass and is reflected to create the reticle.

Lenses

A scope has two primary lenses: the ocular lens and the objective lense. The ocular lens is the one closest to your eye, and the objective lens is the on the target end of the scope.

The objective lense is actually the more critical piece of glass. A large objective lens allows more light into your scope. This is important because magnification will naturally make your scope dim.

A large lense doesn't increase magnification, but it is needed with increased magnification to allow proper light.

Brightness can also be affected by coating your lens. A good lense coating can also provide clarity by manipulating light spectrums. A coated lens is one with a layer of coating on the objective lens. Others will be labeled as a fully coated lens, meaning all lenses are coated.

Multi-coated lens have multiple coats applied to the objective lens, and fully multi-coated lens all lenses are coated with multiple coats.

Magnification

magnifying rifle

Image Source: Pixabay

Every scope magnifies, and you have to understand how much magnification you prefer. As you learn how to adjust a rifle scope, remember that your scope will only be accurate at the magnification you chose when sighting your scope.

Changing magnifications after sighting the scope will leave it unreliable, so be sure you know what magnification you want. Biggest is not always best.

Remember, a more magnified scope will be less bright, and even the military rarely uses more than 10x power magnification. It does no good to choose a high magnification if you do not have an objective lens with the size and coating needed to provide appropriate light.

Field of View

Your field of view is basically a ratio of feet to yards that measures the width of your scope view at a particular distance. In other words, a field view of 10' at 150 yards means that, when eying a target 150 yards away, you will be able to view five feet on each side of the centered target.

This also plays into your magnification decision, because the more magnification you use, the less field of view (FOV) you will enjoy. The advantage of a broader field of view is being able to quickly locate your target.

Naturally, your eye will want to fix on a landmark, and when you do simply adjust accordingly until your target is in your sight.

Conclusion

As shooters learn how to sight in a red dot scope without shooting, rifle shooting is being revolutionized. For weekend hunters and competitive shooters alike, red dot sights give you the best potential for success.

They can be sighted more quickly than iron sights or magnified optics. Another distinct advantage is that the reticle is on the same shooting plane as the target.

Parallax is the phenomenon when the reticle appears to move as you eye your target. Red dot sighting dramatically reduced parallax. Understanding how to sight in a red dot scope without shooting is an important step to achieve consistently accurate shots. Sighting in the scope is easy if you understand the right way to do it.

Nothing is more important than your scope because it is most responsible for hitting the target. A well-adjusted scope and some practice can result in precise accuracy that is not possible without a scope or with a scope that has not been adjusted and sighted.

Visit Us On FacebookVisit Us On PinterestCheck Our Feed